How to Connect a Valve to a Doosan (Gripper / Suction cup)
Would you like to use a valve in your pneumatic system for a gripper or suction cup but don’t know where to start? Here is a how-to on how to connect your valve to a Doosan.
Warnings 
-
Always turn your robot arm off and release the pressure from the compressor before working on your electrical/pneumatic system!
-
The how-to is based on the use of the following products:
- Doosan A509S
- 5/2 Valve → Festo VUVG-LK-10-M52-1R8L-S
- 3/2 Valve → Festo MHE3-M1H-3/2G-QS-6-K
- Vacuum Generator → Festo SBP HV 3 07 13 SD
- Gripper → Festo HGPC-20-A
-
Always make sure to use the correct capacity compressor for your system. We are using about 6-7 bar for our system.
-
If you are using different products, always double check if the information given is the same for your case!
-
Working with electronics and pnuematics can be dangerous → always be carefull and make sure you are not being reckles!
-
If you are not sure if what is being done is correct, ask someone for help.
Step 1: Wiring the solenoid valve 
In my project I have found two kind of cables:
- A cable with two black wires (attached to a 3/2 valve)
- A cable with three wires (blue, black and brown) (attached to a 5/2 valve)
Below can be found how to connect these different types of cables to the Doosan.
(In the pictures on this post can be seen the Doosan A509S)
By using the Doosan as a power supply (recommended) 
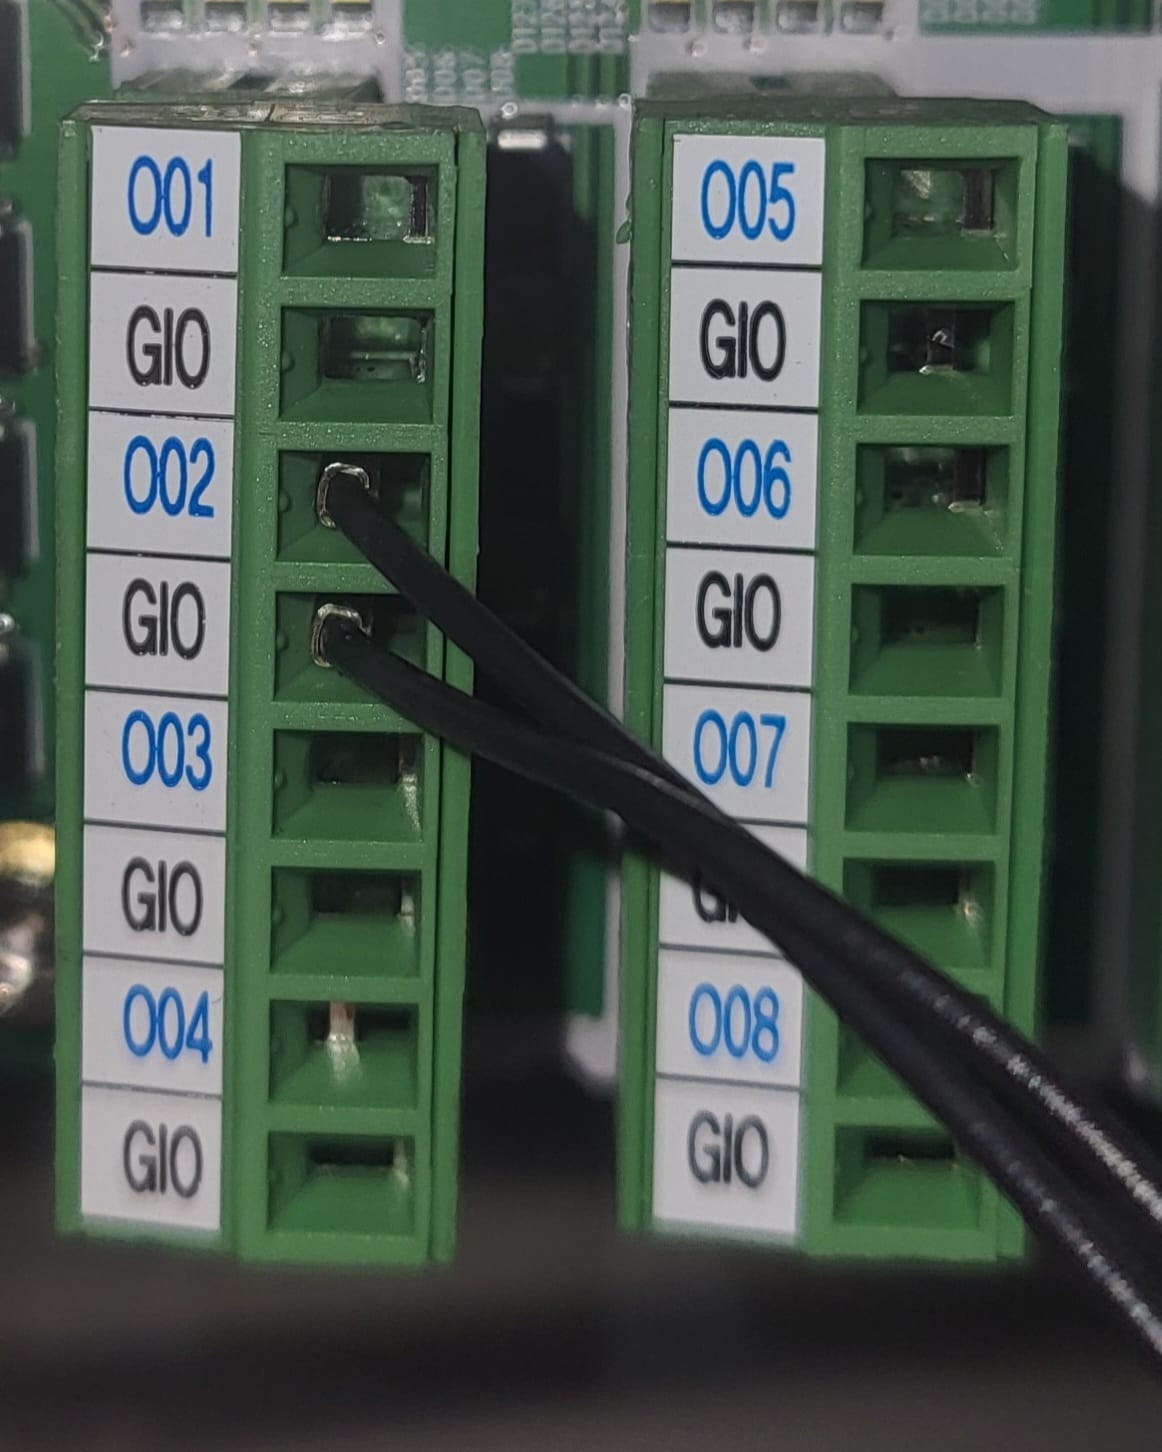
Cable with two black wires 
- Connect the wires to the desired digital output port and GIO pin
The digital output ports are numbered O0x, for example O01, with a GIO port beneath. The number on the port corresponds with the digital output number on your teaching pendant. - It does not matter in which order the cables are connected.
The valve works by either having 24V on the circuit (on) or not (off)
See picture for clarification:
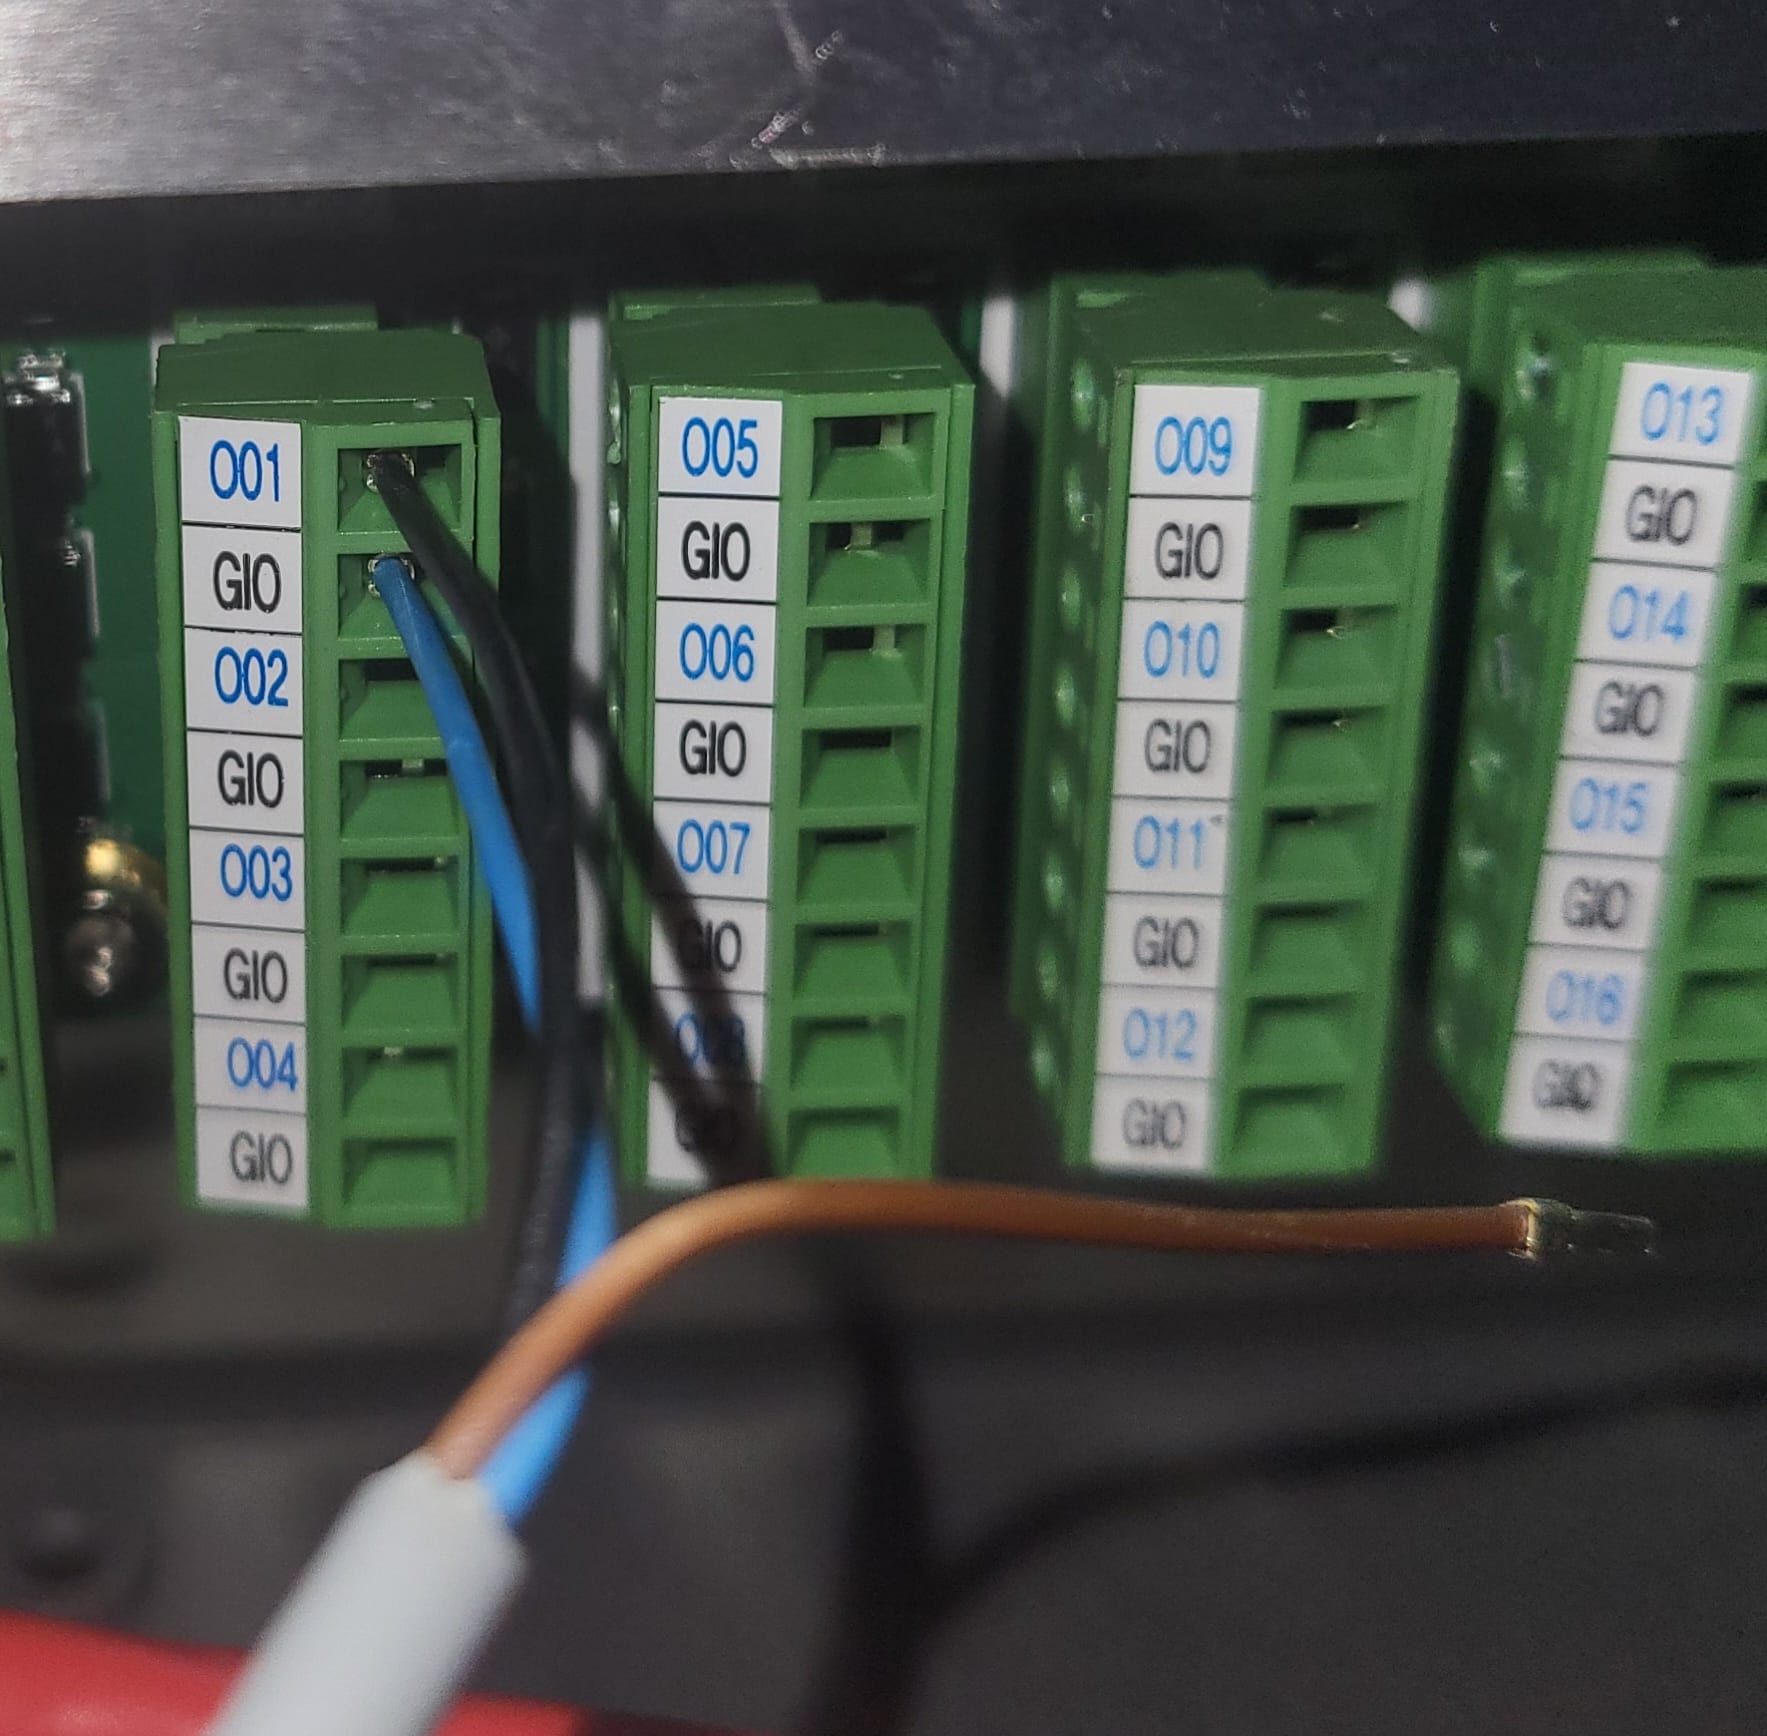
Cable with a black, brown and blue wire 

- Connect the black wire to the desired digital output port
The digital output ports are numbered O0x, for example O01, with a GIO port beneath. The number on the port corresponds with the digital output number on your teaching pendant. - Connect the blue wire to the GIO port.
- The brown wire can be left disconnected.
See picture for clarification:
Intermediate testing 
You could test the valve now:
(without pnuematics attached)
- Turn on the Doosan
- On the teaching pendant turn the corresponding digital output on and off
- The valve should make a clicking sound → this means it works

Step 2: Connect the pneumatics 
After connecting the electronics, you can connect the pneumatics. Here you will find the steps for connecting a gripper and for using a suction cup.
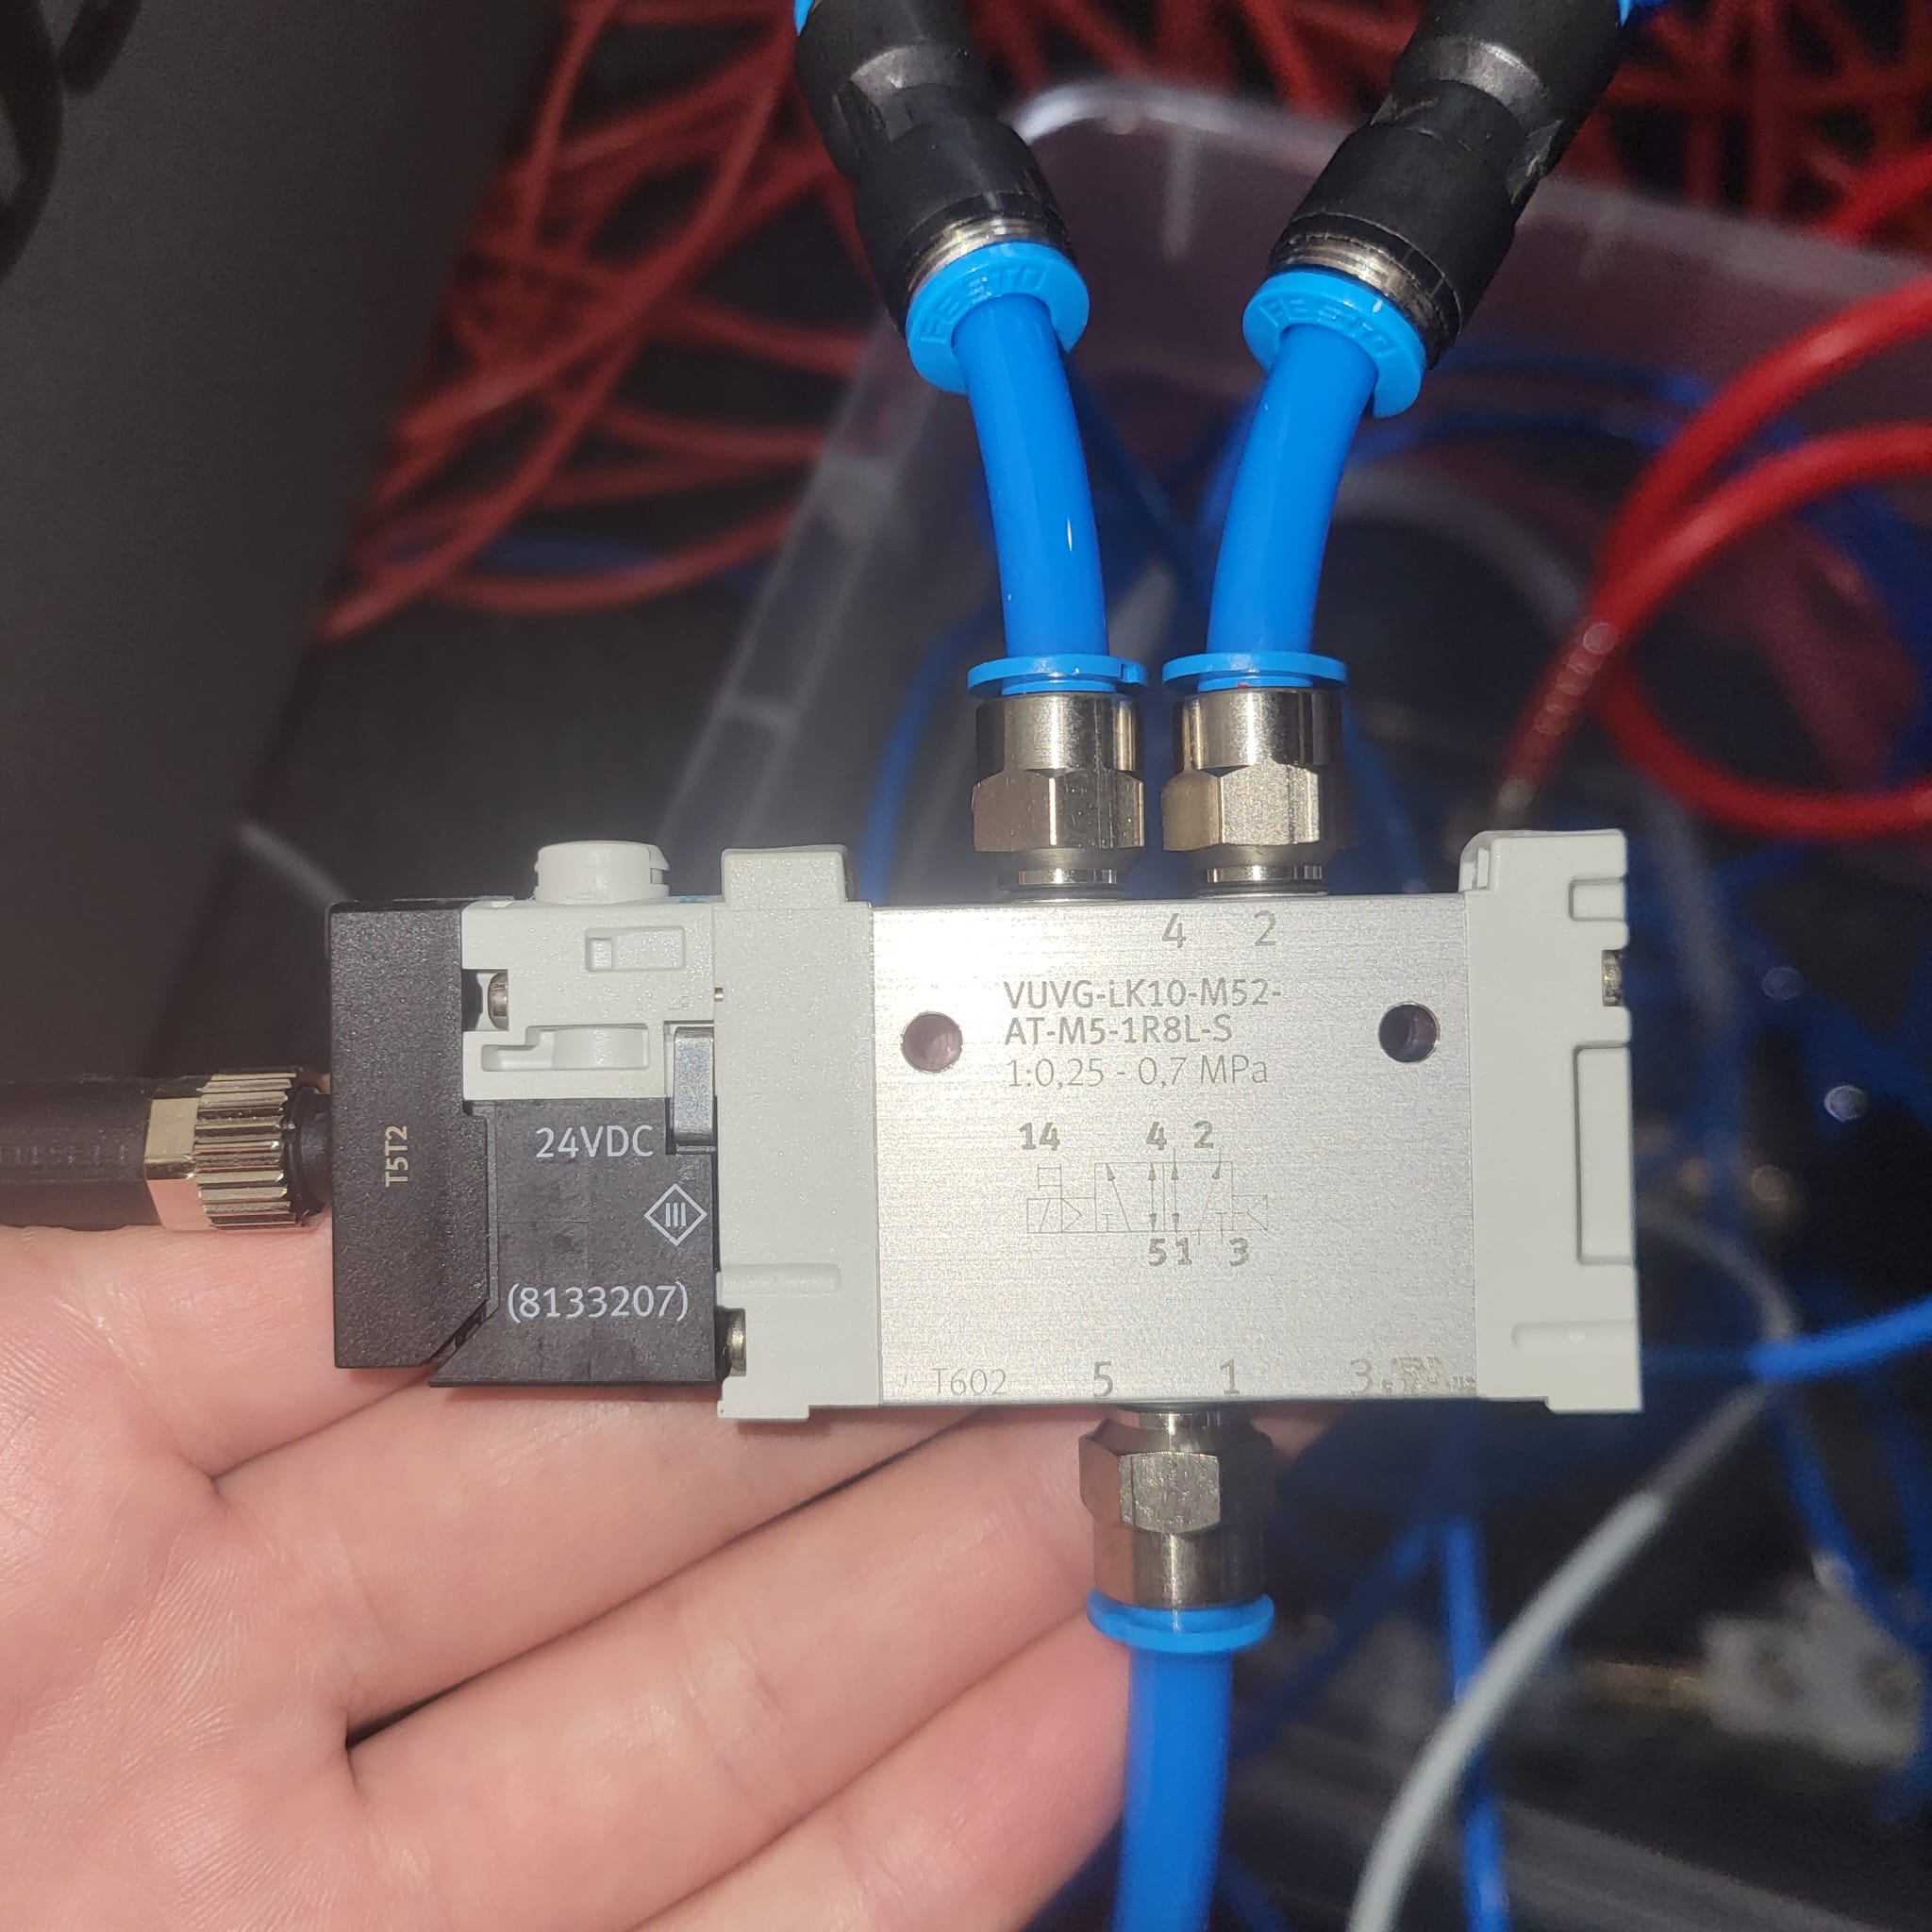
Connecting a gripper
For controlling the gripper we are using a 5/2 valve
- Connected compressed air to the inlet of the valve
See picture for clarification:
- Connect two cables to the in and outlets of the valve to the gripper
See picture for clarification:
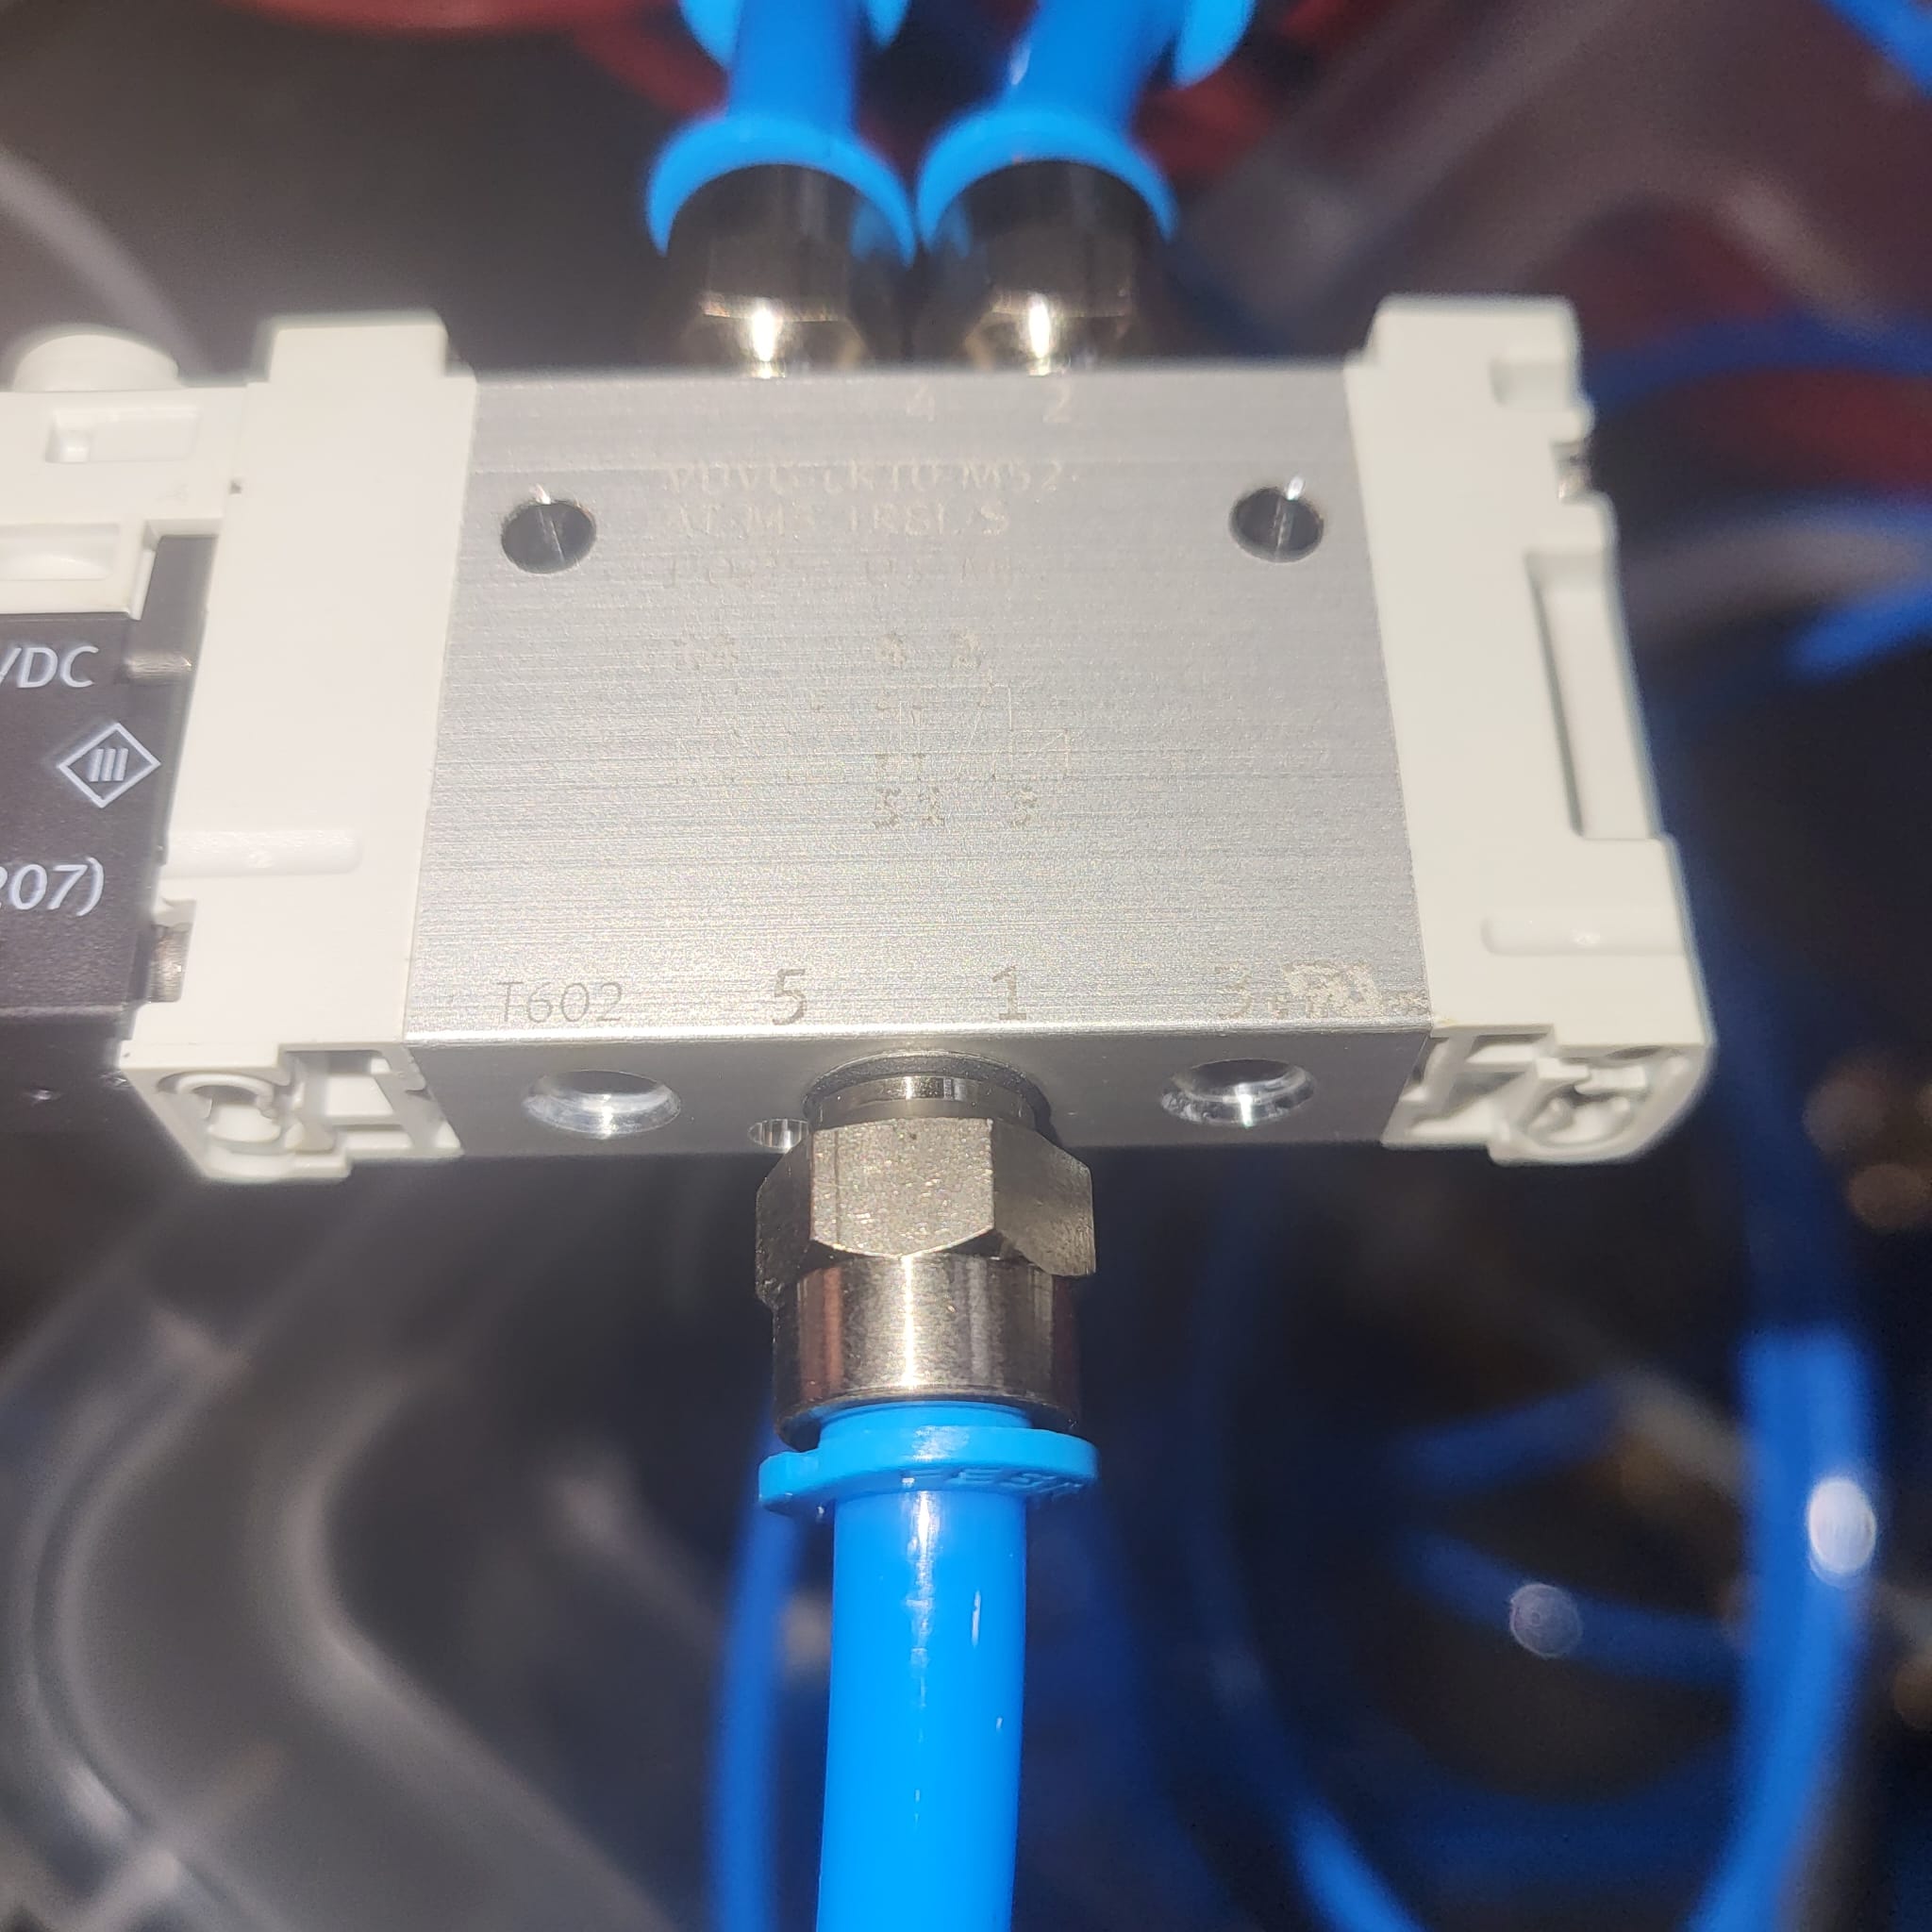
Connecting a suction cup
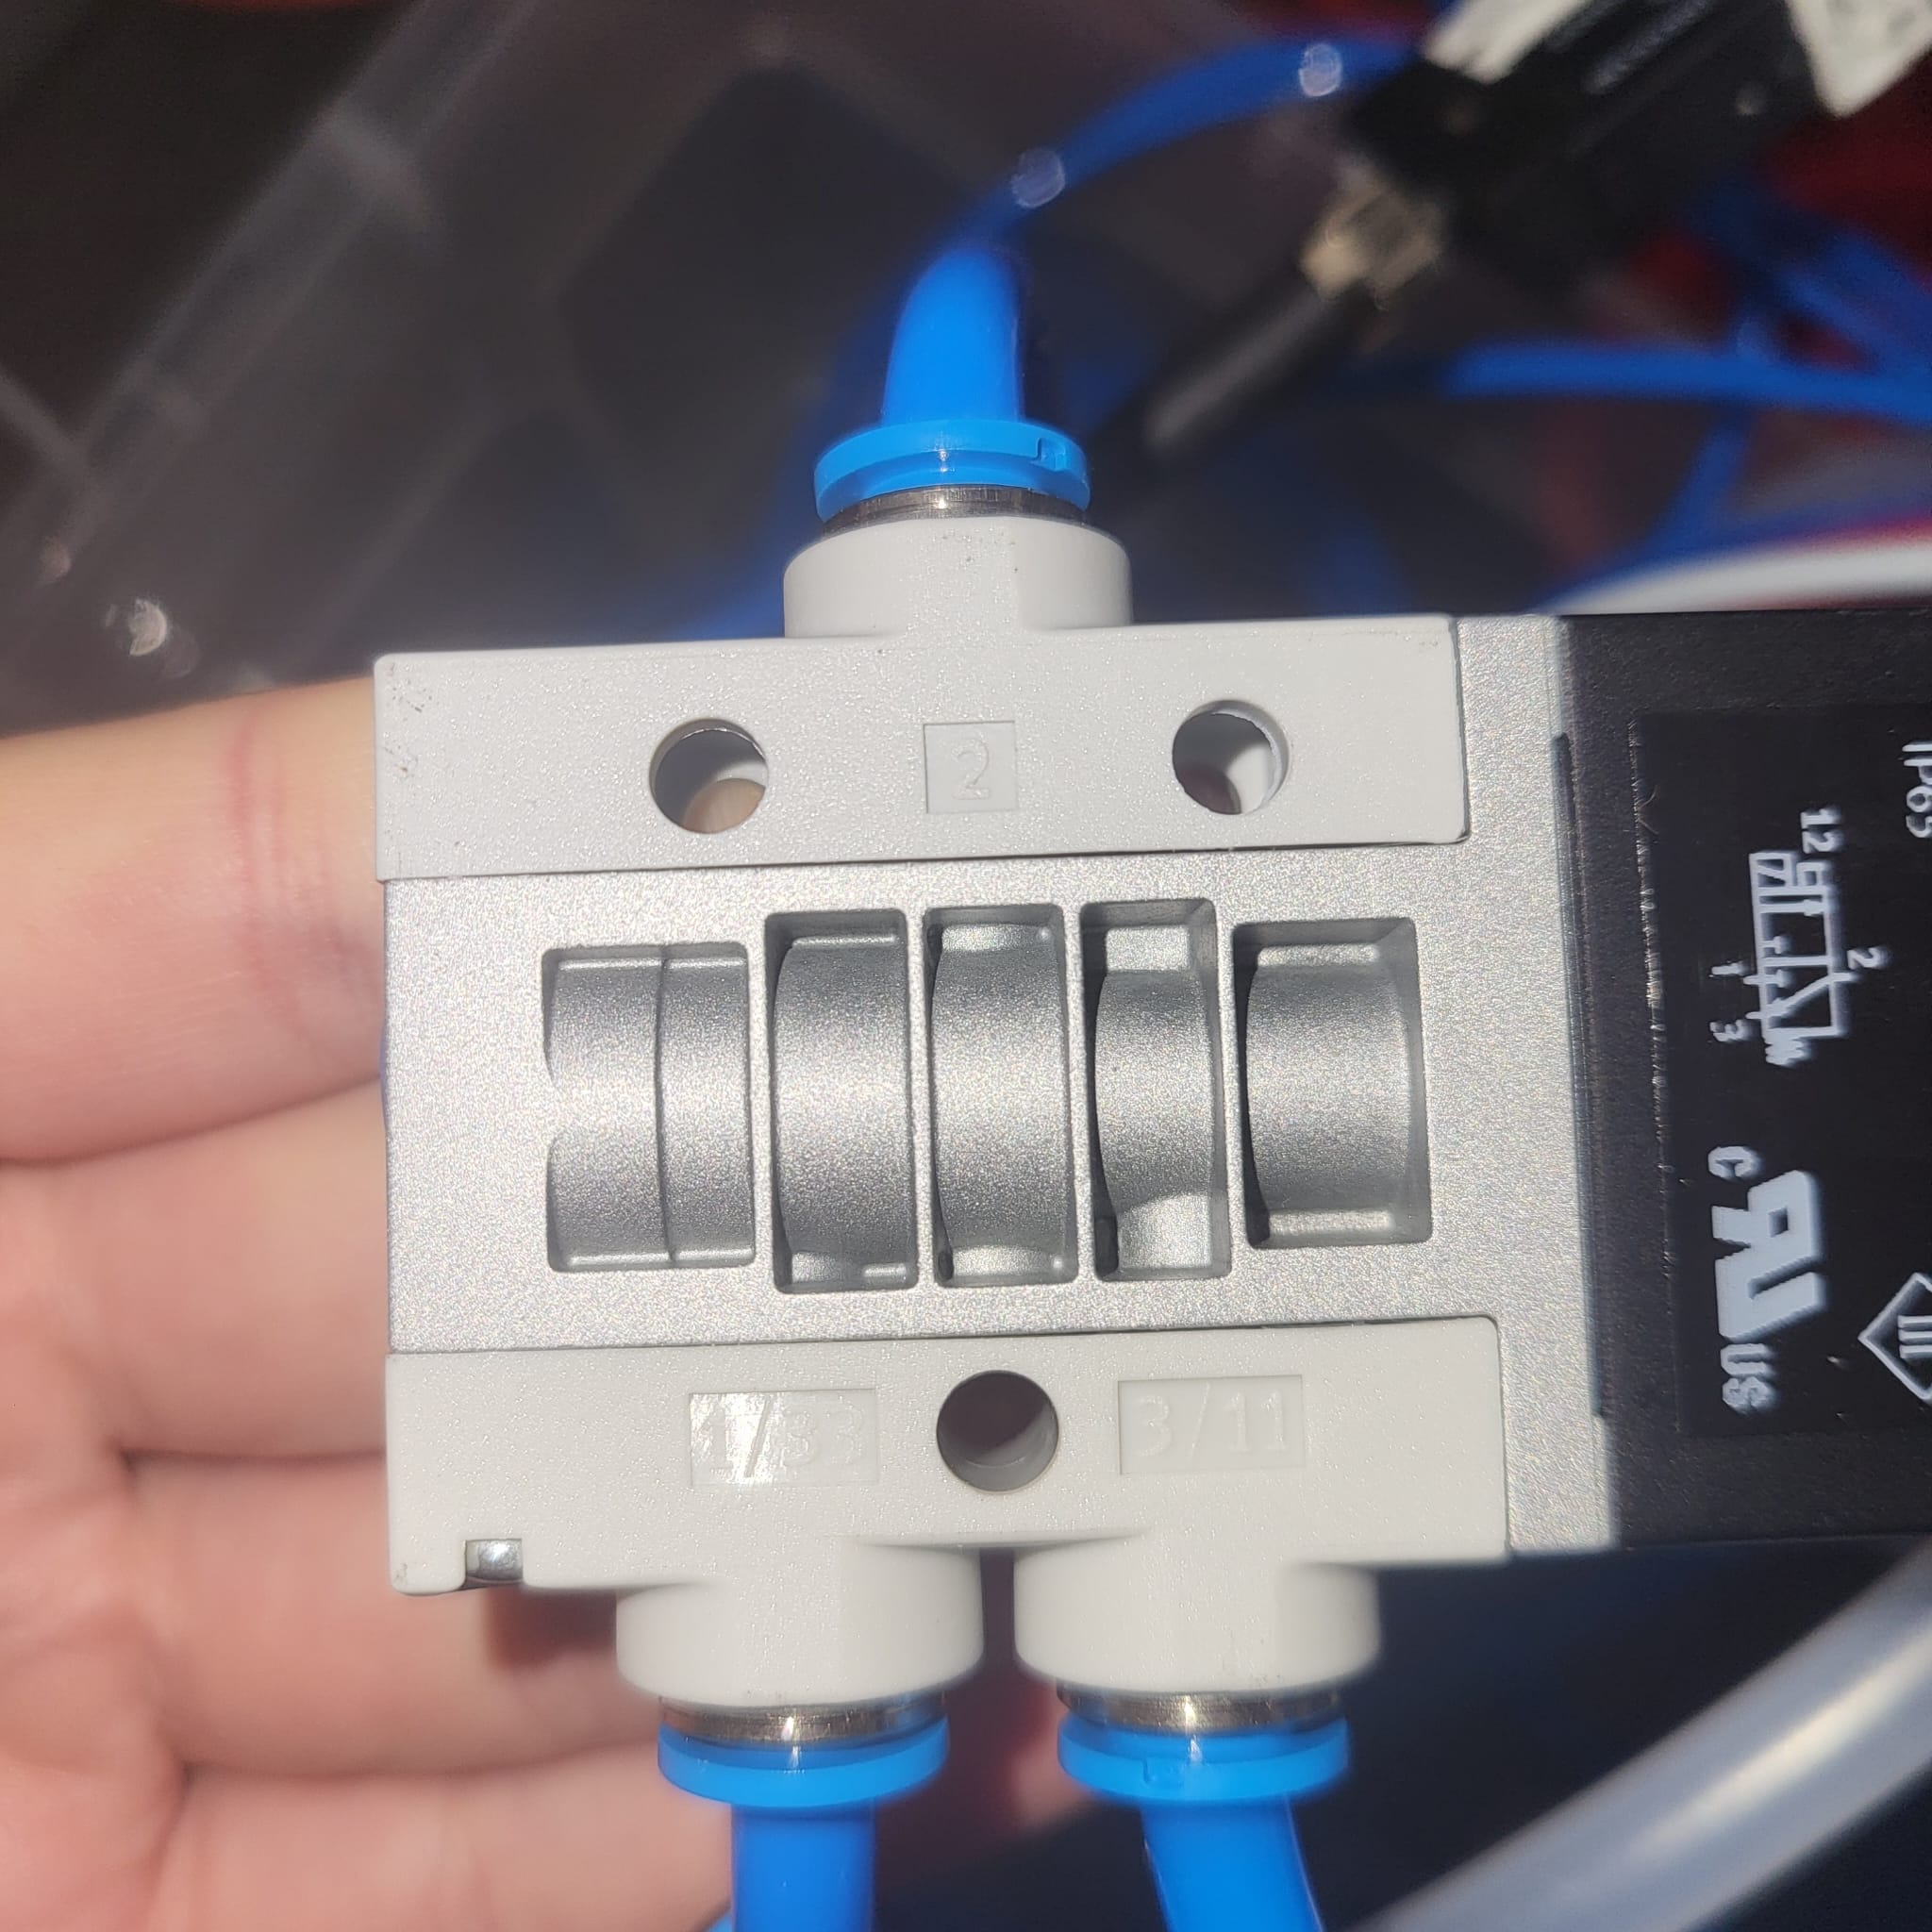
For connecting a suction cup we have used a 3/2 valve. This is since we wanted to be able to switch the airflow from to gripper to the suction cups. How we connected it means that the gripper and suction cups are not usable at the same time. There are other solutions for if you do want to use them at the same time.
- First connect compressed air to the inlet of the 3/2 valve.
- The air will either flow through outlet 1/33 or 3/11 → depending on wether valve is on or off.
- Connect the inlet of the gripper to one side and a tube for the suction cup to the other side.
- For the suction cup you will need to use a vacuum generator to convert the airflow.
- Place this inbetween the 3/2 valve and the suction cup
See picture for clarification:
![]() If everything is assembled the system is ready for use
If everything is assembled the system is ready for use ![]()
Step 3: Programming Doosan 
Now your system is ready for use. You can either control your items through the teaching pendant, or program the Doosan:
#On
set_digital_output(1, ON) #replace number with the O0x number where the valve is connected
wait(0.8) #wait for cylinder to fully extend

#Off
set_digital_output(1, OFF)
wait(0.8)