How to create an industrial dashboard with VUE and Flask.
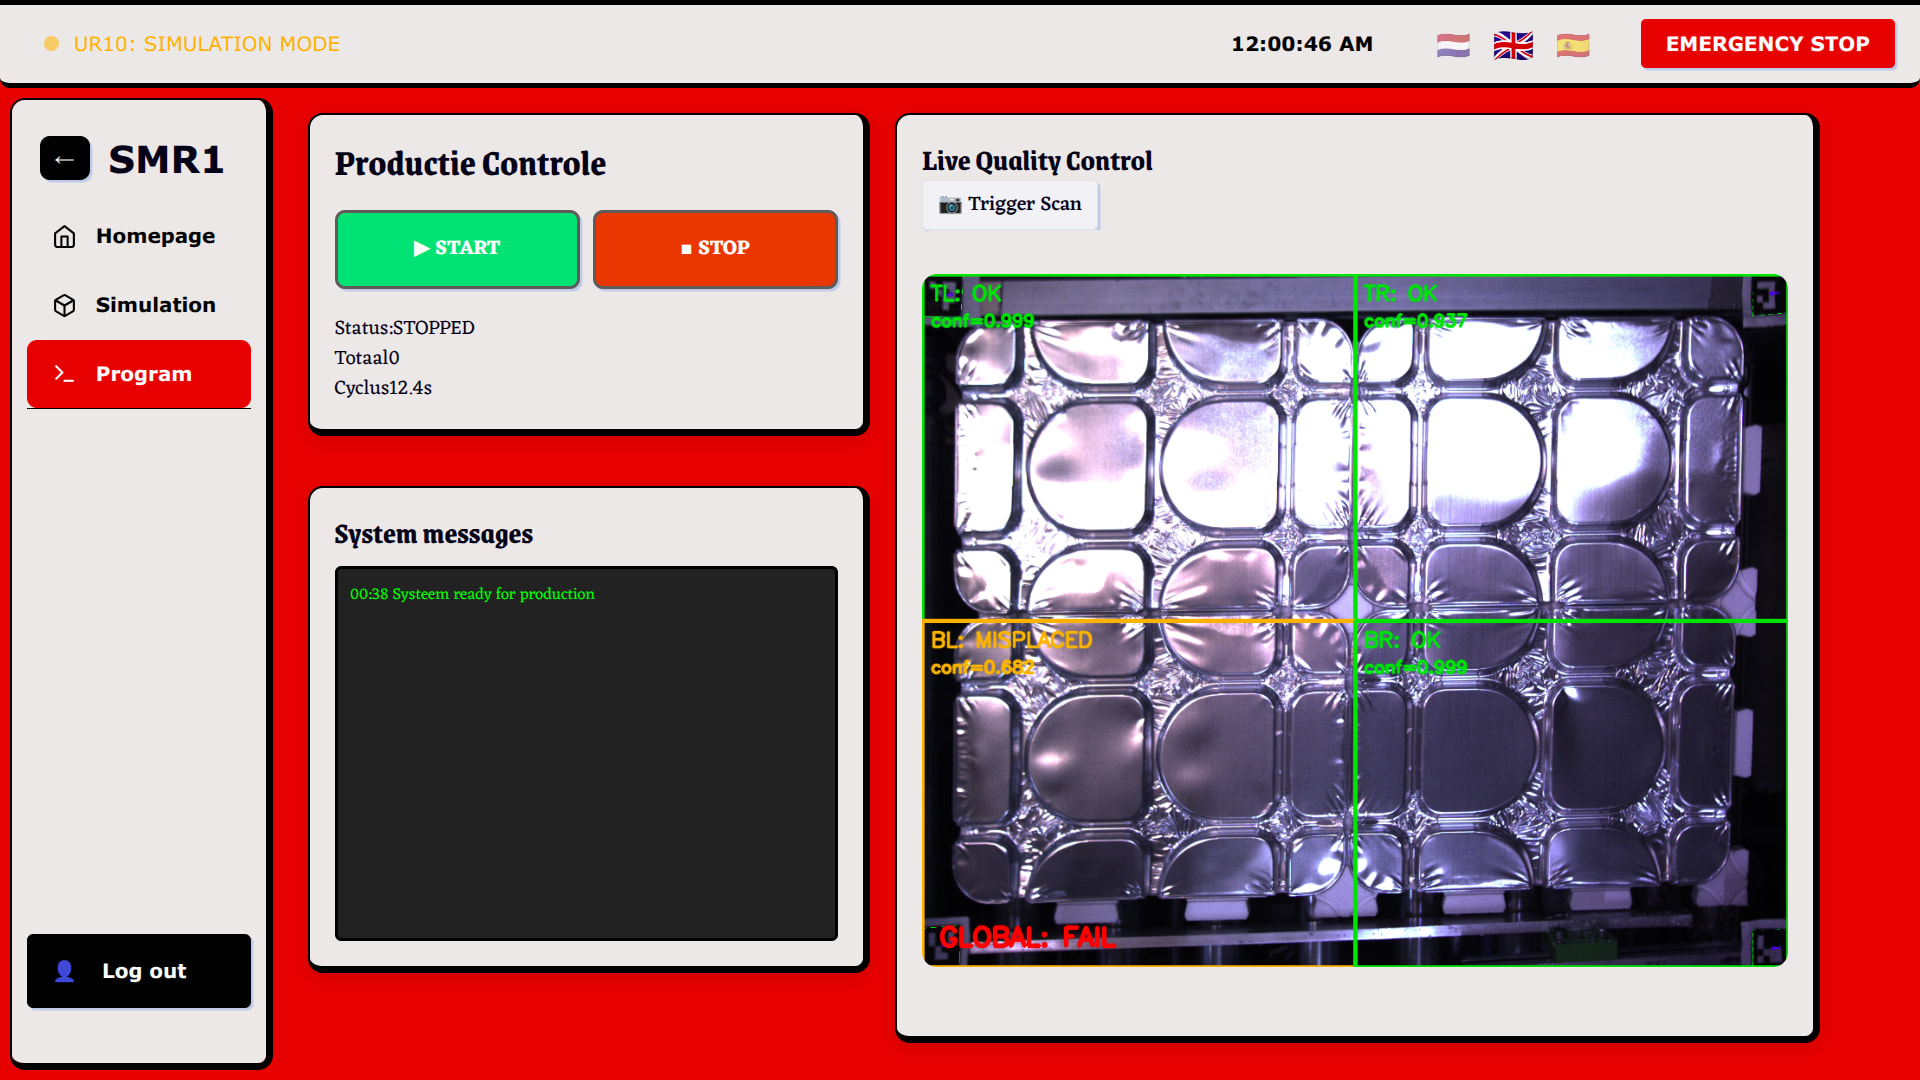
Example dashboard:
Note: Creating a dashboard is not as difficult as people claim. But you will need to understand the bridge between your hardware logic and your web interface. For this tutorial, I’m using Vue 3 (Composition API) and Flask.
Programming a robot in a terminal is functional, but a custom dashboard makes your system professional and user-friendly. In this guide, I will show you how to structure a dashboard that talks directly to your robot.
The Architecture: Full-Stack Robotics
Before writing code, you need to understand the three layers of your application:
- Backend (Python + Flask): This is the “Brain”. It communicates with the robot using libraries like
ur_rtde. - API (REST): The “Bridge”. This allows the frontend to send commands (like START/STOP) to the Python script.
- Frontend (Vue.js): This is the “Face”. A clean UI where you display camera feeds, joint angles, and controls.
Installing Dependencies
You will need a few libraries to get the communication started. Open your terminal:
For the Backend (Python):
pip(3) install flask flask-cors
Note: flask-cors is essential. Without it, your browser will block the connection between Vue and Flask for security reasons (CORS policy).
For the Frontend (Vue.js): Inside your Vue project folder, install these important extensions:
npm install axios       # For making API requests
npm install three       # For the 3D robot simulation
npm install urdf-loader # To load the 3D robot model
1. The Backend Structure (server.py)
Your Flask server listens for requests from the dashboard. It should run in a way that it doesn’t “freeze” while the robot is moving.
from flask import Flask, jsonify
from flask_cors import CORS
import threading

app = Flask(__name__)
CORS(app) # Allow connections from your Vue frontend

@app.route('/api/status', methods=['GET'])
def get_status():
    return jsonify({"state": "IDLE", "connected": True})

if __name__ == '__main__':
    app.run(debug=True, port=5000)
2. The Frontend Structure (.vue files)
In Vue, we use a single-file component structure. Every page or “tab” consists of three parts:
- Template (HTML): Defines the structure (buttons, cards, images).
- Script (JavaScript): Handles the logic, API calls, and reactive data.
- Style (CSS): Makes the dashboard look clean and industrial.
Example of a Program Control Card:
<template>
  <div class="card">
    <h3>Production Control</h3>
    <button @click="startRobot" :class="{ 'active': isRunning }">START</button>
    <p>Current State: {{ robotState }}</p>
  </div>
</template>

<script setup>
import { ref } from 'vue'

const robotState = ref('STOPPED')
const isRunning = ref(false)

const startRobot = async () => {
  const response = await fetch('http://localhost:5000/api/program/run', { method: 'POST' })
  if (response.ok) {
    isRunning.value = true
    robotState.value = 'RUNNING'
  }
}
</script>

<style scoped>
.card { background: white; padding: 20px; border-radius: 12px; box-shadow: 0 4px 10px rgba(0,0,0,0.1); }
button { background: #2ecc71; color: white; border: none; padding: 10px 20px; border-radius: 8px; }
.active { background: #27ae60; border: 2px solid white; }
</style>
Tips for SMR Students
- Use tutorials: Make sure you follow a good tutorial, since Vue is complex.
- Separation of Concerns: Keep your RTDE robot logic in a separate file (e.g.,
robot_control.py) and import it into your Flask app. Don’t mix hardware code with web server code. - Real-time Updates: Use
setInterval()in your VueonMountedhook to fetch data (like joint positions or camera frames) every 100ms. - Responsive Layout: Use Flexbox or CSS Grid to ensure your camera feed stays large on the right, while your controls stay accessible on the left.
With this setup, you can build a professional UI for any cobot or automated system!