Design Parts to 3D Print for Your Robot Using SolidWorks
Step 1: Design with 3D Printing in Mind
When designing, consider these 3D printing constraints:
- Wall Thickness: For structural integrity, ensure that walls are at least 1–2 mm thick.
- Clearances: Leave enough space for moving parts or assemblies to avoid tight fits. A general guideline is a 0.2–0.5 mm gap between parts that need to fit together.
- Avoid Overhangs: Minimize overhangs to reduce the need for support structures. Where possible, design with an angle less than 45 degrees.
Step 2: Add Functional Features
Use features to make your part functional and easier to assemble with other components.
- Holes for Fasteners: If you need holes for screws or bolts, add them at this stage. In SolidWorks, use the Hole Wizard to select the correct diameter.
- Alignment Features: For parts that connect, use slots or alignment pins for easier assembly. This helps ensure everything aligns properly when assembled.
Step 3: Export to STL
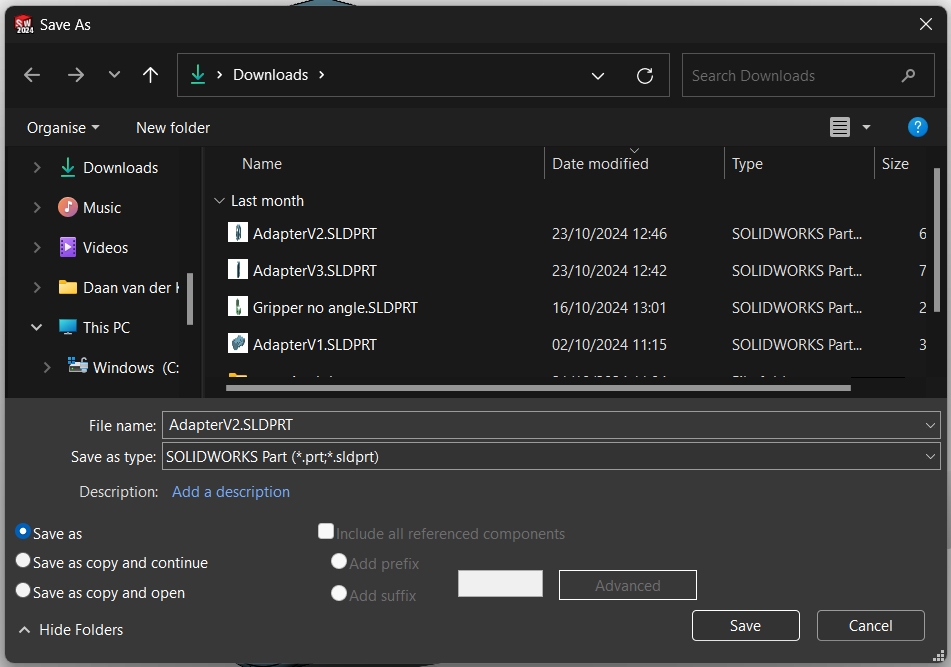
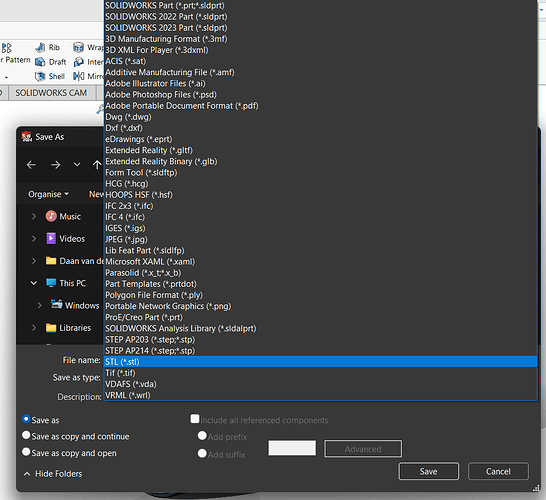
To prepare for 3D printing, export the part as an STL file:
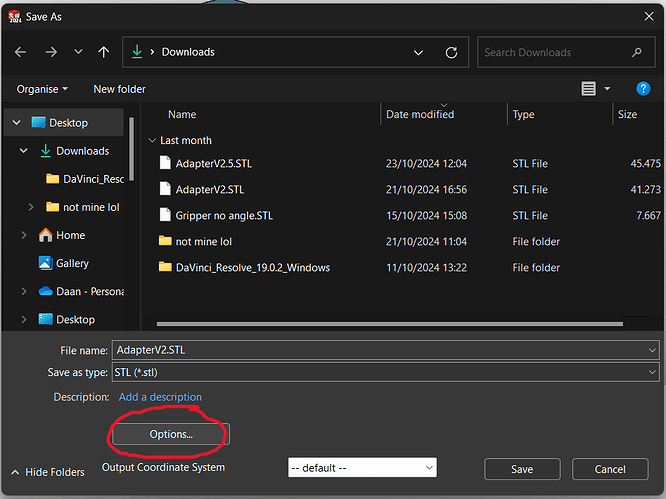
- Click Options next to the file type to adjust the STL settings.
Step 4: Adjust Deviation and Angle Settings
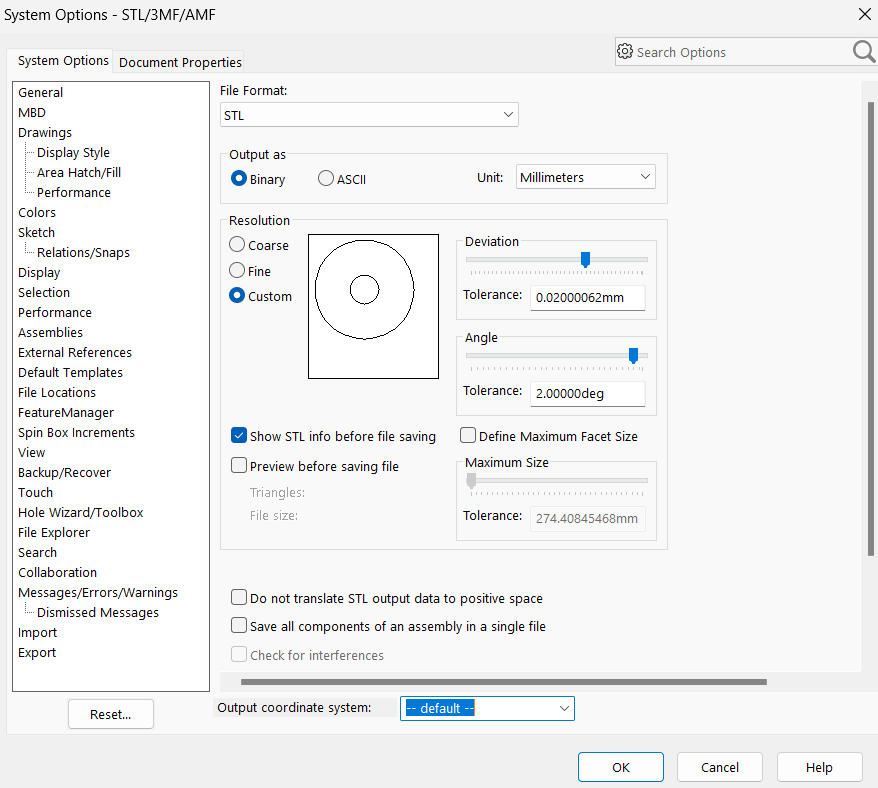
In the STL options, you can control the smoothness and accuracy of curved surfaces by adjusting Deviation and Angle:
- Deviation: Controls the maximum distance between the STL triangles and the real surface. Lower values create smoother surfaces but increase file size.
- Angle: Controls the angular tolerance between triangles, affecting curve smoothness.
- For high-detail prints, use low Deviation (0.01–0.05 mm) and Angle (5–10 degrees).
- For simpler parts, a higher Deviation (0.1 mm) and Angle (15 degrees) work well, saving on file size and print time.
Step 5: Save and Review Your STL
After setting the Deviation and Angle, click OK to confirm, then save the STL. Open it in your slicing software (e.g., Cura, PrusaSlicer) to check for any issues before printing.
Step 6: Export Final STL and Print
Once you’re satisfied with the part settings, save the STL and transfer it to a USB stick. Then you can take your USB stick and ask someone in the workplace to upload it to the 3D printer. Most slicer software will allow you to preview the print layers, making it easier to catch any issues before printing.


