If you use components in your SMR project that use 25V or higher, you have to place them in an electric safety box. For more information, read the Rulebook (electrical safety rules). After you made the box, you need a pass from an authorised teacher (electrical safety officer) before you are allowed to power up the box. This how to will help you with the assembly of an electric safety box.
Step 1 – Place the components in the electric box
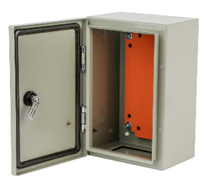
- In the robotlab are electric safety boxes available for you to use. Use one of these;
- Place 1 or more DIN-rails on the metal plate at the bottom. After that you have to attach the metal bottom plate in the corners to the box;
- Now you can place the components on the DIN-rail(s). If a component that you have to use, doesn’t have a DIN-rail connection you have to attach it with bolts to the metal bottom plate.
Electric safety box and DIN-rail

Step 2 – Make the electric safety box ready for wiring
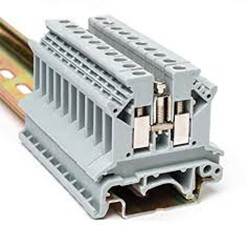
- Every cable that goes outside the electrical safety box needs to be fed through a cable gland and needs to be connected to a terminal block for strain relief;
- Place the cable glands in the holes on the sides of the box. If there are more holes than you have to use, you have to close them with plugs;
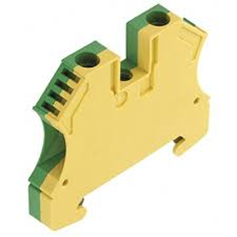
- Place the terminal blocks on the DIN-rail. You have to place the terminals in between grounded terminal blocks.
Cable glands, Terminal blocks and Grounding terminal blocks

Grounded terminal blocks
Step 3 – Wire the components
- Now you’re ready to wire the components. If your cable has a connector you can plug it in;
- If you only have the bare (copper) wires, it’s important to use cable shoes for all the wires. You can find them in the workshop. Don’t forget to check if the cable diameter is suitable for your application.
Cable shoes

Step 4 - Ask for a pass
Before you are allowed to use your box, an authorized teacher (electrical safety officer) has to check it. If you get a pass, it’s safe to use the components.