Using moveit2 to control a Universal Robot is not as difficult as people claim. The documentation of how to do so is really fractured. In this how-to, I try to condense the information so you can install ros2 on a Ubuntu 24.04 LTS system.
Install Ubuntu Linux 24.04
For the best compatibility, you need to run ROS2 under Linux. You have two options here:
- For one-session tutorials: Download a pre-built ROS2 VM or Docker image (quick start but slower performance)
- For playing a bit more extensively with ROS: Install Ubuntu 24.04 & ROS2 inside a Virtual Machine yourself (slower performance)
- For serious work: Install Ubuntu 24.04 directly besides Windows (or instead of Windows) on your machine (recommended; fast performance)
There are ample tutorials elsewhere on how to install one of the options above, so please find a tutorial for your desired situation.
Step 1 install ros2.
Source
Instructions copied from the deb installation of the official documentation with minor changes such as of giving less choice and install more tools
1.1. utf8 support
Some minimal installations do not have a UTF-8 locale installed. Make sure you have it installed. You can run locale to see if it is installed. If you don’t have it installed, run:
sudo apt update && sudo apt install locales
sudo locale-gen en_US en_US.UTF-8
sudo update-locale LC_ALL=en_US.UTF-8 LANG=en_US.UTF-8
export LANG=en_US.UTF-8
1.2. Setup apt repositories.
ROS2 depends on Ubuntu’s Universe repository add that to your system if you have not done that allready
sudo apt install software-properties-common
sudo add-apt-repository universe
The project also has its own repositories where they host precompiled binaries so you don’t need to build as much. They also created a dep package that is stored in the infrastructure github releases page to make setup easy. Please run this install the latest dep.
sudo apt update && sudo apt install curl -y
export ROS_APT_SOURCE_VERSION=$(curl -s https://api.github.com/repos/ros-infrastructure/ros-apt-source/releases/latest | grep -F "tag_name" | awk -F'"' '{print $4}')
curl -L -o /tmp/ros2-apt-source.deb "https://github.com/ros-infrastructure/ros-apt-source/releases/download/${ROS_APT_SOURCE_VERSION}/ros2-apt-source_${ROS_APT_SOURCE_VERSION}.$(. /etc/os-release && echo ${UBUNTU_CODENAME:-${VERSION_CODENAME}})_all.deb"
sudo dpkg -i /tmp/ros2-apt-source.deb
1.3. Update your system
To make sure there are no mismatched dependencies.
sudo apt update && sudo apt upgrade
1.4. Install ROS2 and tools using apt
sudo apt install ros-jazzy-desktop ros-dev-tools ros-jazzy-ros2-control ros-jazzy-ros2-controllers
The above installation command adds around 1163 pkgs to a freshly installed
Tip: You can add ros-jazzy-ur to this apt install so you have one big installation progress where you can walk away and setup the robot. (ros-jazzy-ur add around 60 pkgs.)
Step 2: Install Universal Robot’s ROS2 driver
The ros2 driver for the cobots from Universal Robot is stored in the ROS repositories under the name ros-jazzy-ur. But you can also compile it from source following official documentation.
sudo apt install ros-jazzy-ur
Step 3 Prepare the robot
To move the robot, you need to run a program on the teaching pendant that makes a reverse connection to ros2. The program you need is stored in a ucap file that you need to install on the robot. The official documentation shows the process of how you install it. On that page there are also noted which settings must be enabled. In the end the program should look at the picture below if your using a robot in the cb3 series.
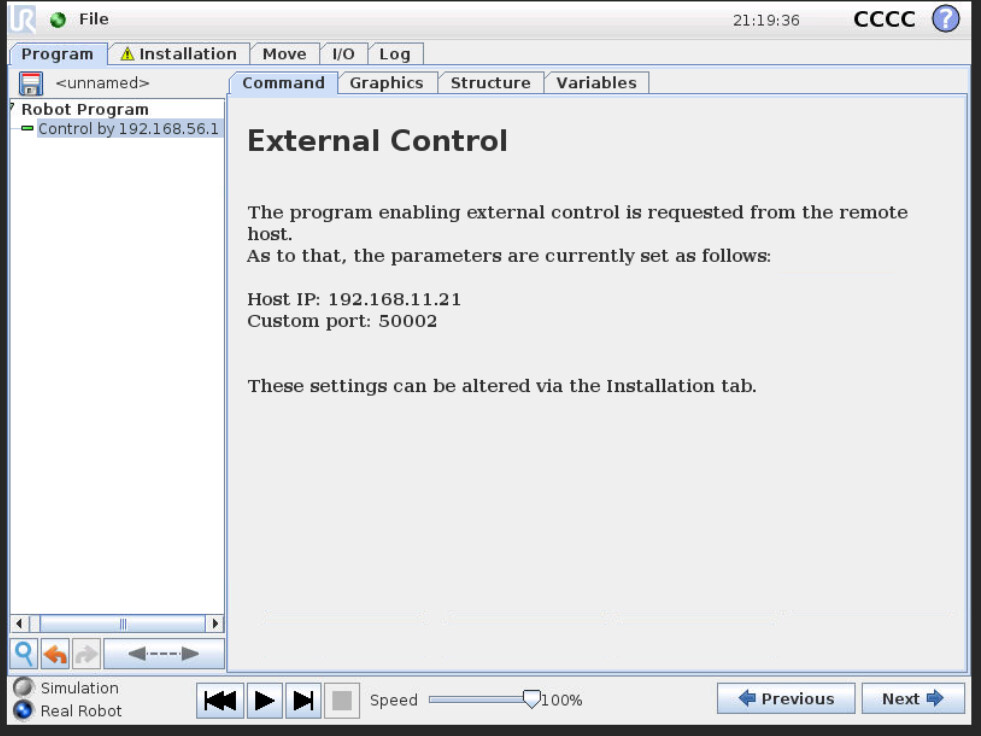
To simulate the robot you can use ursim. A docker container (and previously an vm image) where you can run the teaching pendant on your pc. And there is an script that spins one up with the external control ucap already enabled. You should need to create the program.
docker installation instruction for ubuntu
ros run ur_client_library start_ursim.sh -m ur5e
Step 4: Start the robot.
After you created the program you can start ros2 and control the robot in the way you want. Because this is the first
- launch the robot driver
To make any communication with the robot possable
source /opt/ros/jazzy/setup.bash
ros2 launch ur_robot_driver ur_control.launch.py ur_type:=ur5e robot_ip:=192.168.56.101 launch_rviz:=false
-
start the program
-
start moveit
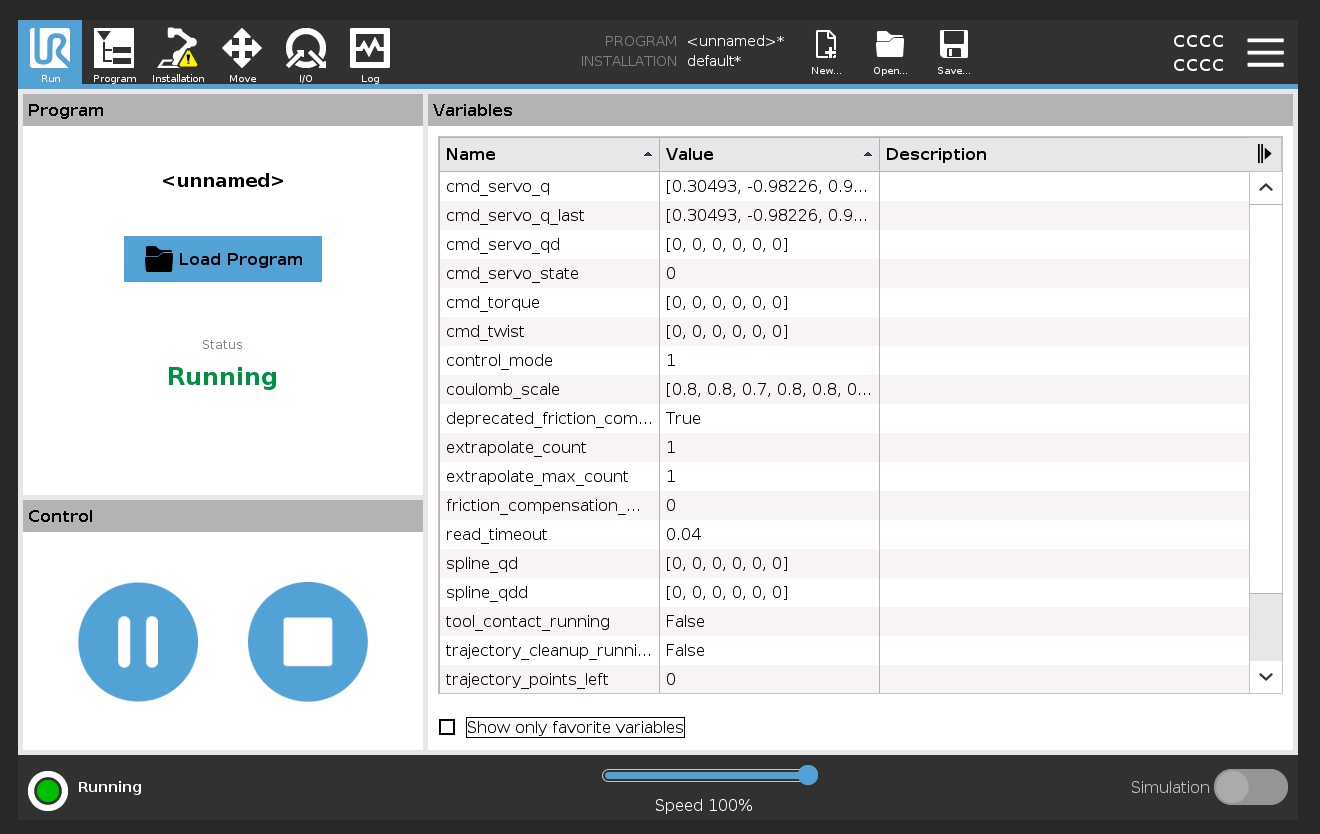
ros2 launch ur_moveit_config ur_moveit.launch.py ur_type:=ur5e launch_rviz:=true
Programmatic control of the robot
You can write a program in c++ or python to plan motions and execute them after a signal is received. Most of the programmers use c++ to send commands and the documentation is mostly in c++. And if you want to write your project in c++ i recommend following the entire moveit tutorial starting from “Your First C++ MoveIt Project” There is well a few changes because you are not controlling the panda robot arm. Here are all the changes:
- You haven’t created a workspace. It is just a folder that contains another folder called src. The location does not matter but ill but it inn my projects folder.
mkdir -p ~/projects/ur_moveit_tutorial_workspace/src
cd ~/projects/ur_moveit_tutorial_workspace/src
# then follow with  the commands given in "Your First C++ MoveIt Project"
ros2 pkg create \
 --build-type ament_cmake \
 --dependencies moveit_ros_planning_interface rclcpp \
 --node-name hello_moveit hello_moveit
- MoveGroup is not called “manipulator” change it it to “ur_manipulator”
- When starting at MoveItVisualTools “base_link” does exists you can use “world”.
Python
The python interface binds a subset of the moveit c++ API provides. But you do not need a colcon project which makes it easy for rapit prototypical in a repl shell. Might i recommend ipython.
The installation process isn’t nicely documented and you need an incantation for the ur robot to work so here instruction to move the robot with python:
You need to install the ros-jazzy-moveit-py apt package. And you need at least the following python packages that are in pypy: numpy pyyaml lark packaging
Create a file called moveit_cpp.yaml With the flowing contents and remember the full path.
planning_pipelines:
  pipeline_names: ["ompl"]

plan_request_params:
  planning_attempts: 3
  planning_pipeline: ompl
  max_velocity_scaling_factor: 1.0
  max_acceleration_scaling_factor: 1.0
After the file exist you can call the following function to get the moveit interface
def create_ur_moveIt_node(robot_model: str, moveit_cpp_path: str, node_name="ur"):
    from moveit_configs_utils import MoveItConfigsBuilder
    from pathlib import Path
    moveit_config = (
        MoveItConfigsBuilder(robot_name="ur", package_name="ur_moveit_config")
        .robot_description_semantic(Path("srdf") / "ur.srdf.xacro", {"name": robot_model})
        .trajectory_execution(file_path="config/moveit_controllers.yaml")
        .moveit_cpp(moveit_cpp_path)
        .to_moveit_configs()
    ).to_dict()

    from moveit.planning import MoveItPy
    return MoveItPy(node_name=node_name, config_dict=moveit_config)
Moving to robot Using the instance of MoveItPY is a cinch. You can move the robot from A to B with a nogo zone in between.
robot = create_ur_moveIt_node("ur5e", "/home/aron/test")

robot.get_planning_component("ur_manipulator")
planner =  robot.get_planning_component("ur_manipulator")
planner.set_goal_state("home")
res = planner.plan()
robot.execute(res.trajectory, controllers=[])
Moveit2 provides two example scripts where you can see what set_goal_state accepts and how to add objects where moveit calculate a trajectory around the object to avoid colliding with it
Handy links
Sending and autmaticly executing URScript
A list of usefull controllers that can be used to read and write gpio pins. How the ScaledJointTrajectoryController works. (The controller that moveit uses.) But some knowledge of how ros works is needed.