You can sometimes quickly lose track of which version you are in when you are designing in solidwork. Or if you have printed many parts with small variations, you can easily make a mistake as to what the latest version is.
One way to counteract that is to incorporate the version into your design. This way, you make fewer mistakes and can easily work backwards in versions.
The most important first step is to save each new ‘version’ under a new name. This can be done with the Save as option. Name changes can be something like xxxxx V1.4 → xxxxx V1.5. Or in case of a big change like a redesign of important parts you can change the version to xxxxx V2.0.

To place your title in your design, you can use the test sketch (next to eclipse).
First you need to decide where to place it, on a horizontal surface you will have better letters than a vertical surface.
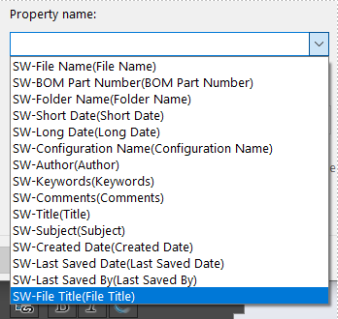
You then need to ‘link to Property’. At ‘Property name’ you can then choose various name references. For now, I choose the File Title. You can still place text by clicking the dot where you want. Or for curve choose a border where it should go along. You can also change the font and size by unchecking ‘use document fond’.

Then you can cut or extrude the text. Every time you make a new version, you can use the rebuild button. This adjusts your text immediately.
It is recommended not to go completely through the object when extruded cut. Because text does not remove the circles of letters like p, this will give you potential flying mass.

If you want to discuss this topic or if you have questions, reply in the comments.