How to ‘pause’ a Kawasaki robot on command using a Kawasaki background program (by @icorn)
In this How-to you will learn how to pause a Kawasaki robot on command usinga Kawasaki background program, called “Process Control Program” (PC program)
Introduction
First of all, this solution will help you implement a software “emergency button” (not really an emergency button but rather the “hold” button on the robot), so that you can immediately pause and then resume the robot’s movement.
Basics
Unlike the ABORT and HALT command, the HOLD command that we’re going to use in this how-to, pauses the program the same way turning the “Hold” dial would and then keeps the robot engine’s on. That way, you can gain more control over the robot via software. To be able to communicate with the robot via your PC, you would need to establish an IP connection, it does not matter if it is TCP or UDP. However, in this how-to we use UDP for the sake of simplicity.
How does it work?
The PC Program can be executed simultaneously with the main program that you run on the robot, it is executed in the background. You can recognize a PC Program by its extension, .pc . Any .pc program is a PC Program that is meant to execute in the background, unlike the AS language files ( .as ).
So, the PC Programs are a bit different than the AS program, as they are meant to be used to control the flow of execution of programs, allowing you to execute commands that would not be normally permitted on a regular program, such as:
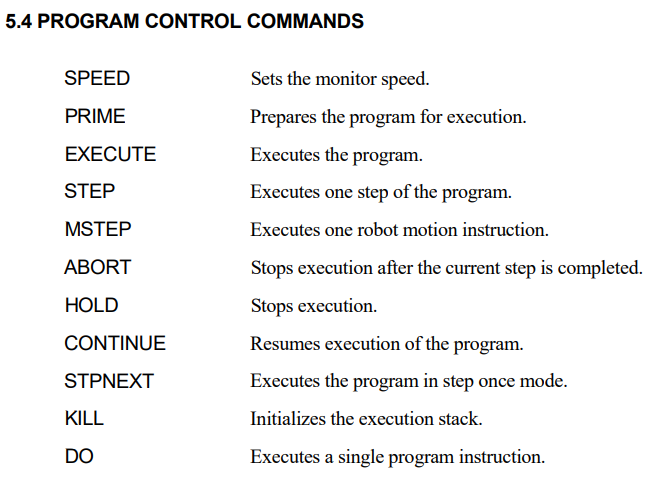
Now, the commands that will allow you to pause the robot and then resume its operation are HOLD and CONTINUE.
Keep in mind that in order to execute these monitor commands from a PC program, you must use the keyword MC before each command, i.e MC EXECUTE program_name .
Full sample code snippet
In this example you can see three different programs:
- PC Program (the one that allows you to reach the goal of this how-to, pause a Kawa robot).
- Support program for the UDP communication.
- Python script for the server side.
PC Program:
.PROGRAM bg_control.pc () ;

  .retrecv = -1
  WAIT SWITCH (POWER)
  MC EXECUTE main_robot1

  receive:
    .$receive = ""
    ; Receive control commands via UDP, executes the UDP support program
    CALL udp_emergency(.retrecv, .$receive)

    ; Check for errors in UDP reception
    IF .retrecv < 0 THEN
      GOTO receive
    END

    ; Handle received commands
    IF .$receive == "hold" THEN
      MC HOLD  ; THIS IS THE COMMAND THAT PAUSES THE ROBOT!!
      PRINT " -> PROGRAM HELD"
      ; Add a short delay to ensure state update
      TWAIT 0.5
      GOTO receive
    END

    IF .$receive == "continue" THEN
      MC CONTINUE  ; THIS IS THE COMMAND TO RESUME ROBOT MOVEMENT
      PRINT " -> PROGRAM RESUMED"
      ; Add a short delay to ensure state update
      TWAIT 0.5
      GOTO receive
    END

    ; If neither hold nor continue, loop again
    GOTO receive
.END
This is a sample program for the robot to use UDP Communication to the server:
.PROGRAM udp_emergency (.ret,.$receive) ;
    ip[1] = 192
    ip[2] = 168
    ip[3] = 0
    ip[4] = 10
    .$recv_buf[1] = .$receive
    .ret = 0
     timeout = 60
     max_length = 255
    .port = 10020
    .$receive = ""
    .num = 0

    ; We use UDP to recover message from server with the following parameters.
    ; Check the Kawasaki AS Manual to get more information on the function.
    UDP_RECVFROM .eret, .port, .$recv_buf[1], .num, timeout, ip[1], max_length
    IF .eret < 0 THEN
      PRINT "UDP_RECV error in Control Program ", .eret
      PRINT ".num = ", .num
      .ret = -1
    ELSE
      IF .num > 0 THEN
        IF .num * max_length <= 255 THEN
          FOR .j = 1 TO .num
            .$receive = .$receive + .$recv_buf[.j]
          END
        ELSE
          .ret = -1
          PRINT "String too long"
          PRINT .$recv_buf[1]
        END
      ELSE
        PRINT "Invalid response"
        .ret = -1
      END
    END
  .END
Now, here is the Python code from the PC side:
ROBOT_IP = '192.168.0.1'       # Replace with your robot's IP address
ROBOT_PORT_EMERGENCY = 10020   # Use any non priviliged port that the robot is not using

def send_message(message, ROBOT_PORT = 10010):
    # Create a UDP socket
    with socket.socket(socket.AF_INET, socket.SOCK_DGRAM) as server_socket:
        try:
            try:
                server_socket.sendto(message.encode(), (ROBOT_IP, ROBOT_PORT))
                print(f"Message '{message}' sent to robot at {ROBOT_IP}")
            except:
                print(f"Error sending message to robots")
        except Exception as e:
            print(f"Error sending message to robot: {e}")

send_message('hold', ROBOT_PORT_EMERGENCY)
send_message('continue', ROBOT_PORT_EMERGENCY)
Further reading:
Check out the manuals if you have further doubts: Manuals - Google Drive