How to print something with the labs 3d printer
Step 0
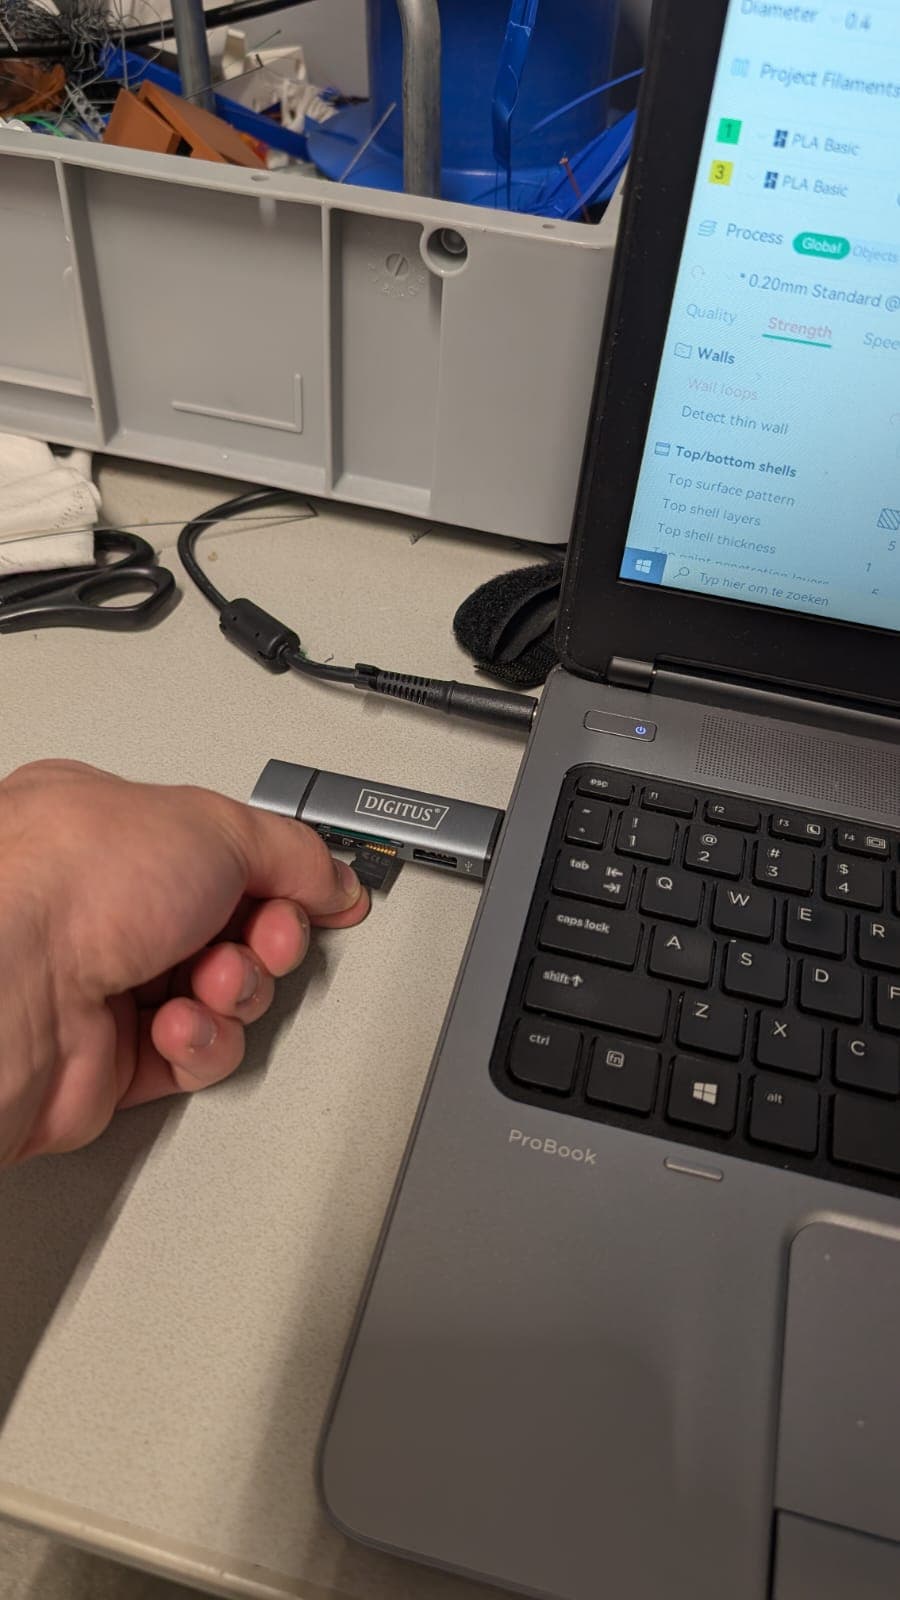
Make sure the printer micro SD card is inserted into the 3d pinter assigned laptop.
Step 1
Obtain a .STL or .3mf file of the model that you want to print. Set this model on a usb stick and plug the usb-drive in the 3d printer assigned laptop.
Step 2
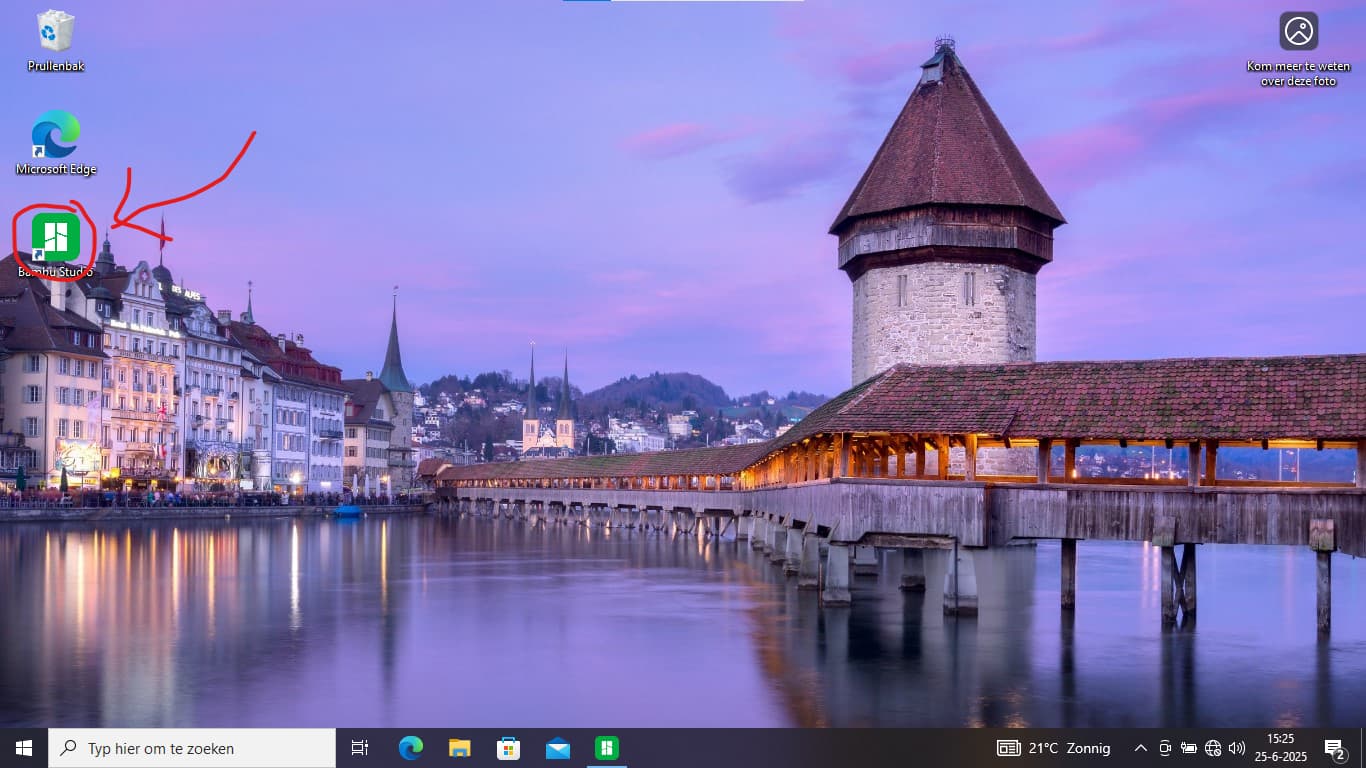
Open the Bambu slicer app on the laptop. Then import the model file into the slicer. You can do this either by drag and dropping the model from the windows explorer onto the print plate.
If you want to print multiple models in one go, repeat this process.

Step 3
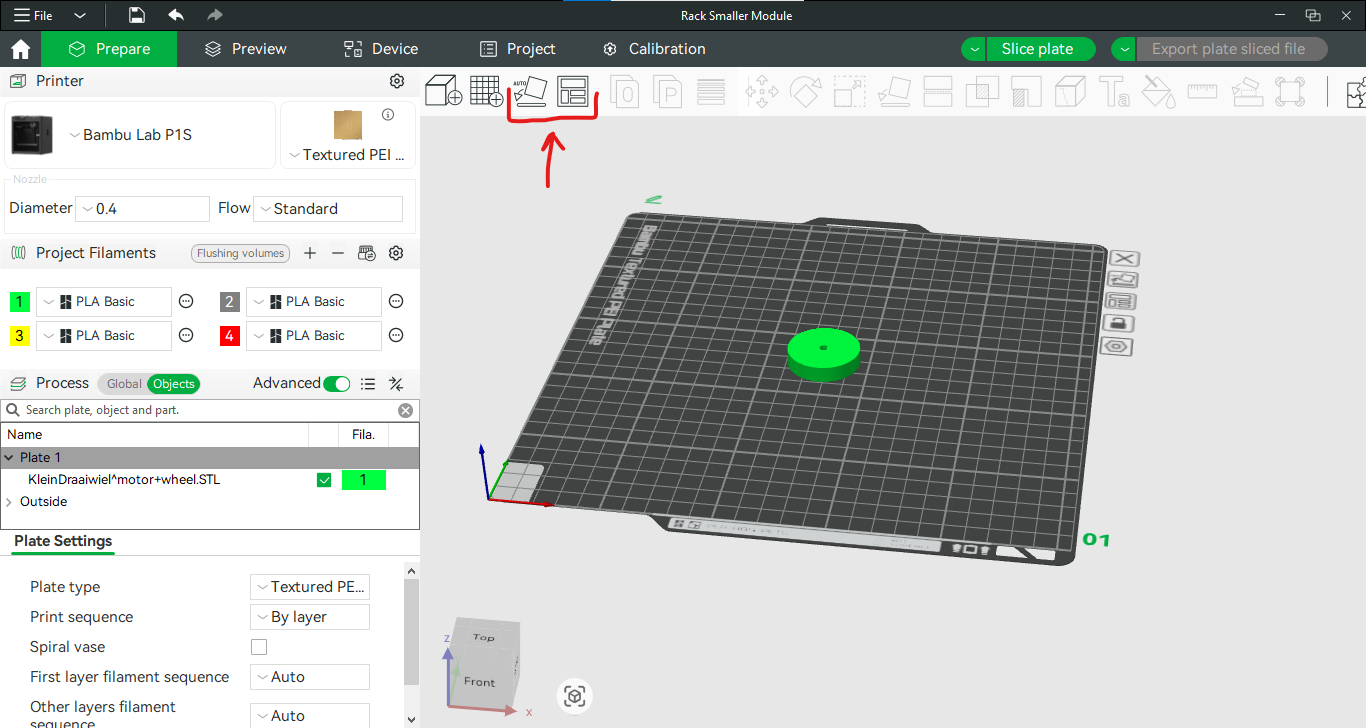
Make sure all the models are placed correctly on the plate. You can do this by either moving them manually, or press auto arrange and auto orient as shown in the image below:
Step 4
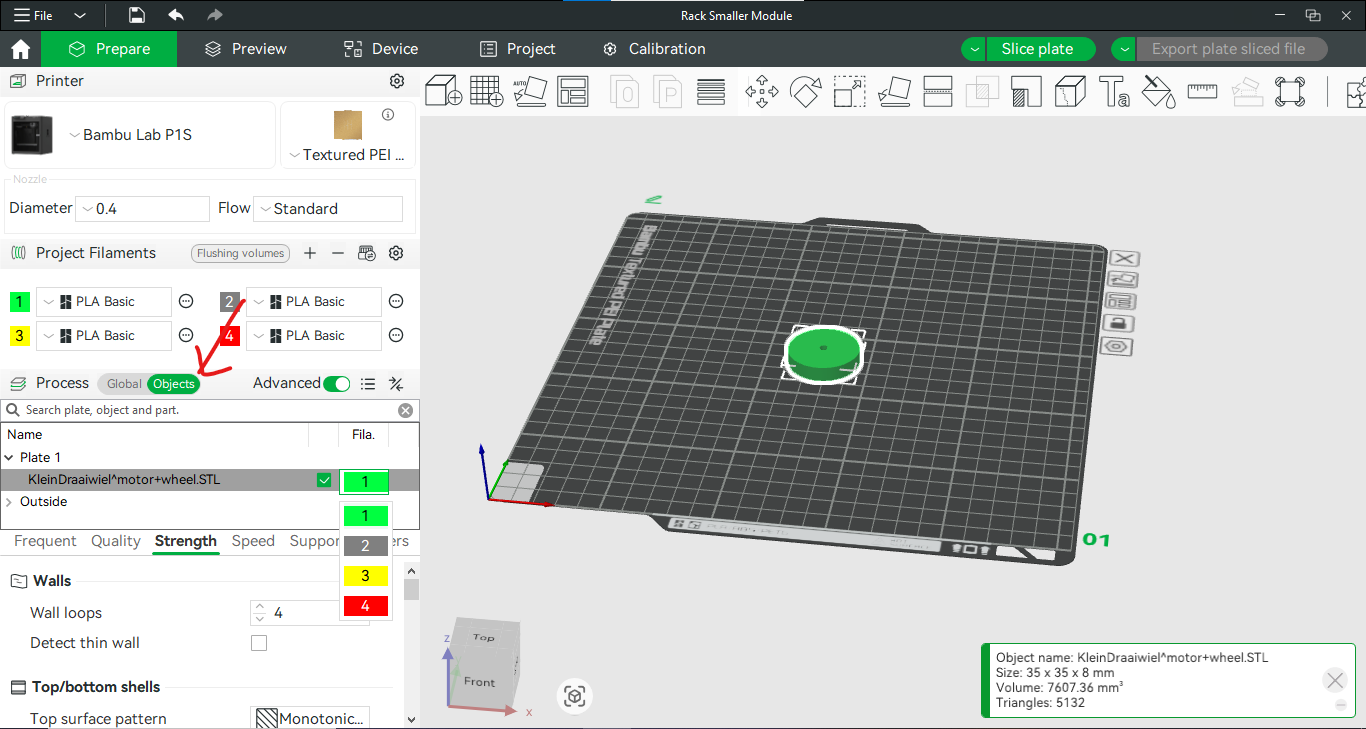
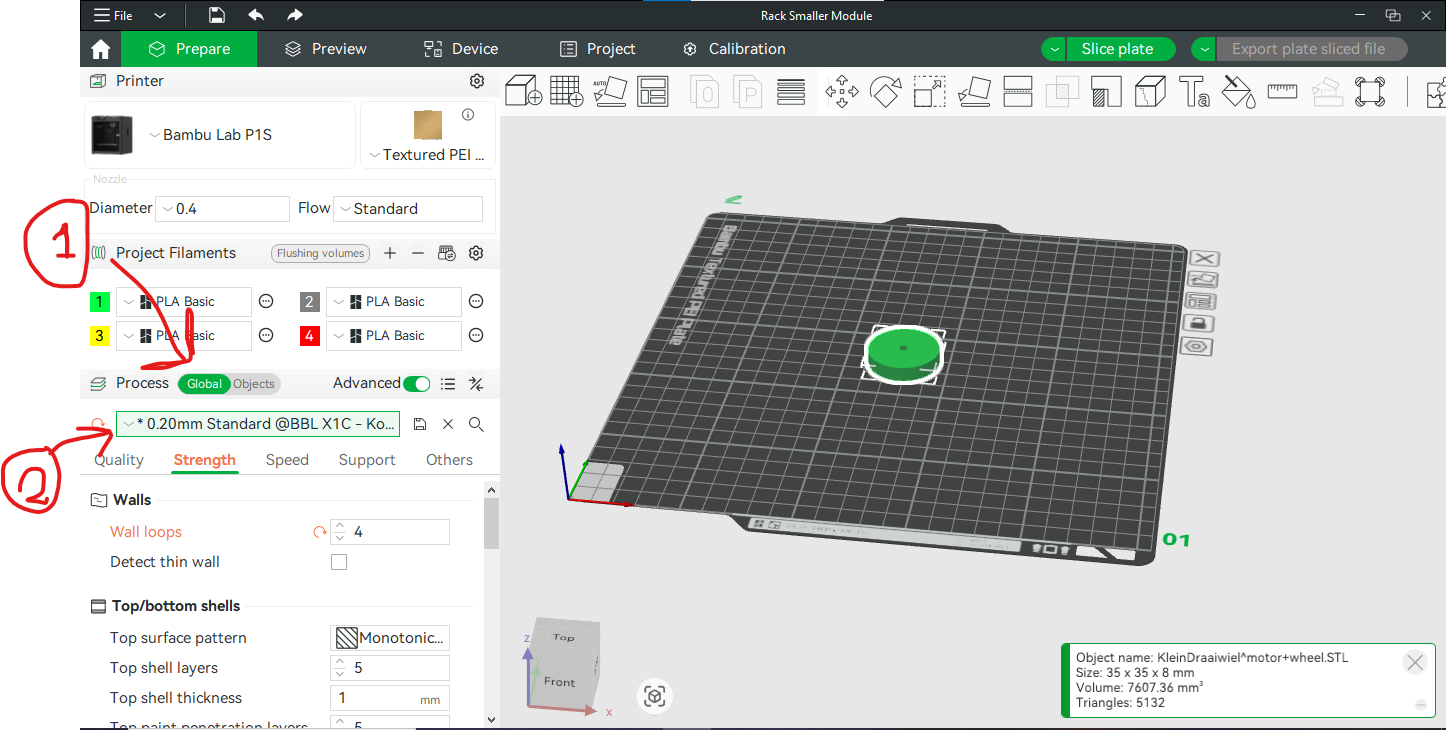
Select the filament that you want to use for your print. The minors 3d print responsible person will make sure that the filaments are correctly preset in the slicer as they are in the printer.
Now click on the “objects” tab below the filaments. Here you can double click on the filament to right of the objects and chose which one you would like to use for your print.
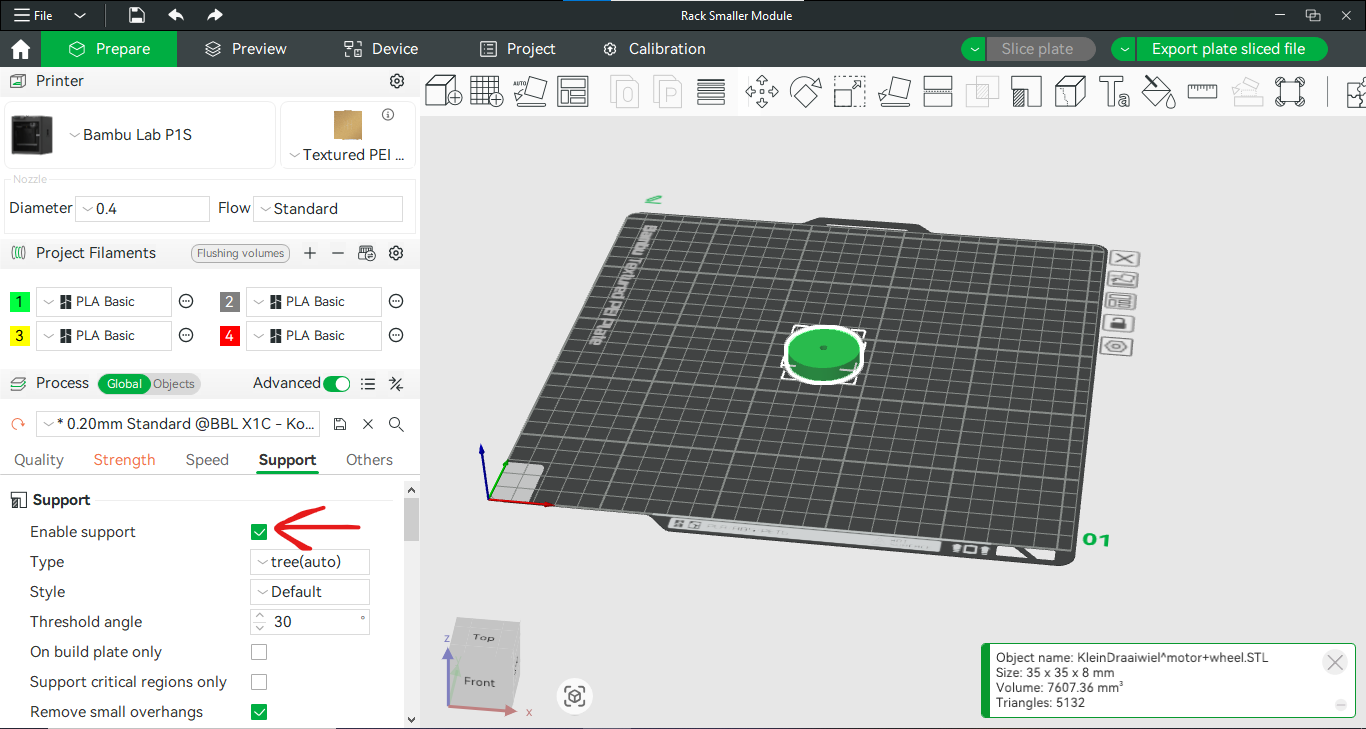
Step 5
Select the print profile. This will determine how quicly and how strong your print is. The lower the layer height is, the nicer it looks but the less strong it is.
Firstly select the “Global” tab below the filaments. Then click on the print profile.
Furthermore you can select a strength print profile for any models that have to endure high forces.
Lastly make sure supports for the print are on. (Sometimes the slicer wants to turn them off by itself)
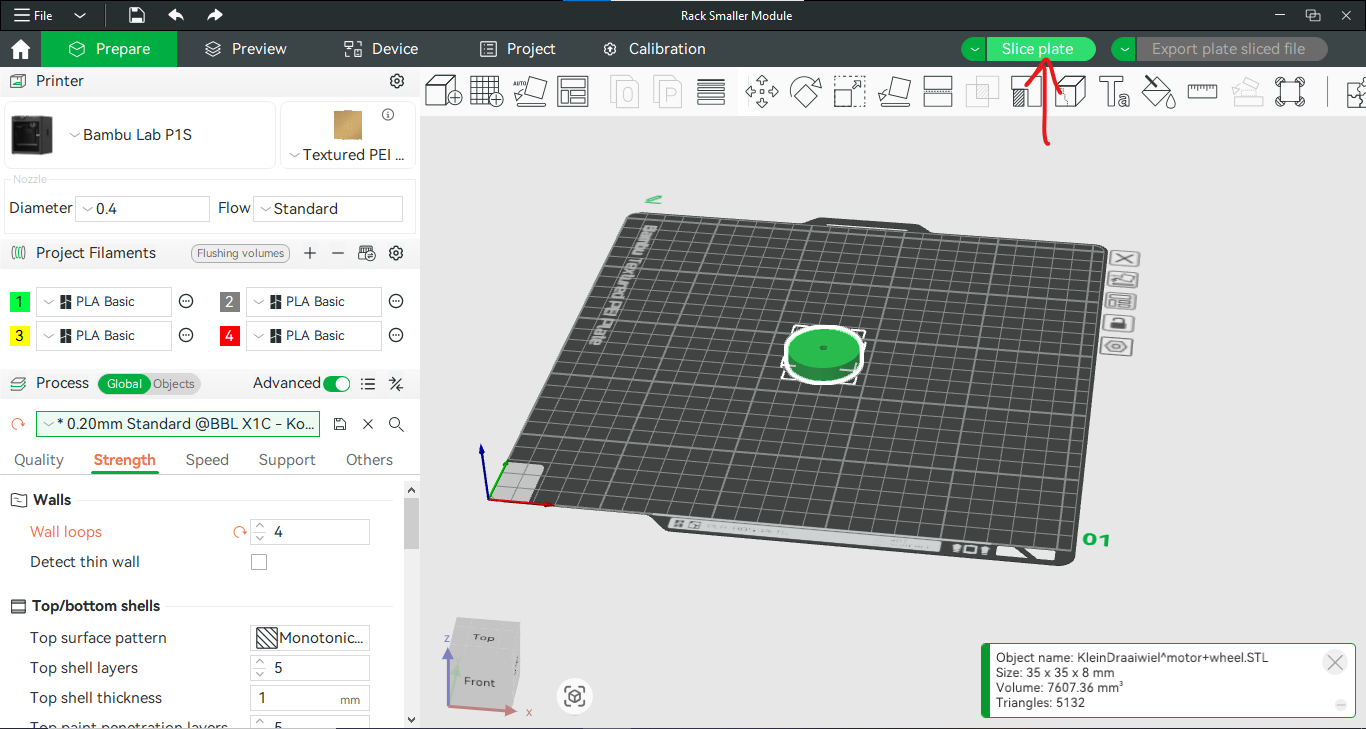
Step 6
Export the plate sliced file. Firstly, click slice plate in the top right. This can take a moment…
Then click on the arrow to the right side of “print plate” and select the option “Export plate sliced file”. Now click on it.
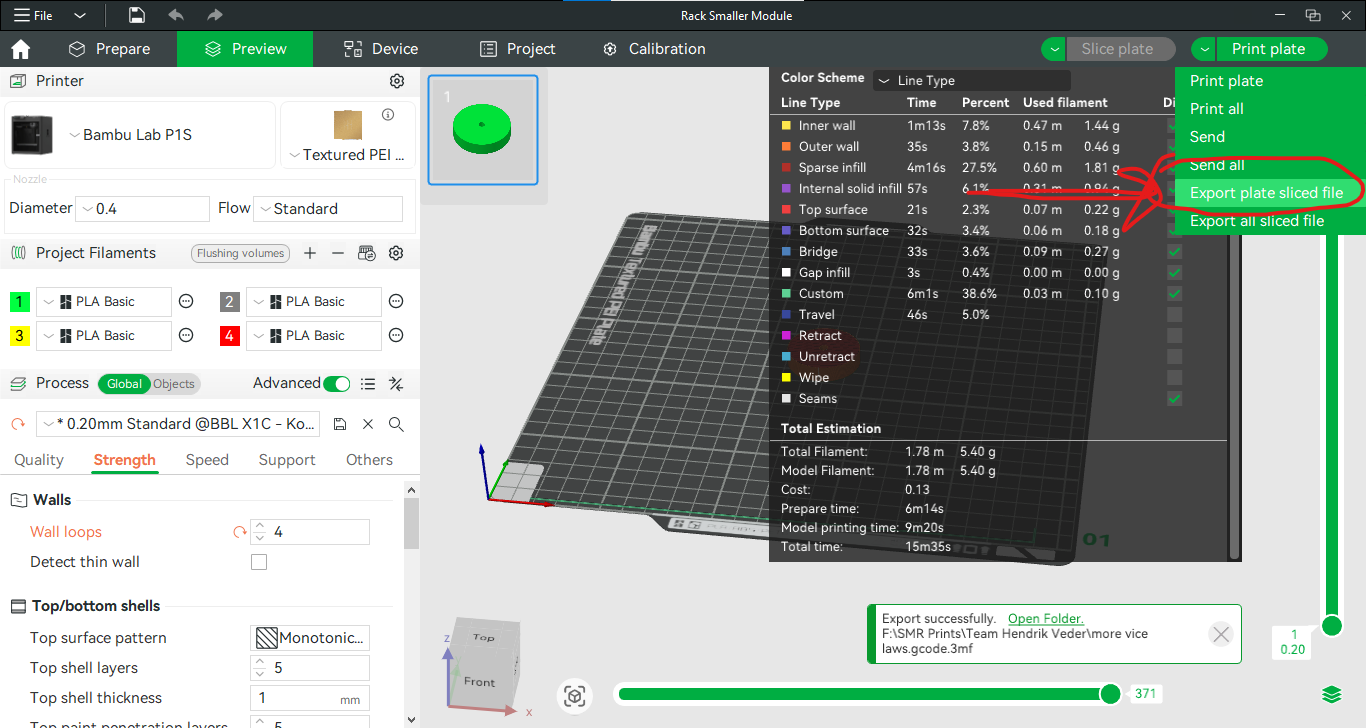
Now save the file to the micro SD card of the printer. The 3d print responsible person will have made a dedicated folder for your group to place your printing files.
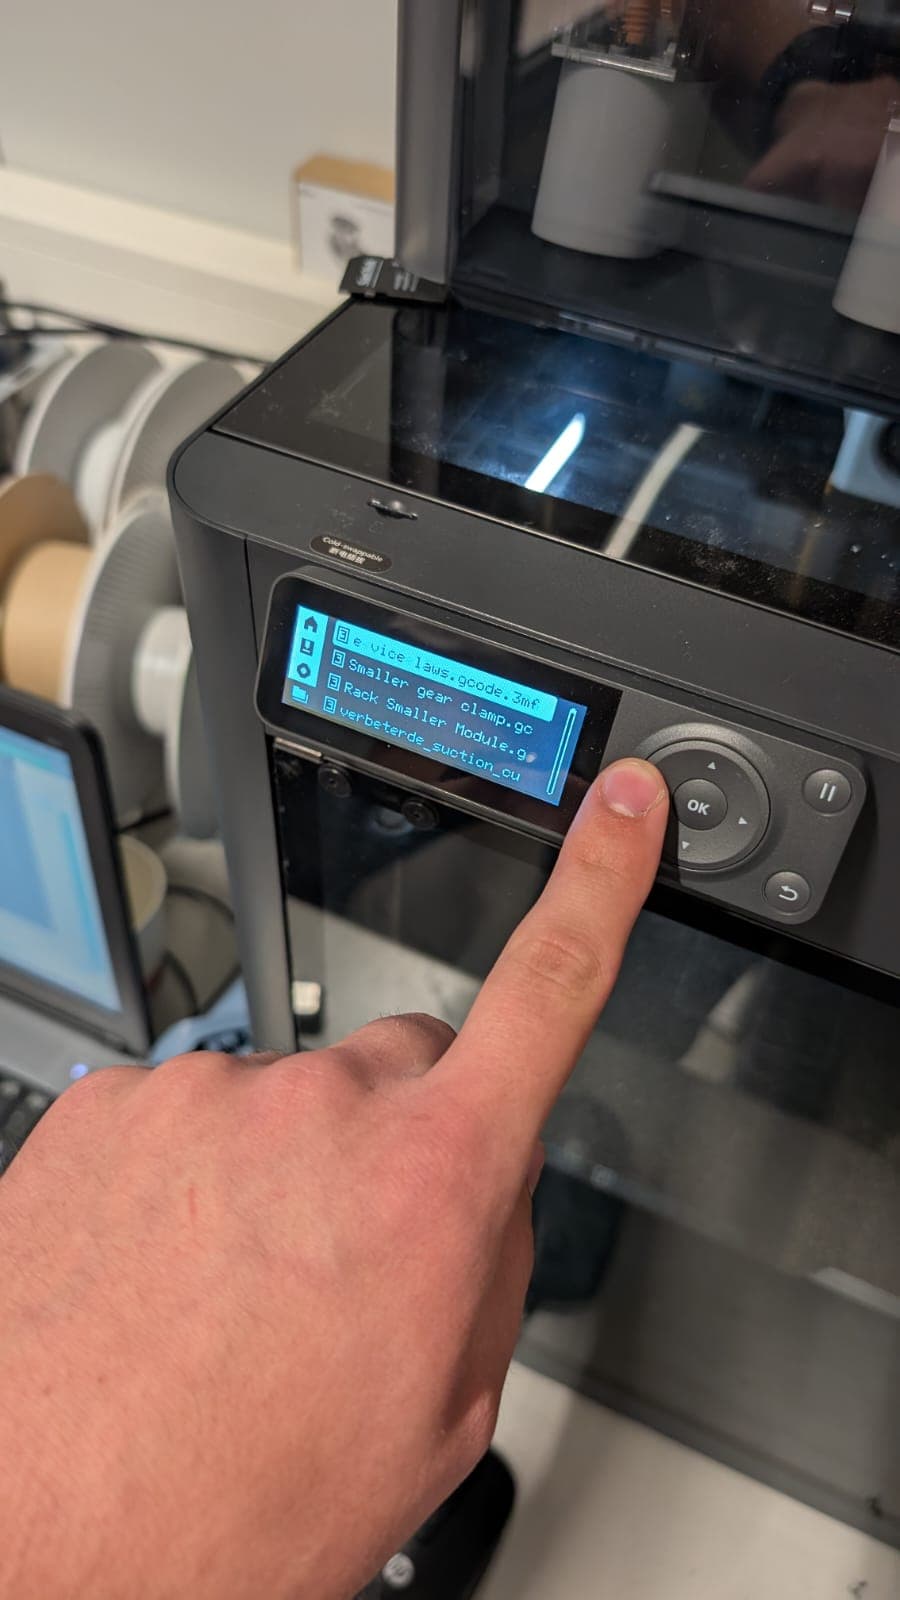
Step 7
Now you can insert the micro SD card into the printer.
On the printer select the print file menu on the left hand side. Now the top file should be the file you just put on the card. Click on it and click start print.
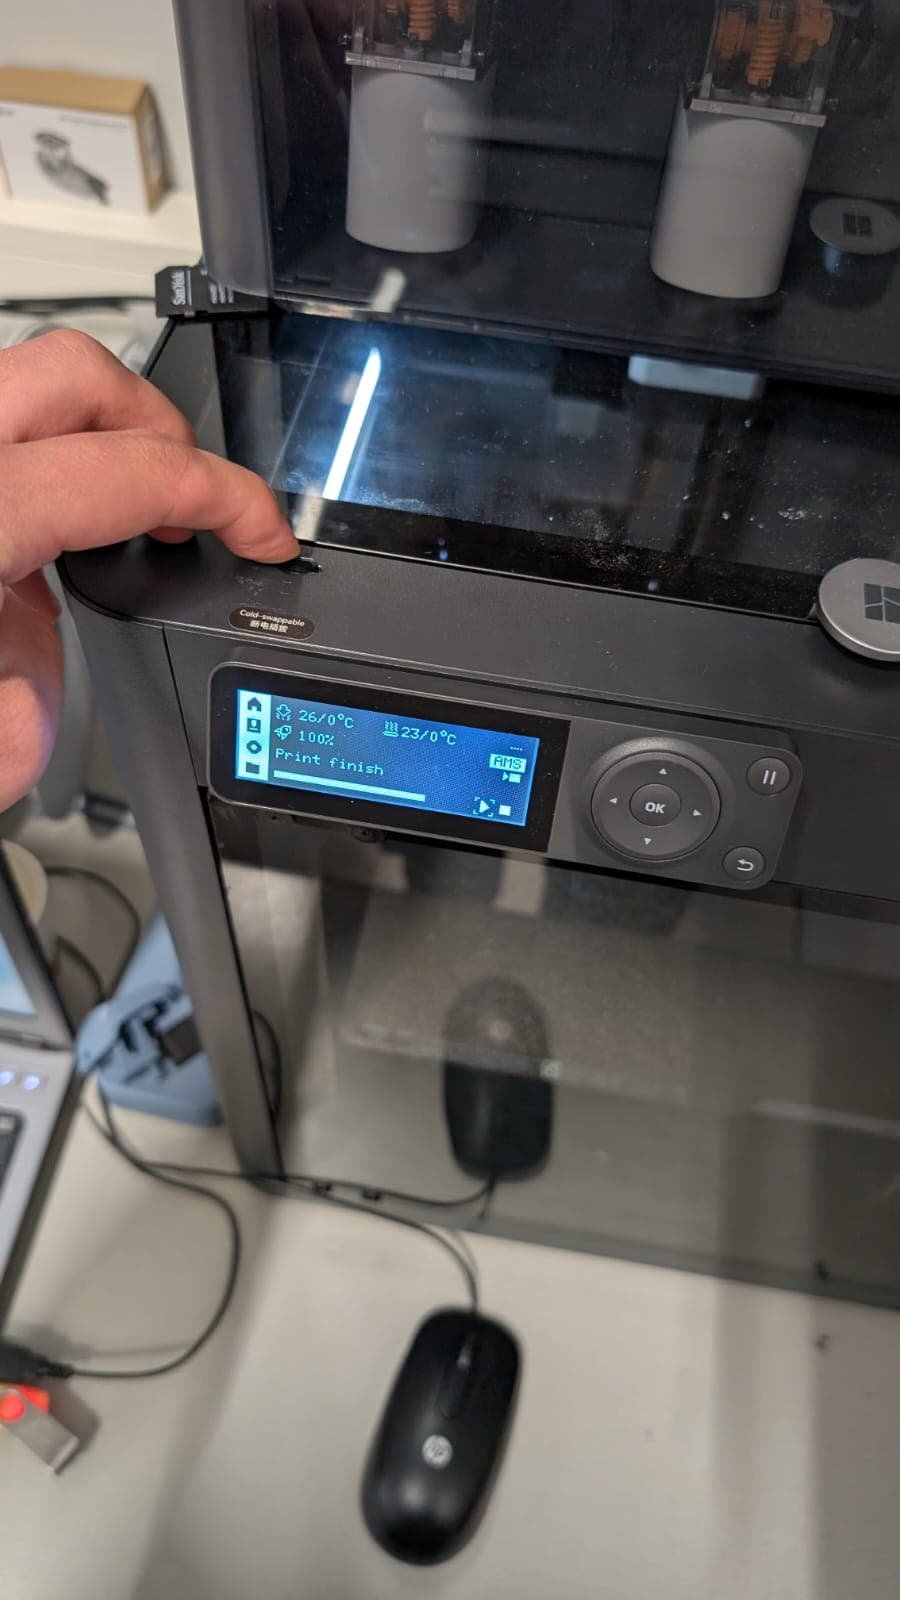
Step 8
When the printer is finished it will lower the bed so you can take out the print. Try not to touch the bed surface, this will grease it and make prints more likely to not adhere to the bed.
HAPPY PRINTING!!