How to Set Up Basic Control for the SEW Movitrac
To get started with controlling the SEW Movitrac, follow these steps for proper wiring, configuration, and software setup.
What You Will Need:
- SEW frequency inverter Movitrac (any power variant)
- SEW interface adapter Movidrive / USB
- Software: MOVITOOLS-MotionStudio
Step 1: Wiring the SEW Movitrac
- Input Connections:
- On the side with two inputs, connect your phase wire to L1 and the neutral wire to N.
- Motor Connections:
- On the side with five inputs, connect the motor wires (1 to 3) to the corresponding U to W terminals.
- Grounding:
- On the top of the device, first connect all GND terminals together to your general ground (GND).
- Analog Output Connection:
- Connect AI11 to the analog output on your controller. This can accept a signal between 0 and 10 volts, allowing you to adjust the motor speed within its minimum and maximum speed range.
- Digital Inputs:
- Connect DI01, DI02, and DI03 to the digital outputs of your controller. These inputs correspond to the following functions:
- DI01: Enables the motor to start.
- DI02 (CW): Clockwise direction.
- DI03 (CCW): Counterclockwise direction.
- You must enable either CW or CCW for the motor to run; otherwise, the motor will not turn on.
- Digital Output Connection:
- It’s also useful to connect DO03, which will be activated when the Movitrac has finished the startup process.
Step 2: Initial Controller Setup
Before sending any signals to the DI01 input, it’s important to first configure your controller:
- Connecting the Interface Adapter:
- Connect the interface adapter to the Movitrac unit.
- Software Setup:
- Connect the USB cable to your PC where MOVITOOLS-MotionStudio is installed.
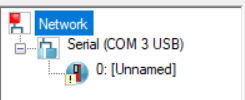
- Open MOVITOOLS and create a new program. In the top-left corner of the interface, click Scan.

-
If successful, you should see a device labeled “Unnamed” on the left side of the screen.
-
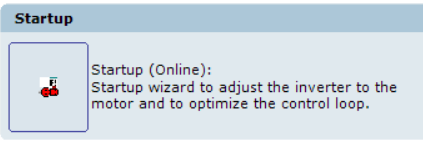
Startup Configuration:
- Click on the “Unnamed” device, and in the window that opens, go to Startup.
Step 3: Running the Motor
Once the startup configuration is successfully completed, you can now send an Enable signal to the motor. The motor should start running. You can adjust the motor speed by varying the voltage sent to the AI11 input.
Step 4: Parameter Adjustment
In MOVITOOLS-MotionStudio, you can find and adjust various parameters in the Parameter Tree.
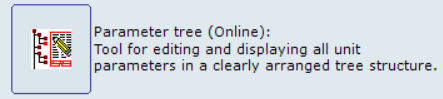
The key parameters include:
- 0.02 (Analog Setpoints): This controls the analog input settings.
- 0.03 (Binary Inputs): This controls the digital input signals.
- 0.05 (Binary Outputs): This controls the digital output signals.
- 3.30 (Limits 1): This sets the motor’s minimum speed limit.
- 3.31 (Limits 2): This sets the motor’s maximum speed limit.
Important Notes:
- Parameter 0 (Display values): Allows you to monitor most incoming and outgoing signals.
- Parameters 3.30 and 3.31 (Limits 1/2): Set the motor’s minimum and maximum speed limits. The default minimum speed is set to 15, and the maximum speed is determined by the startup settings. It is recommended not to adjust the maximum speed above the value set during startup unless you are certain of the motor’s capacity.
Conclusion
By following these steps, you will be able to set up and control your SEW Movitrac unit. Ensure that the controller and parameters are properly configured to avoid any issues. Always test the motor after configuration to confirm everything is working correctly.