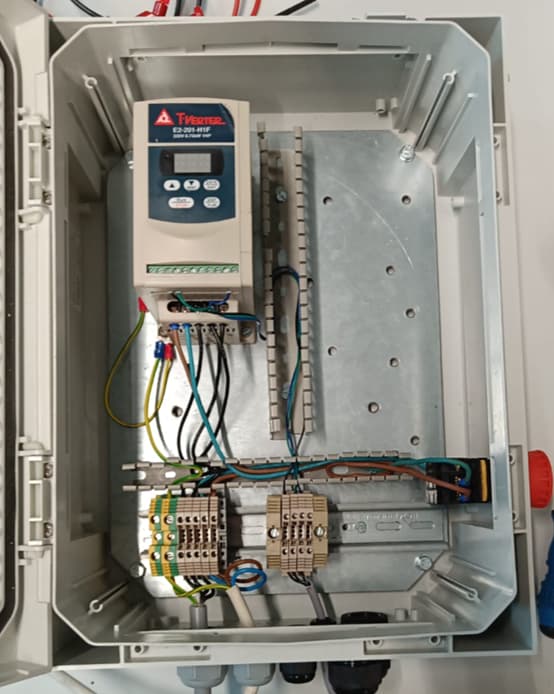
Warning: The inverter drive uses a high voltage. Make sure you do not turn it on before it is in a proper electrical box and checked by an electrical professional.
The first thing that needs to be done is connecting the wires from the belt to the inverter drive. L1 and L2 should be connected to 230V AC. T1, T2 and T3 come from the motor and should be as easy as laying wires between the corresponding numbers.
warning: Before powering the inverter drive, make sure you know if your motor is delta or star connected.
If you have done this, the belt can be turned on by pressing the start/stop button if the settings are default. The speed of the belt is the blinking value on the screen.
After this there are some extra steps you need to take to use it in combination with the robot arm. We used the ur5 robot for our solution, but it should work with every machine that can give an output of 24V. On the inverter drive, you need to change some settings. First change F19 or F20 to 1 and set F09 to the preferred speed. F03 should be on 0, this makes sure that you can adjust direction of the motor with powering input 3 (forward) or 4 (reverse). Make sure to also connect the ground (pin 10) to the ground of the robot.
After this your electrical box should look something like this:
If you want to look up all the other functions or read back what the mentioned functions do, here is the user manual of the inverter:
37388_E2Manual_Engels-V09.pdf (1.6 MB)
