For this tutorial you need:
- Doosan robot
Setting up the robots safety area can be done by using the teachpendant. It’s very simple and can help u a lot when working in a small area or when there is a physical obstruction like a wall in reach of the robot.
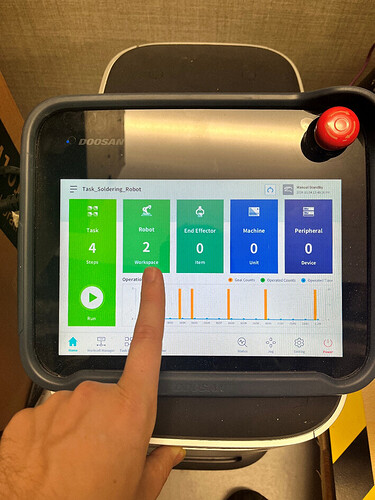
On the teachpendant there is a menu named robot, u can see it in the picture below. If you click on it you get another menu where you can choose different restriction settings. You can choose to only limit some joints or you can create a working space or space restriction.
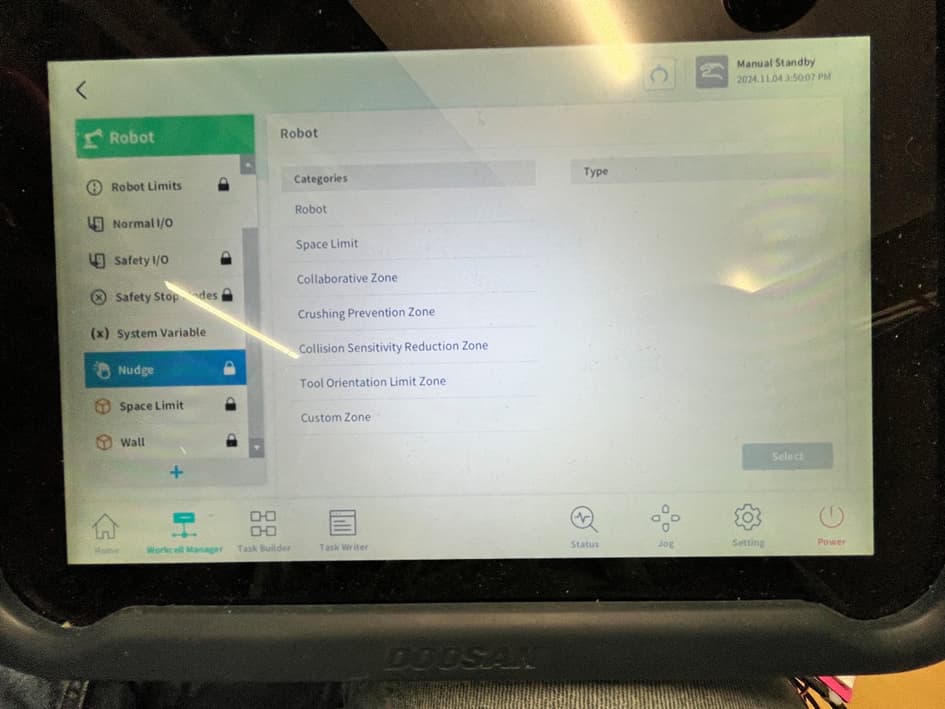
After you click the “Robot” button you get to the robot settings screen. If you want to add a space restriction you can click the plus button on the bottom of the scroll menu on the left.
Your screen will look like this:
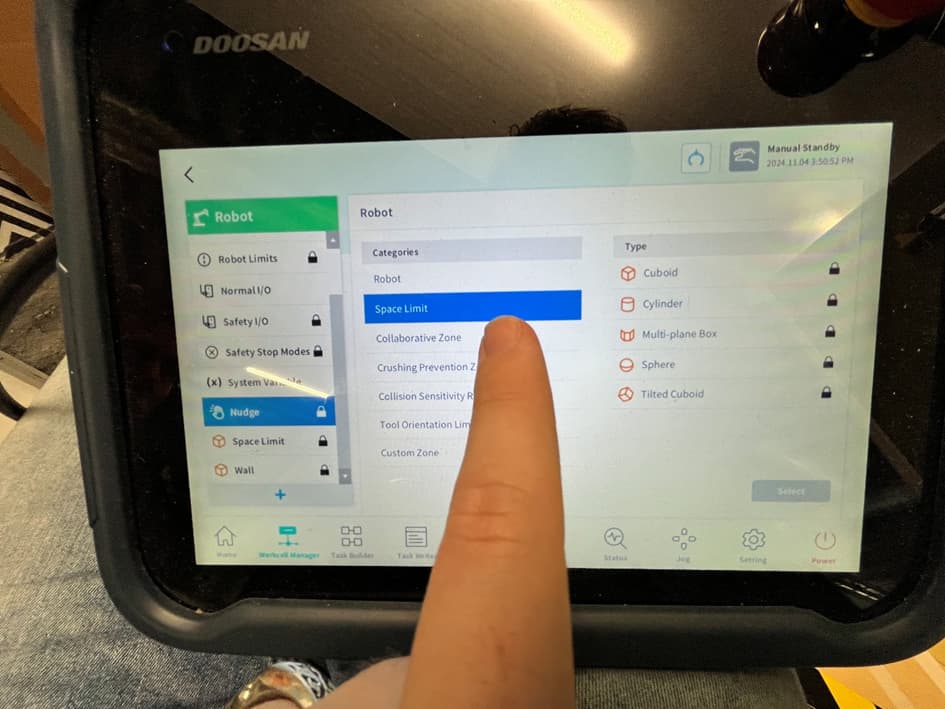
As you can see you get a categories list you can choose from. For a normal space limit click the “Space Limit” button:
You can than choose a type:
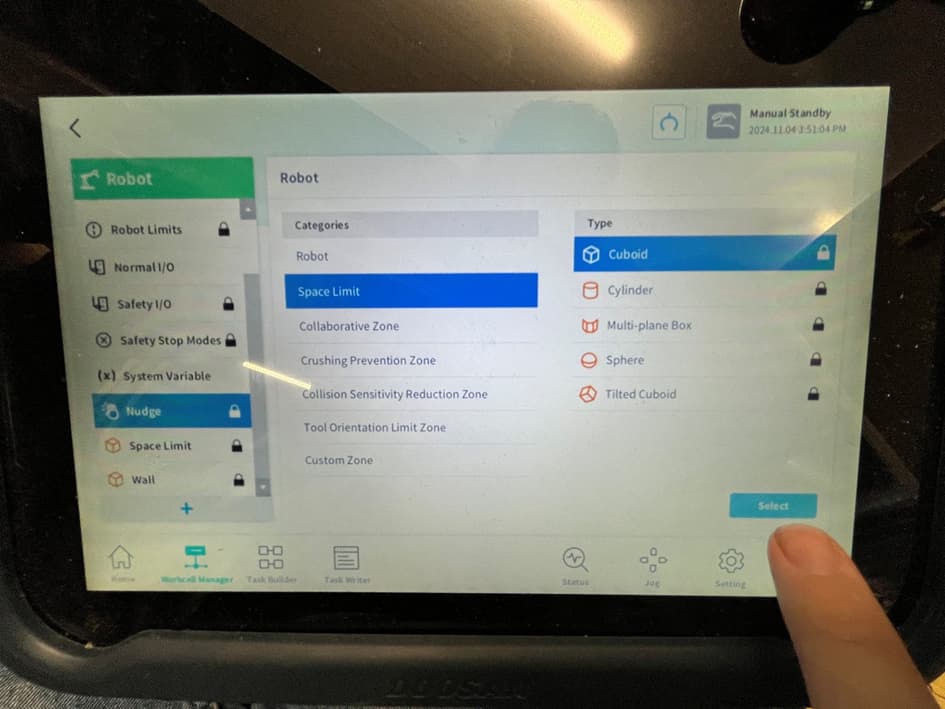
We wanted to create a square workspace up to a certain hight so we chose a cuboid shape, but you can choose other shapes according to your needs.
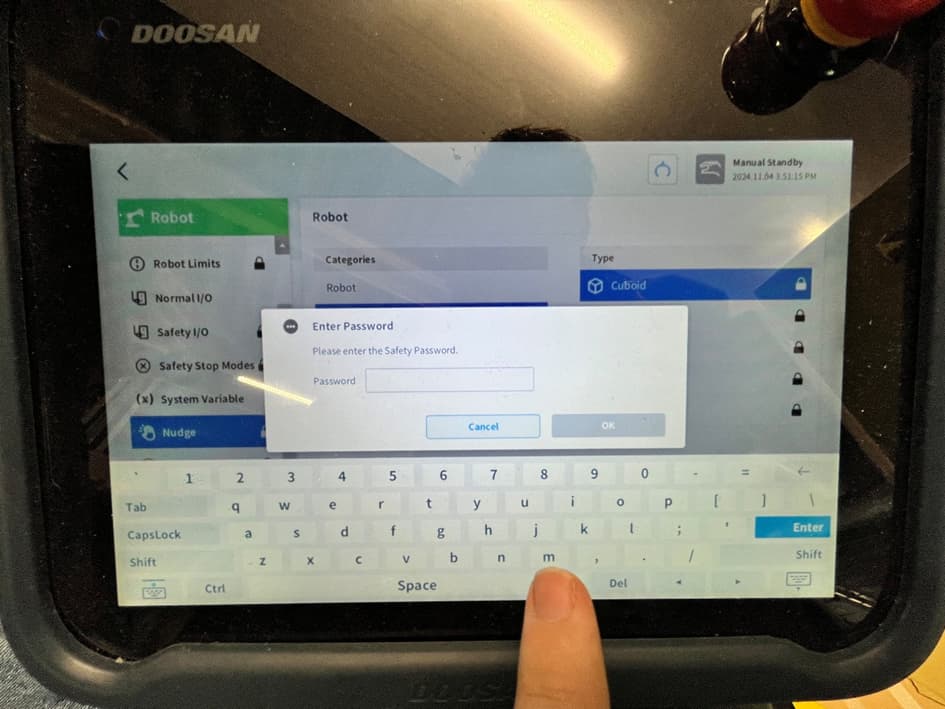
After selecting your type you can press “Select” on the bottom right of your screen. Then you get this message:
As you can see to set the restrictions on the robot you need to enter a password. The standard password should be “admin” without capital letters. When you have entered the password you should be able to place a workspace in the following menu:
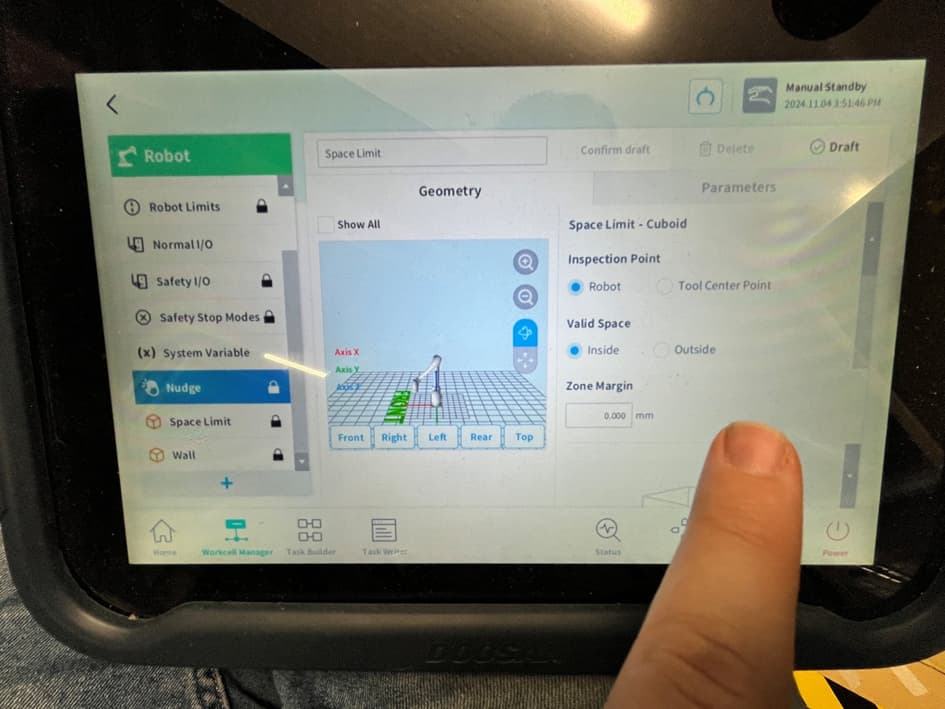
As you can see here you can setup the space limit. For this there are a few ways u can use this. If you have a tool installed on top of the robot arm, you can make this your point your tracking by clicking tool center point, then you tell how far the tool center point is away of the arm. Be aware that the robots limit for this box is the bottom which is always 3mm higher than the table top you have your robot placed on. What this means is that when you set your tool center point exact, the robot will not allow it to move below that bottom limit so you won’t be able to touch the table top with your tool tip. So keep that in mind if that is something you need to do.
In that case I would recommend u to make your tool center point distance 3 mm shorter so that you can touch the table.
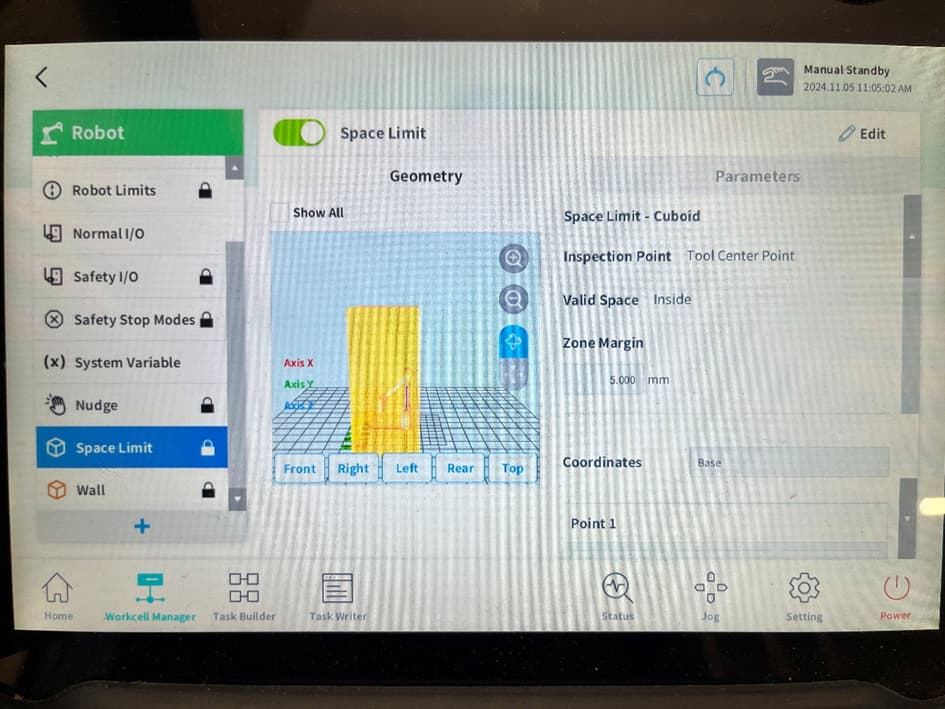
As you can see in the picture below, we made a space in which the tool center point should always stay. This is really funny when moving the robot by hand. When you press the move button to move the robot by hand, the robot will automatically pull itself into the space limit you put around it. Of course you can force it out of this limit, but then the robot will lock itself and give an error on the teach pendant that the robot was forced out of the space limit.
The other option is to take the robot as an inspection point. This means that the robots body will be restricted to move or touch the walls of the space limit.
The other option you’re given is to choose the valid space for the robot. What this does is tell the robot whether it should always be in this space limit or if it should never go into this space limit.
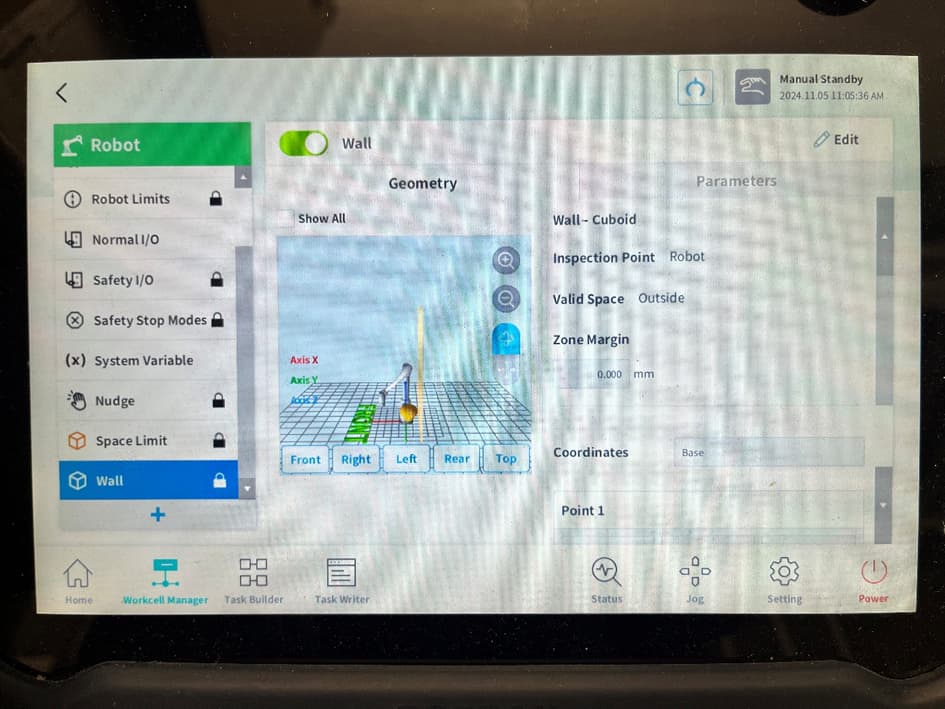
We have used this to simulate a wall that is behind our robot arm.
As you can see here we have used the robot as an inspection point and we have made the valid space to be outside the space limit box. What this now does is it stops the robot from hitting the wall. If the robot detects that any part of the robot is hitting the space limit, it stops the robot from moving any further and it will give the same error on the teach pendant that a space limit is reached.
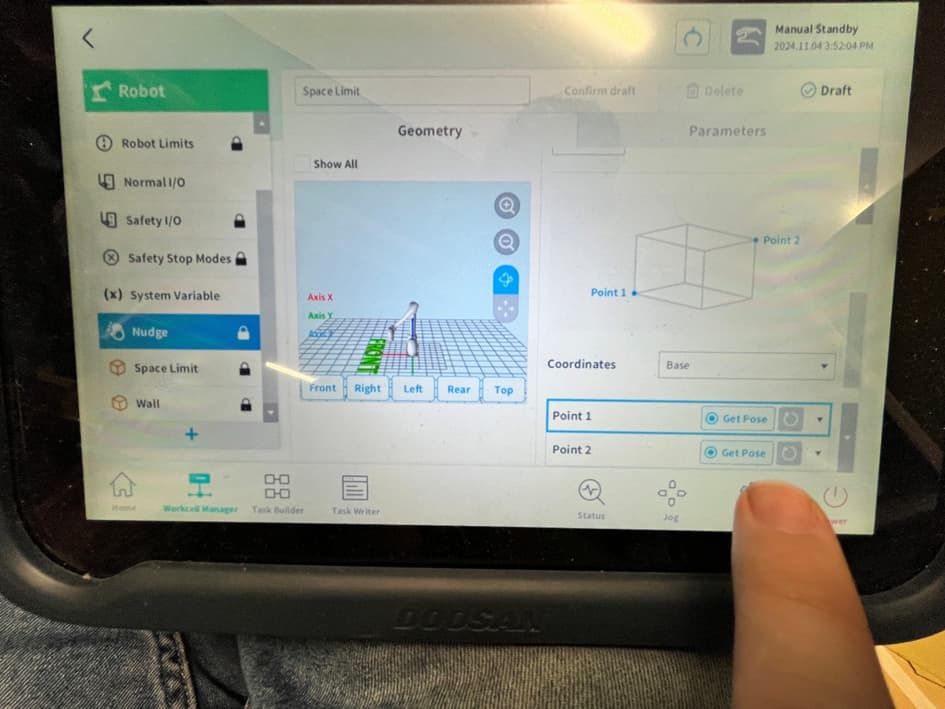
I see that I only need to explain how to set the safety box points now so I will tell you how to do that. It is very simple. When you have entered your inspection point and you valid space, you can scroll down that tab to when you see the next screen:
Here you can see how the robot calculates the space limit. As we have chosen a Cuboid as a space limit we only need to define two points in the space. You can set point one by clicking on it and then moving the robot head by hand or by teachpendant to the corner of your space limit. Then when you click on “Get Pose” it will make this pose point 1. You can do the same for point 2.
After this you can save your settings by clicking on “Draft” in the top right corner of the screen.
So now you have created your space limit, but how to recover the robot if it runs into the space limit? Don’t worry I got u covered!
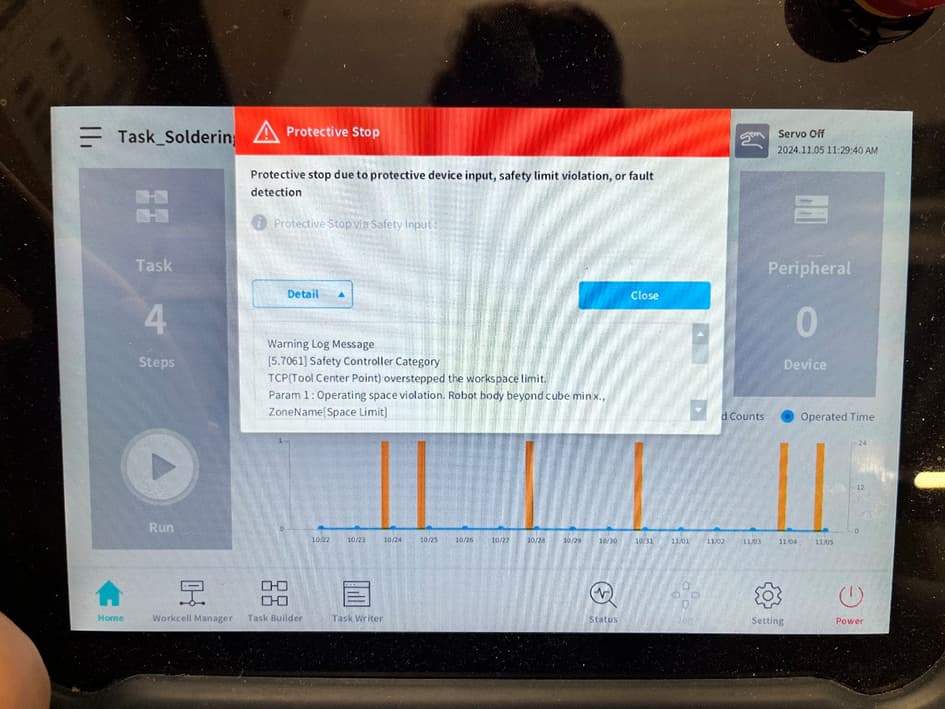
If the robot encounters a safety limit it should give the next error on the teachpendant and the led ring on the robot head should turn red:
U can close this error, but it won’t let you move the robot yet.
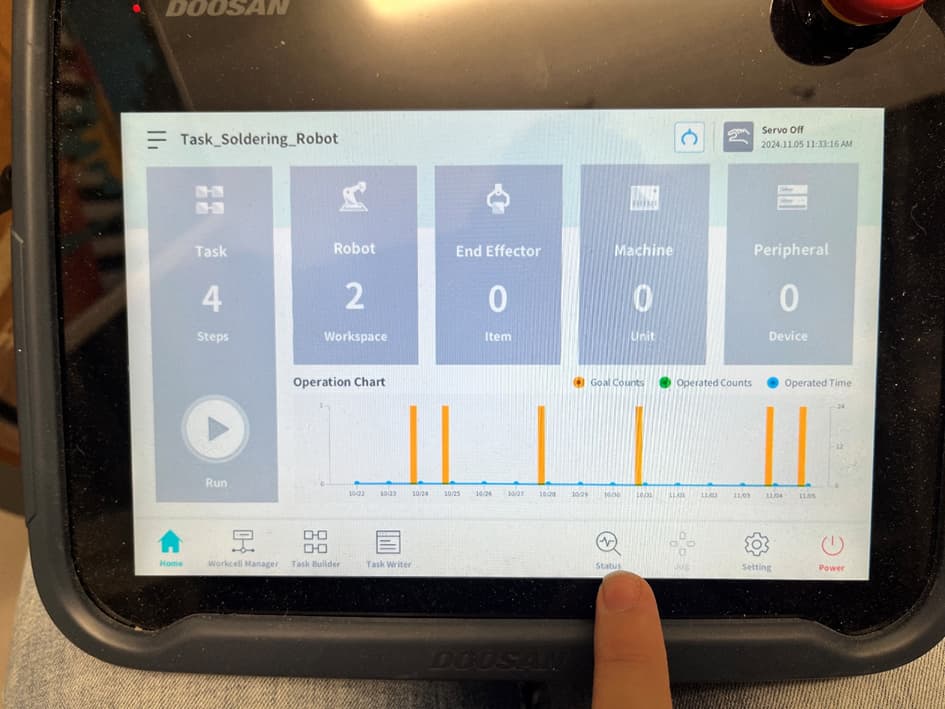
After you closed the error, the screen should be completely grey. On the bottom tab there is an option “Status” you need to click that to get into the status tab:
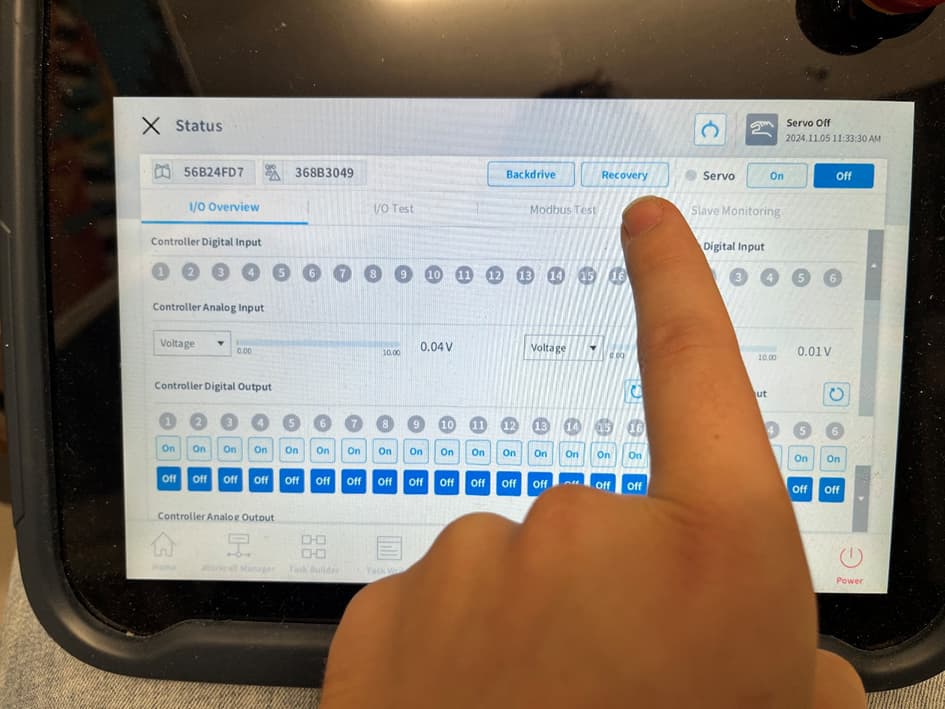
The status tab looks like this:
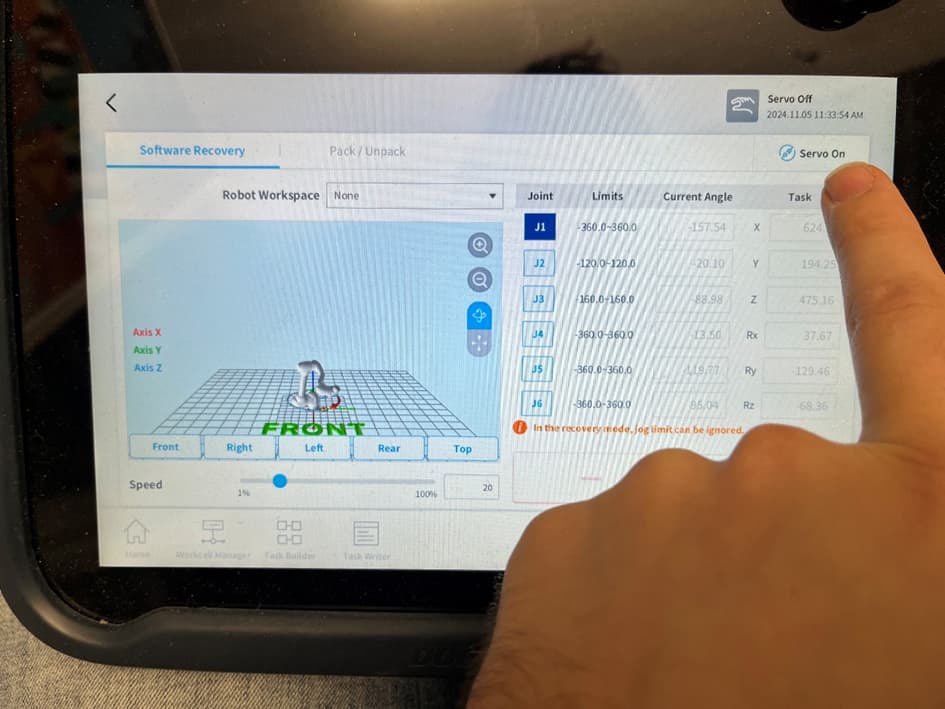
In the status tab you need to press recovery. This will disable all safety limits and allow you to let the robot moving individual joints. In the next picture u can see the recovery tab. Before you can move anything you have to press “Servo On” on the top right corner of the screen.
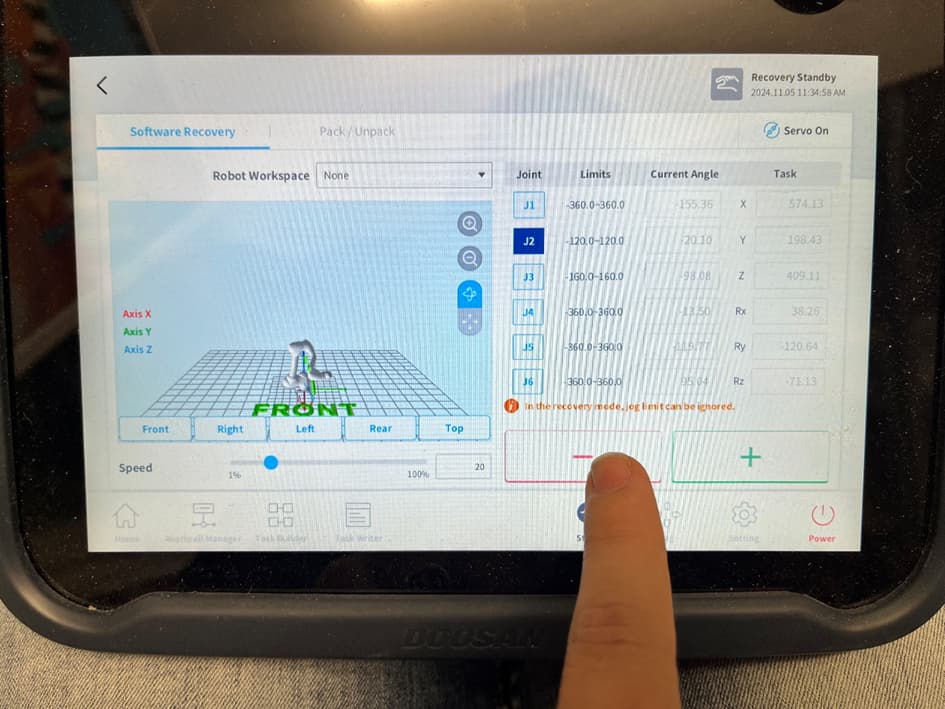
Now you can click individual joints and move them using the + and – button.
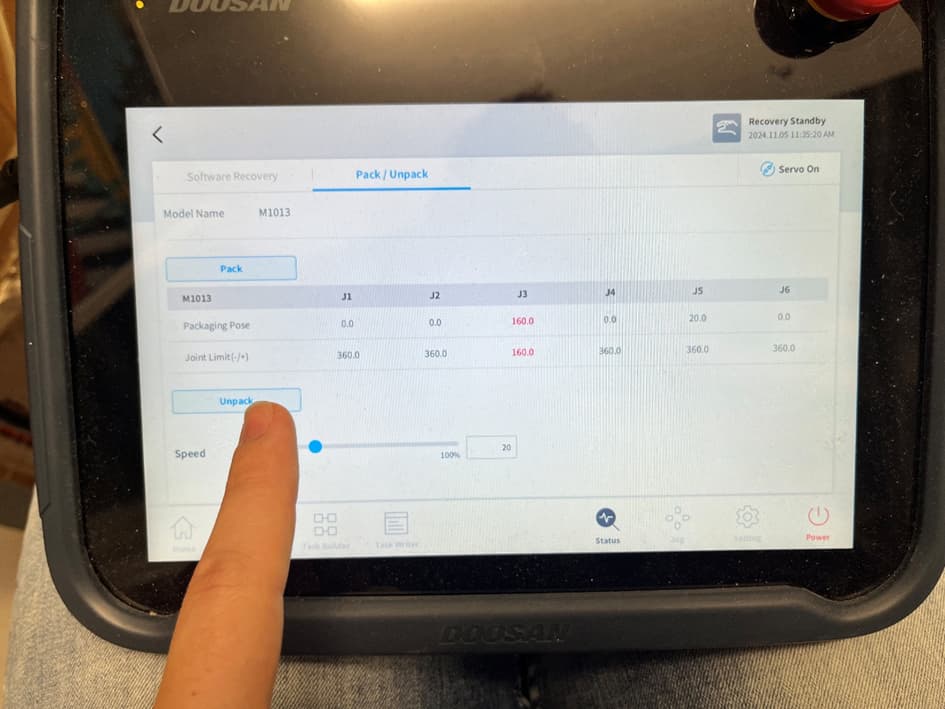
Sometimes this function won’t work or if this is to tricky, u can also use the pack/unpack function. Be aware that if you use this the robot will move to the upright position or the pack position, which is the form it has in the transport box. See picture below for the pack/unpack tab:
u don’t need to fully pack or unpack the robot to fix the space limit issue, you only need to make sure that the robot or the tool centerpoint is back into the space limit. After that u can exit the recovery mode and move back to the home screen. You should be able to move the robot by hand again. U can only move the robot by hand when the led ring on the head is blue.
I will also give u the link for the programming manual we used, this will probably help u a lot with programming the robot as well.
Link: https://cobot-smx.jp/info/wp-content/uploads/2023/08/Doosan_Robotics_Programming_Manual_V2_9_3_v2_6_EN.pdf
This was the end of this tutorial, I hope it helped you. Good luck with your project! How to written by Erik Endlich
If you want to discuss this topic or if you have questions, reply in the comments.
