Welcome to this how to about the 230V power-outlet switch we made.
WHEN WORKING WITH POWER AS 230V ALWAYS CHECK WITH THE TEACHER FROM THE WORKSHOP BEFORE PLUGGING IT IN!!!
ADDITIONAL SAFETY INSTRUCTIONS FOR WORKING WITH ELECTRICAL COMPONENTS CAN BE FOUND ON ROBOTEXCHANGE:
In this how to I will explain how to use it, and provide the documentation for the relay we used.
Be advised that if you change the setup inside the electrical box, one of the teachers in the workshop needs to check it for safety purposes.
If u just want to use it go ahead, it is already cleared by the teacher for plug and play.
Quick start guide
Plug the red wire in a 24V digital output port in the robot controller.
Plug the brown wire in a 0V port in the robot controller.
DON’T PUT THE EXTENSIONCORD DIRECTLY INTO A WALL SOCKET, IF SOMETHING GOES WRONG OR SHORT CIRCUITS, THE WHOLE SCHOOL WILL BE WITHOUT POWER!!! ALWAYS USE THE BLACK POWEROUTPUTS IN THE LAB THEY LOOK LIKE THIS:
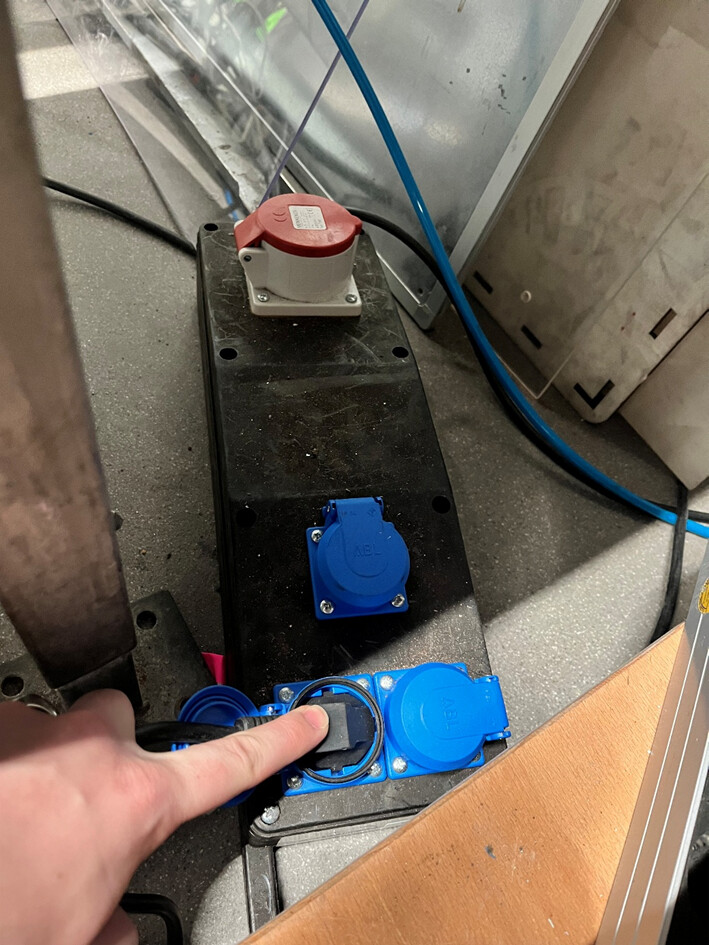
If your done with the robot controller you can plug it in the black power outlets in the lab as shown in the picture above.
Now you should be able to turn the power in the extension cord by switching your digital output port manually in the robot control menu, or use programming to switch your digital output.
WHEN YOU GO HOME AT THE END OF THE DAY ALWAYS PLUG THE EXTENSIONCORD OUT OF THE POWER SOCKET.
The manual of the relay can be found here.
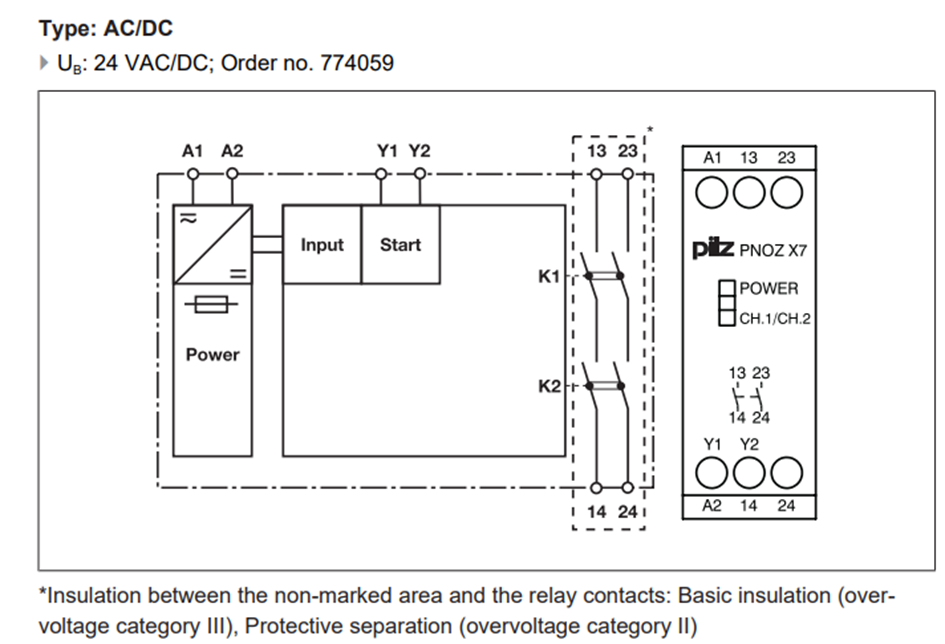
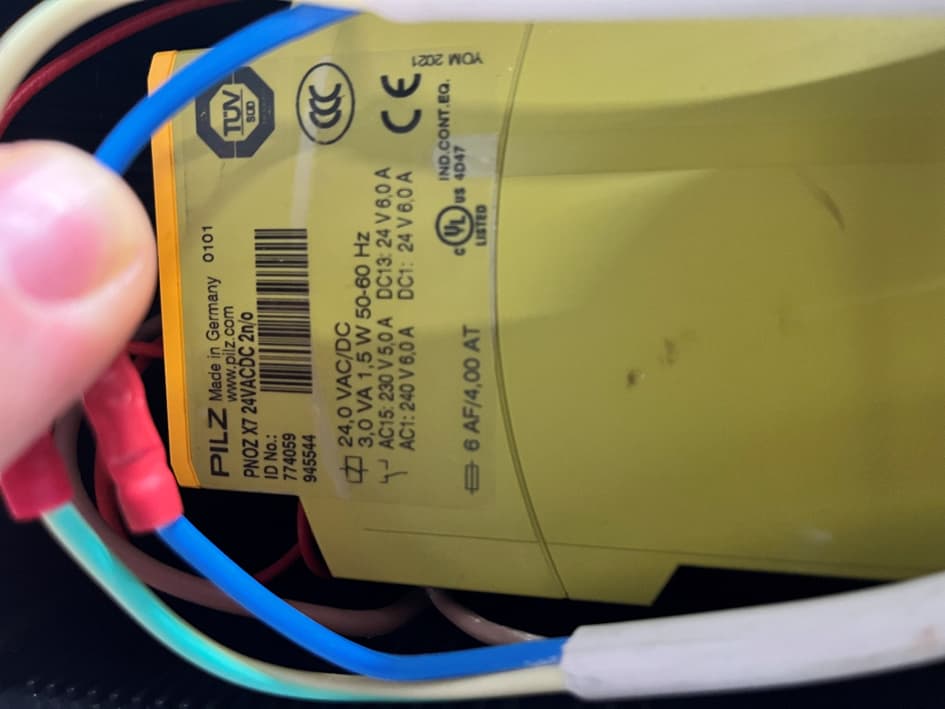
PNOZ_X7 relay specs
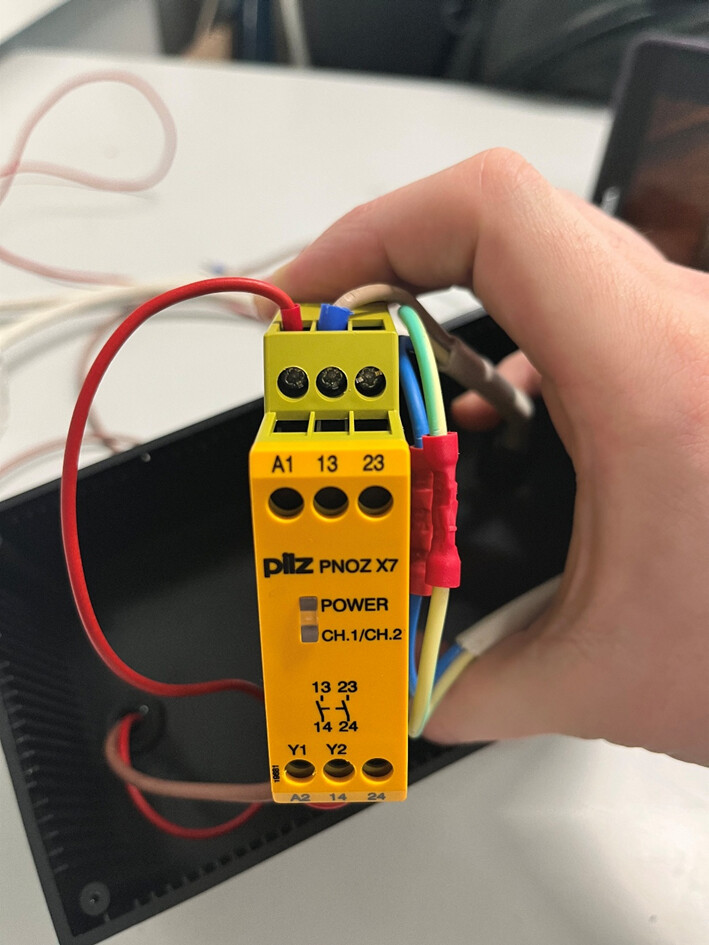
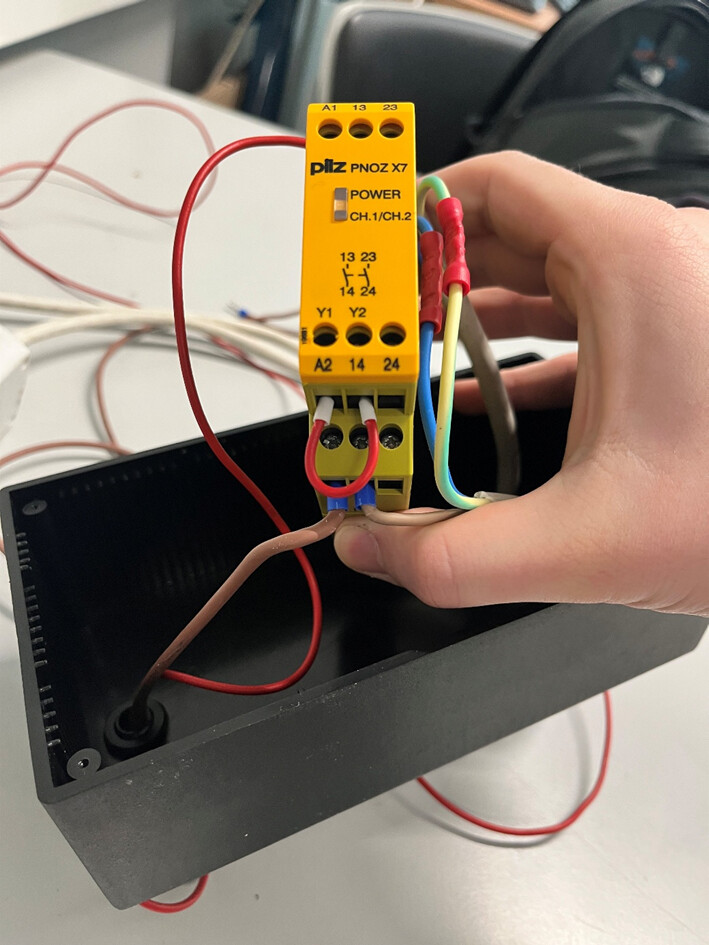
How we set up the relay
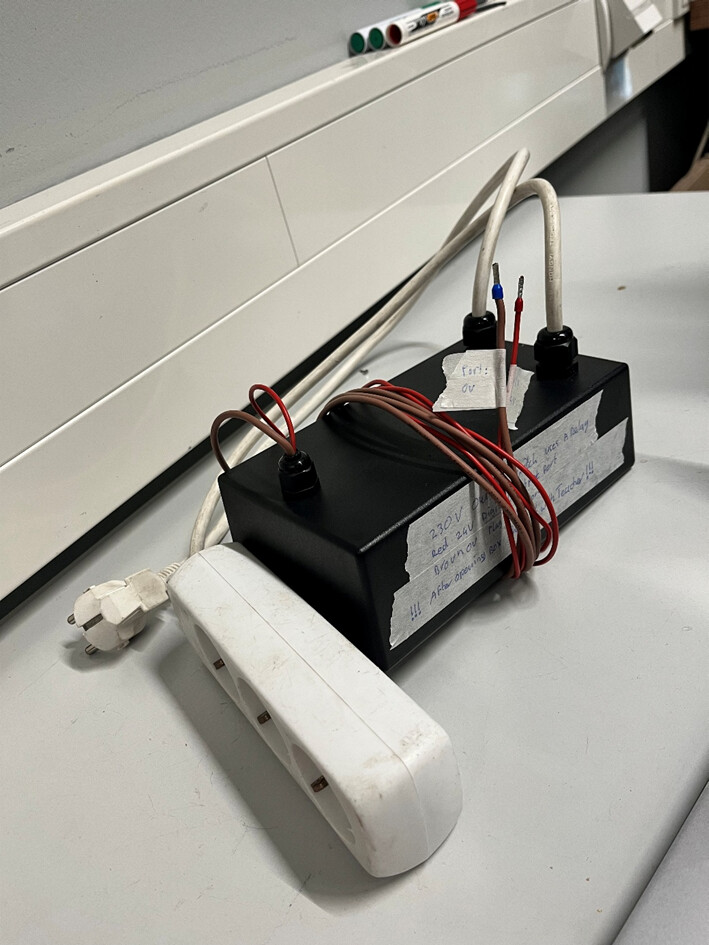
We can switch the relay by putting the signal wires 24V (Red) in port A1 and 0V (Brown) in port A2 of the relay.
From the extension cord we cut the wires and put the 230AC wire (brown) in the port 13 and 14.
We reconnected the neutral wire and the ground inside the electrical box, they didn’t need to be cut, but we couldn’t get them in the box otherwise.
Port Y1 and Y2 are connected with a short wire.
The picture below shows how the relay works.
In the pictures below you can see how we set it up.
If u change anything in the setup, please update this How To so the next group knows what to do with it. Good luck with your project!
Initial update: 23-1-2025
Current update: 23-1-2025