How to work with chain drive systems
Julius Bötger – Hogeschool van Amsterdam
This how to is divided in 3 parts: choosing parts for a chain drive system, using the ‘shaft generator’ function in inventor and working safely with chain drive systems.
Choosing parts for a chain drive system
If you want to use a chain to perform an action in a machine, it will need a couple of base components to function. The size of the components have to be compatible with each other, there are a lot of different sizes and norms to choose from. For this example we will take a look at kettingtechniek.nl, a Dutch supplier of chains and accessories.
The first thing you will need to choose is what size chain to use. On the website of kettingtechniek you can find datasheets with the different sizes and their properties. Once you have found the size you would like to use, look at the KTN number on the left, and remember this number (in our example 06B-1).
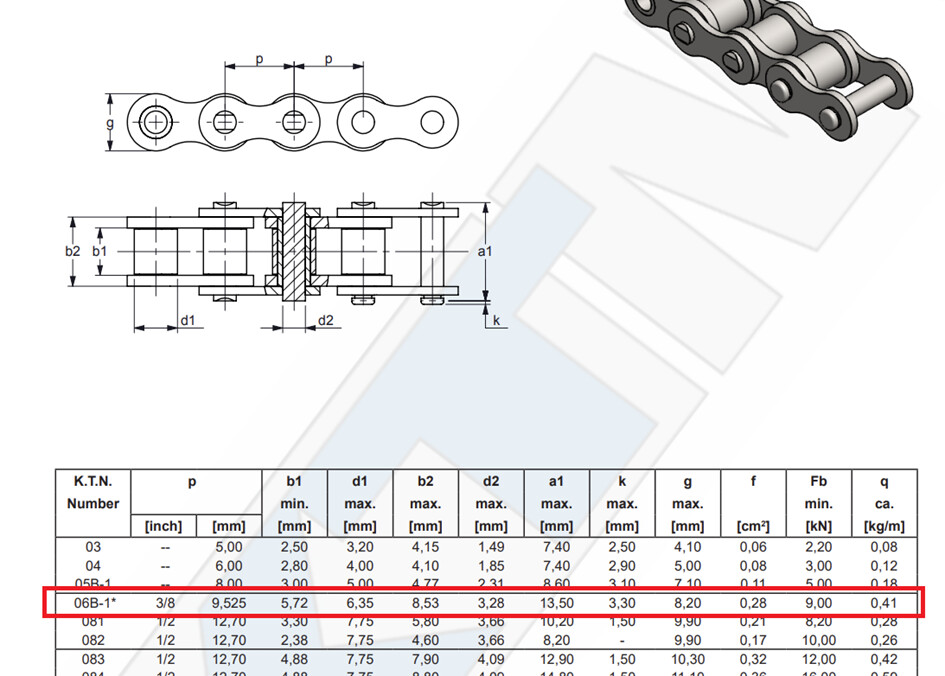
To drive the chain you will need a sprocket with a key groove. This sprocket will be connected to a motor, and is what drives the chain. To connect it a shaft has to be used with another key groove of the same size. This allows for a key to be placed, wich ensures the sprocket cant rotate over the shaft.
When choosing a sprocket look at the datasheet, and then search for the sprockets with the same code as your chain. This way you will be sure the parts fit together nicely.
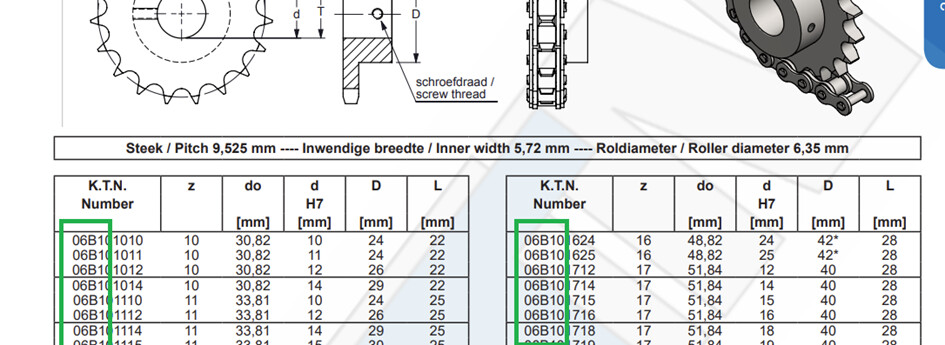
These sprockets fit.
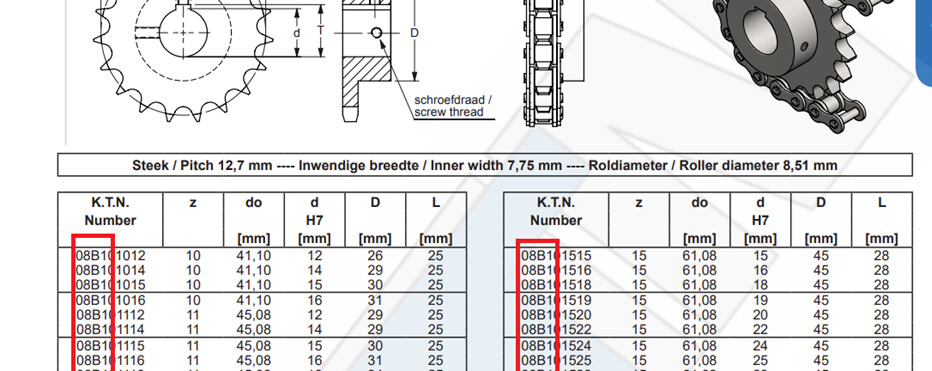
These do not.
If your chain has to transfer rotation to another part another sprocket with key groove can be used to drive a different shaft. Sometimes you want to use a chain just to pull something, or as a saw. Or sometimes you want to tension the chain via a 3th gear. In these instances you want to use a gear that can rotate freely. The easiest gears to use are the ones that come with a bearing pre fitted. To tension the chain you can create a fitting where the gear can be moved until the chain has the correct tension, and then tightened.
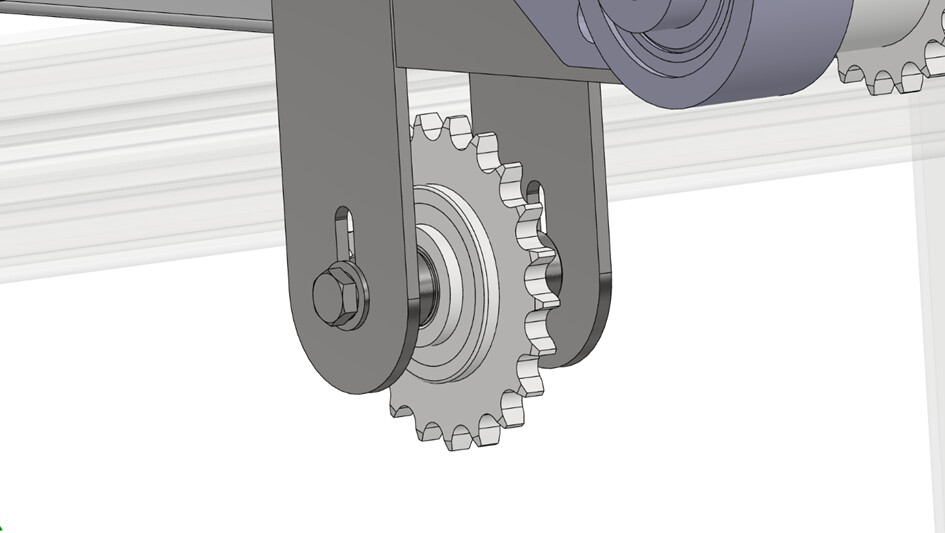
A gear with a prefitted bearing, mounted with a possibility to tension the chain.
There are a lot of different possibilities with chains. You can transfer rotational force, move parts of machines, pull products and much more. They are compact, very strong and easy to work with. If you buy different parts for chains, make sure that you at least have the base components shown above, and make sure that you only buy parts that have the same product code.
Using the ‘shaft generator’ in inventor
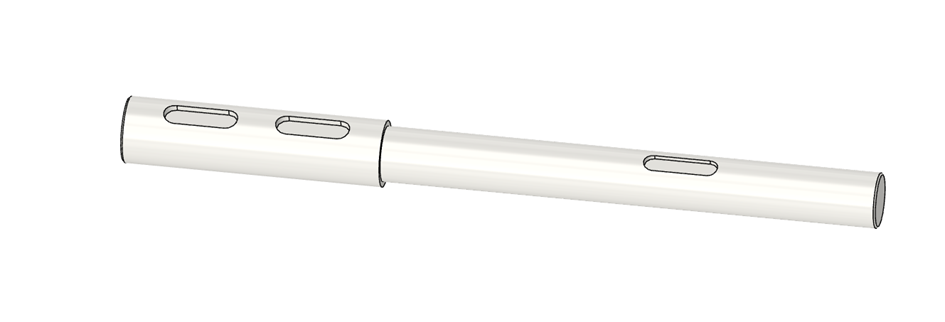
To drive the chain the sprocket has to be connected to an electric motor. This can be done with a shaft. 3D drawing a shaft can take quite some time, but luckily inventor has a built-in shaft generator.
To use the function you first have to come up with the dimensions of your shaft. For our example we will create a shaft that has a section with a diameter of 15mm that is 134mm long, and a section with a diameter of 18mm that is 70 mm long.
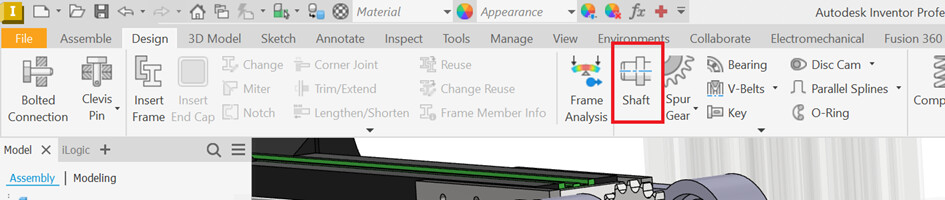
Open your assembly, and search for the ‘shaft’ button under ‘design’.
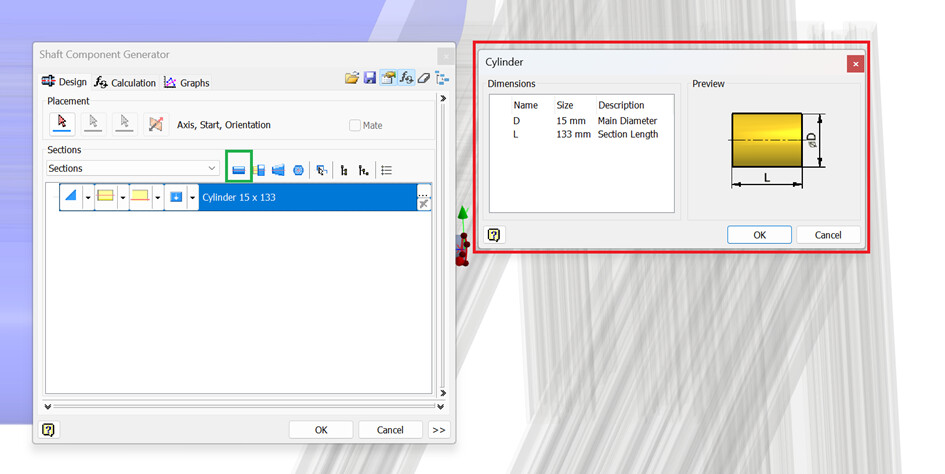
In the box that opens you can find a lost of the different sections. There will be one cylindrical section there, if you double click it another box opens (red) where you can put in the dimensions. After this you can press the add cylinder button (green) to add the second section, and give it its dimensions.
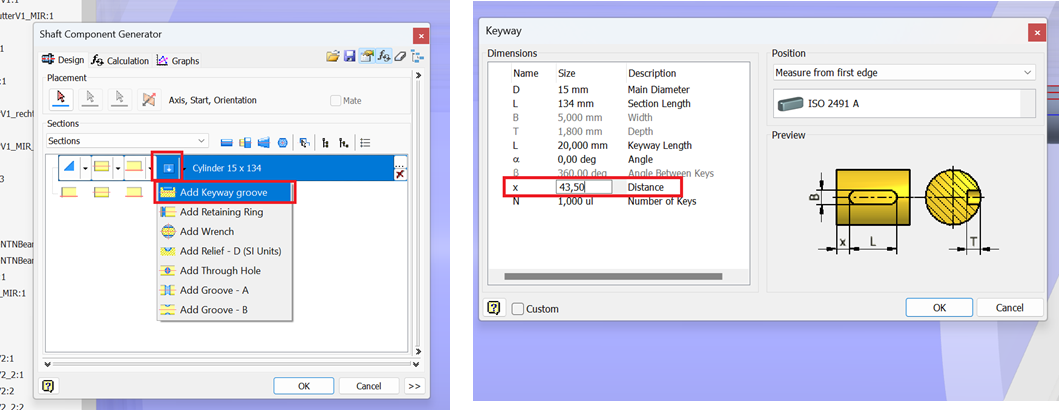
For our shaft we want 3 keyway grooves, one for a 5mm key on the long shaft, and 2 for 6mm keys on the shorter bit.
To add the groove, click the dropdown button on the section where you want to add the groove, and press the ‘keyway groove’ button. The groove will appear in the section tree. If you double-click the groove in the tree, a box will appear where you can choose the type of key. By changing the value of x you can position the groove.
After doing this for all the needed keys, you can add features to the ends of the sections by pressing the button in the tree(red).
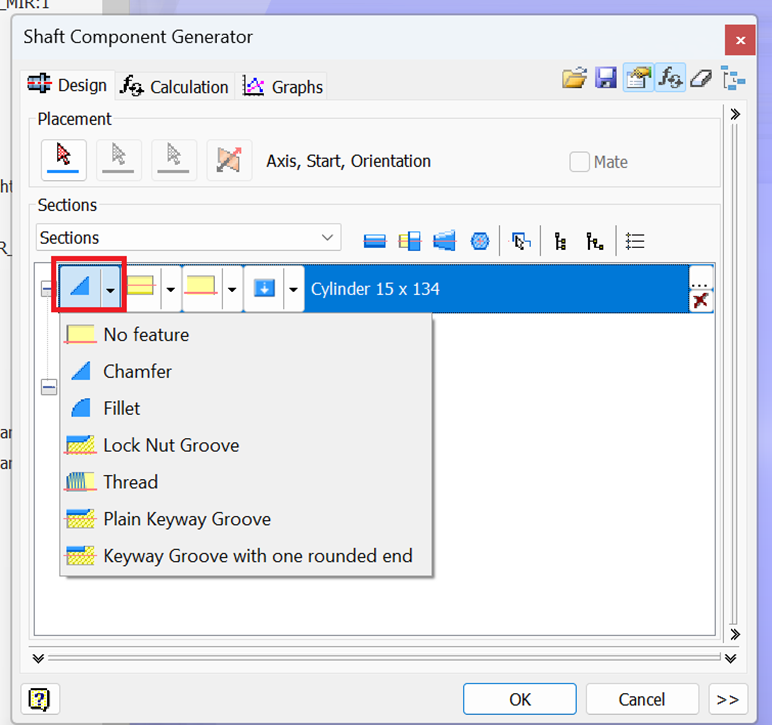
After this you can press the ok button and you can place your shaft.
This is an easy way to create shafts for driving your chain system. By using this way you can also ensure that you use universal dimensions for features like, keyway grooves, clip grooves and chamfers.
Working safely with chain systems
The most important part of working safely with chain systems is working safely. Chains are incredibly strong, and if they are driven by a strong electric motor can become incredibly dangerous. The teeth of the gears can destroy almost anything that gets between them. That is why it is very important to use some safety measures to prevent dangerous situations.
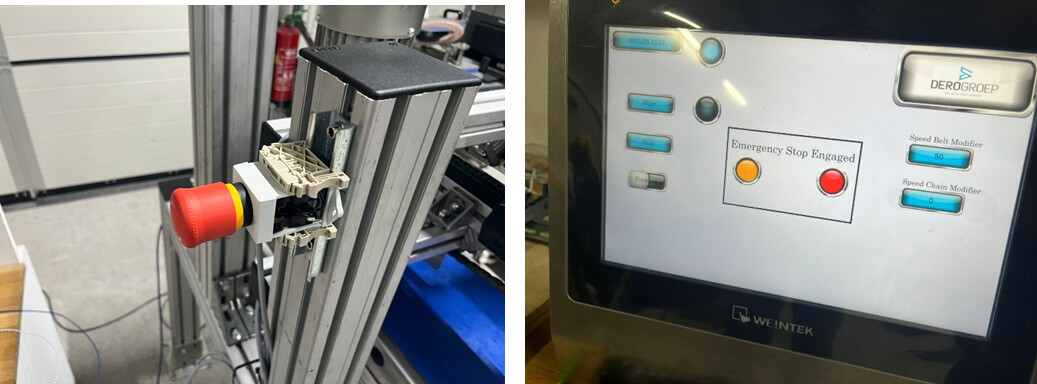
The first safety measure that any type of machine should have is an emergency stop. When working on the chain, you want to be 100% sure that it isn’t going to spin. That is why there should always be an emergency button in your range when you are in the proximity of the machine. The emergency stop should override every other command to the machine, making it impossible for something to happen while the emergency stop is active. Another rule to keep to is to always press the emergency button when working on the system, and only releasing it when you are done, and are sure nothing else is close to it.
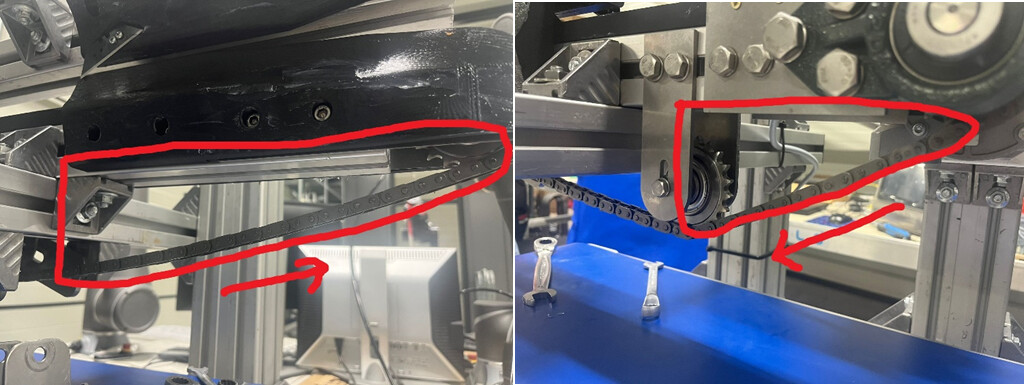
Another important safety measure is preventing your hand from getting between the chain and a gear, by using handguards. By looking at the places where the gear and the chain meet you can often spot areas where your hand can get caught between them. In the pictures below a couple of dangerous areas are marked in red. If your hand slips or moves unexpectedly in this zone it can get caught, which has to be prevented at all cost.
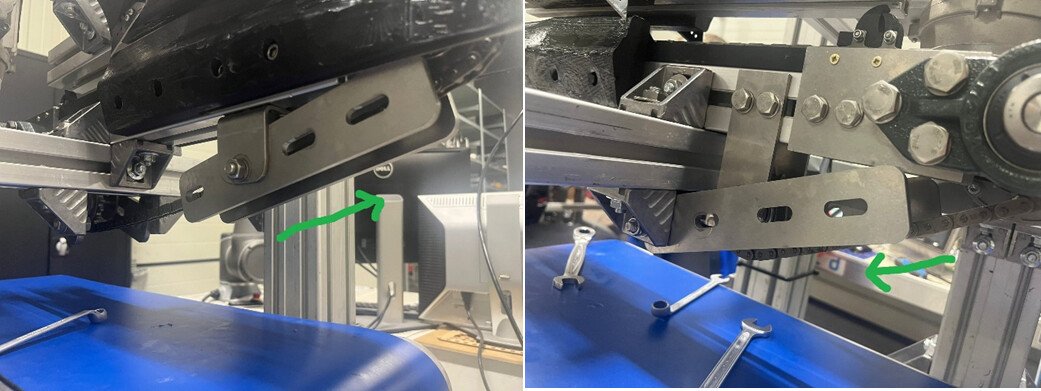
To prevent your hand from getting caught, you can add hand guards. These should be strong pieces of material that shield the dangerous area, so your hand can in no way get to the gear. It is preferable to hit a flat metal part with your hand than the sharp teeth of a gear.
As long as you make these safety measures your first priority, nothing bad should happen while working with chains. Of course its always important to use your common sense with stuff like this, and watch out for dangerous situations.