0. Introduction
This How-To assumes that you have no idea how OpenCV sees an image and that you don’t know how slicing an array works.
Do you already know these things? → Then skip to point 5 to see the code or download it from the zip file in point 1.
1. Requirements
For this How-To you will need:
- A computer with Windows / macOS / Linux
- Python (version 3.8 or higher recommended)
- The Python library OpenCV
- Downloaded the zip file
Needed_Files.zip (565.1 KB)
If you do not have OpenCV installed, run:
pip install opencv-python
2. Images in OpenCV are arrays
When you load an image in OpenCV, the image is stored as a matrix of pixel values.
This means we can treat the image like data and work with parts of it, this is what makes zooming possible.
Each pixel is stored as 3 values (Blue, Green, Red), so the image is a 3-dimensional array:
image[row, column, color_channel]
Where:
- row moves: top to bottom
- column moves: left to right
- color_channel is in B, G, R (Blue, Green, Red)
You can create a simple 3x3 image with the following code:
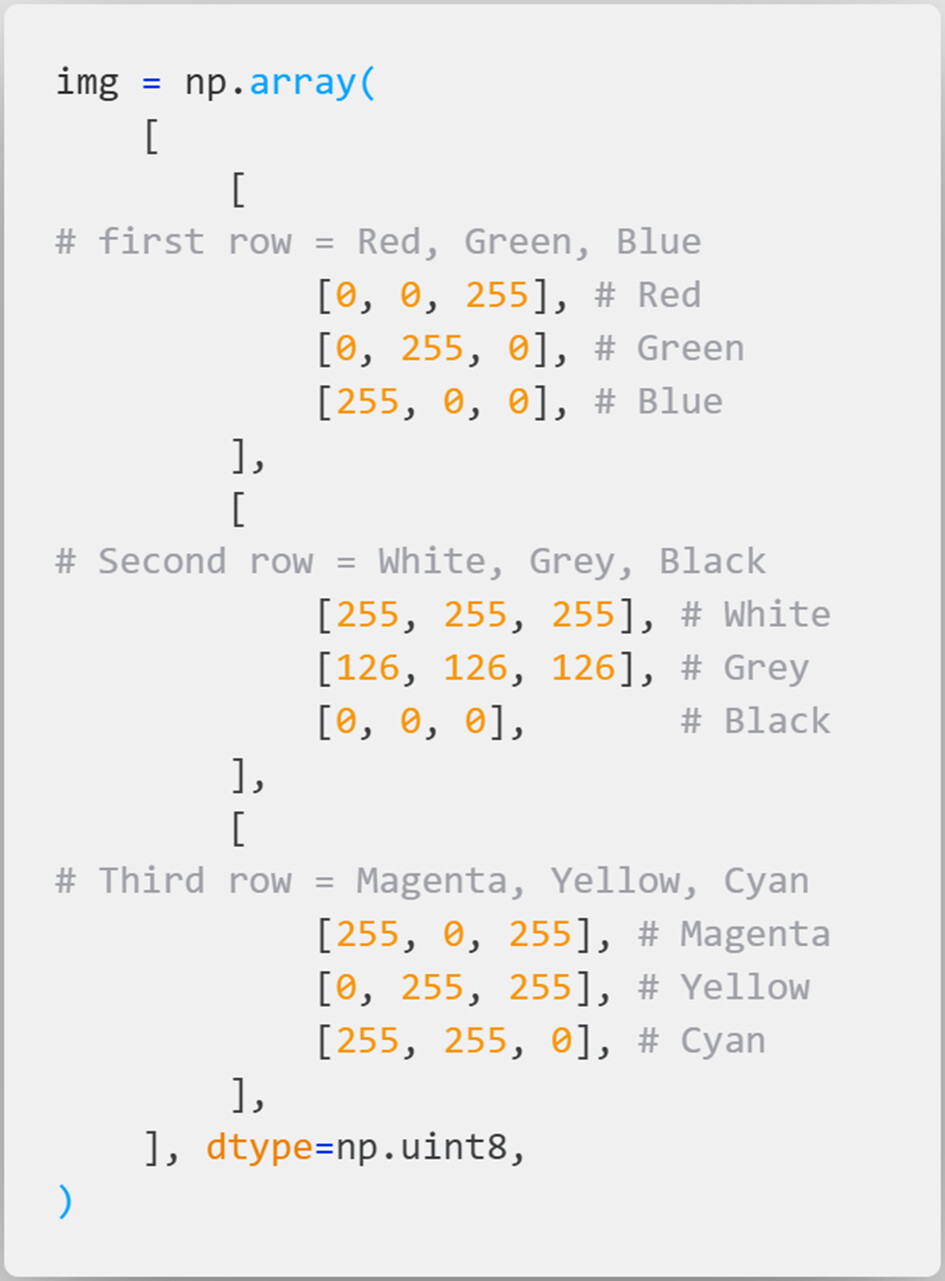
When enlarged to see the pixels, this outputs the image:

Now that you can somewhat understand how an image it created, I will talk about slicing.
3. What is slicing? And how to slice a Multi-Dimensional Array (image)
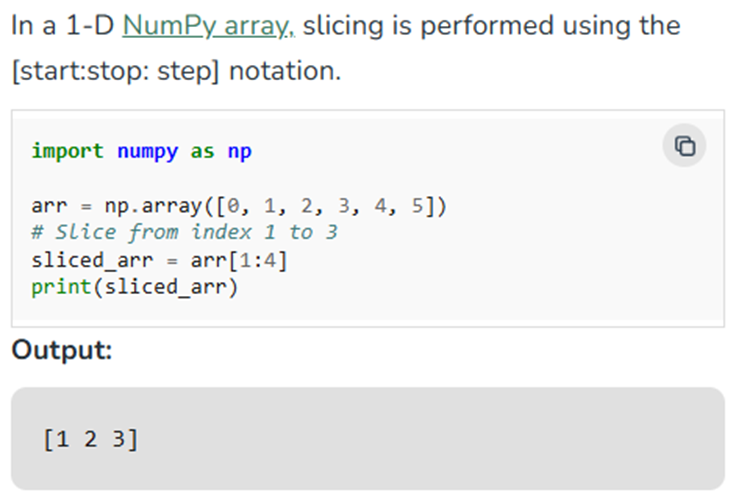
Slicing is a method for taking out an array section frequently used for subsetting and modifying data inside arrays. For example, slicing a simple 1-D array:
Now, an example of slicing a Multi-Dimensional Array:
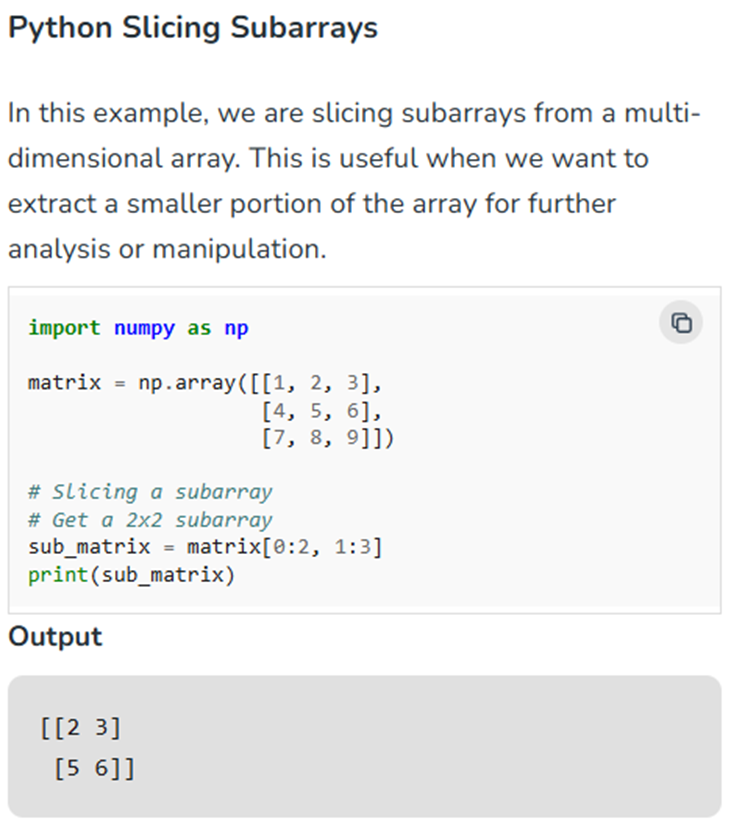
As you can see the matrix gets sliced into the first two rows and the last two columns.
4. So how to zoom in on an image or frame?
Zooming is simply selecting a smaller rectangle from the original image using slice indexing. So, the previous logic can be used to zoom-in into an image or frame using the following syntax:

5. Example code
Make sure you have downloaded the zip file for the needed image and code.
Important to note:
1: Make sure you keep all the files from the zip in the same folder.
2: Keep all values the same otherwise the rest of the code won't work as intended.
3: An image AKA array/list can be zoomed-in AKA 'sliced' with the following syntax:
New_image_name = original_image_name[top:bottom, left:right]
4: The pixel coordinate-system (in opencv) is defined as followed:
top, left: top, right
(0,0) ------------ (50, 0)
| |
| |
| |
(0, 50) ----------- (50, 50)
bottom, left: bottom, right
5: When using pixels, keep in mind they are integers (whole numbers, no decimals)
6: I used 'Python Try Except' to make sure all windows get closed when the code stops
(either on purpose or via an error).
I recommend using 'Python Try Except' when using you webcam feed, because sometimes
your code get's interupted inbetween and then your webcam doens't get released
The code:
import cv2

try:
    # Open the image
    image = cv2.imread("banner-4000x2000.png")
    ratio = 4000/2000

    # Resize the image so it doesn't go bigger than your screen
    # (TIP: keep the ratio the same of the original image)
    width = 1200
    height = int(width / ratio)
    image = cv2.resize(image, (width, height))

    # Let's zoom-in into the window with the robot arm in it
    # (follow pixel coordinate-system from note 4)
    top_robot_window = 190
    bottom_robot_window = 450
    left_robot_window = 850
    right_robot_window = 1095

    zoomed_robot_window = image[
        top_robot_window : bottom_robot_window,
        left_robot_window : right_robot_window
    ]

    # Let's zoom-in into the text: "SMR DELFT" (follow pixel coordinate-system from note 4)
    top_SMR_Delft = 190
    bottom_SMR_Delft = 360
    left_SMR_Delft = 550
    right_SMR_Delft = 800

    zoomed_SMR_Delft = image[
        top_SMR_Delft : bottom_SMR_Delft,
        left_SMR_Delft : right_SMR_Delft
    ]

    # Show the images
    cv2.imshow("original_resized", image)
    cv2.imshow("zoomed_robot_window", zoomed_robot_window)
    cv2.imshow("zoomed_SMR_Delft", zoomed_SMR_Delft)

    # When the esc-key gets pressed
    if cv2.waitKey(0) & 0xFF: # == 27:
        """
            first part: "cv2.waitKey(time)": waits 'time (in ms)' amount to renew the image or frame
                for picture:
                    0 or 1 are fine
                for video:
                    low value speeds video up,
                    high value slows the video down
                for livefeed:
                    low value: you can't go faster than the camera,
                    high value: the feed will be slower than reallive

            second part: "0xFF == 27": looks to see if an keypress has been made
                0xFF: any key can be pressed
                0xFF == 27: is the ESC-key
                0xFF == ord (' q '): is the q-key
        """

        # Save the images
        cv2.imwrite("original_resized.png", image)
        cv2.imwrite("zoomed_robot_window.png", zoomed_robot_window)
        cv2.imwrite("zoomed_SMR_Delft.png", zoomed_SMR_Delft)

        raise KeyboardInterrupt("ESC-key has been pressed.")


except KeyboardInterrupt as e:
    print(e)

finally: # Makes sure all windows get closed, even if an error occurs
    cv2.destroyAllWindows()