Based on contributions by Jasmijn.
“Zooming in” on part of an image in OpenCV doesn’t need any special function, it’s just cropping a rectangle out of the image array. This how-to explains why that works and gives copy-pasteable code, for anyone who doesn’t yet know how OpenCV stores images or how array slicing works.
What you need
- A computer with Windows, macOS or Linux.
- Python 3.8 or higher.
- OpenCV:
pip install opencv-python - An image to test with (a photo of your own, or any PNG/JPG).
Steps
1. Understand that images in OpenCV are arrays
When you load an image with OpenCV, it’s stored as a matrix of pixel values, one 3-value entry (Blue, Green, Red) per pixel. So a color image is a 3-dimensional array:
image[row, column, color_channel]
rowmoves top to bottomcolumnmoves left to rightcolor_channelis B, G, R (in that order — OpenCV uses BGR, not RGB)
You can build a tiny 3x3 image by hand to see this in practice:
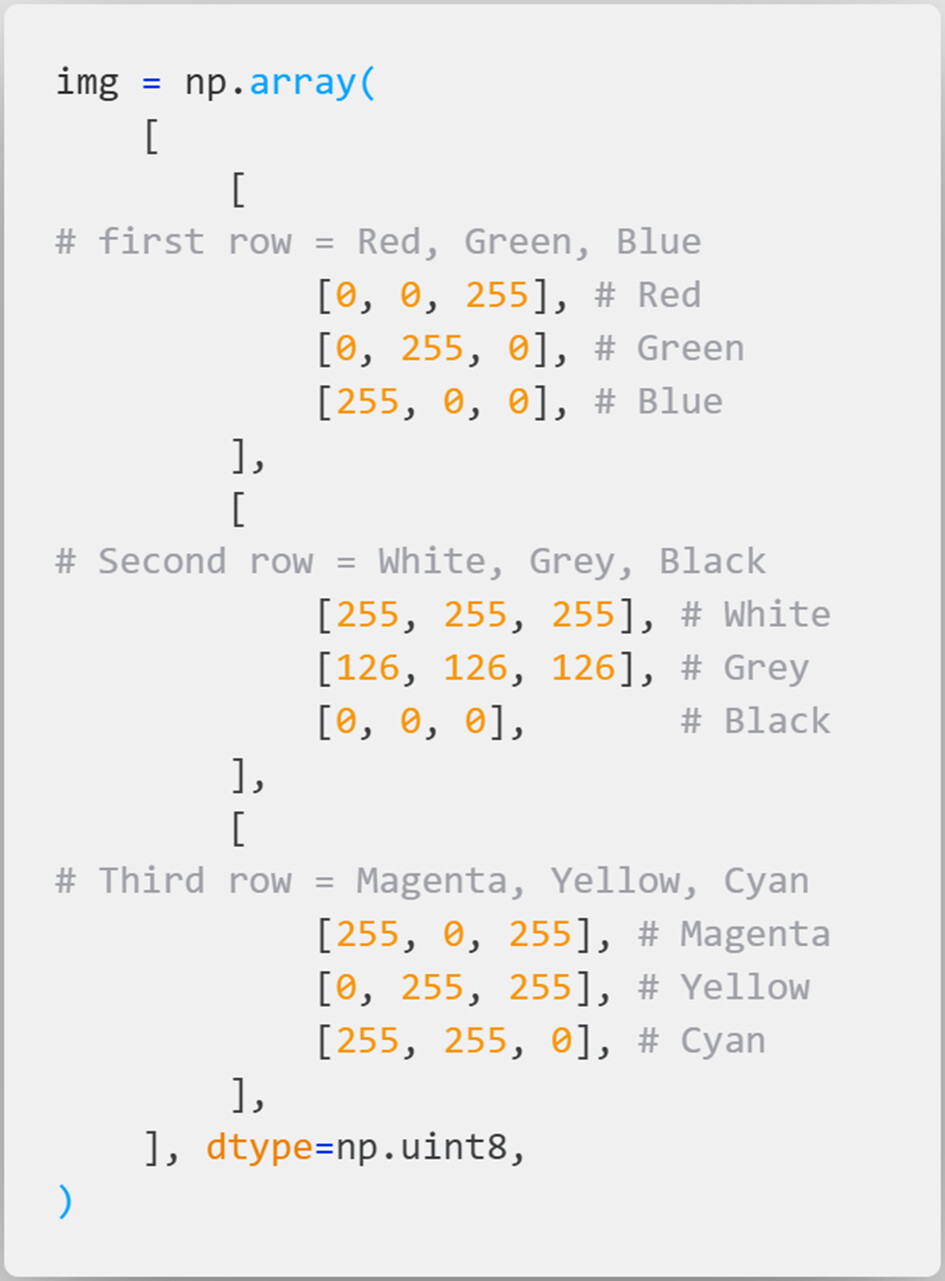
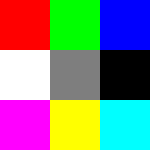
Which, enlarged so the individual pixels are visible, looks like:
2. Understand slicing
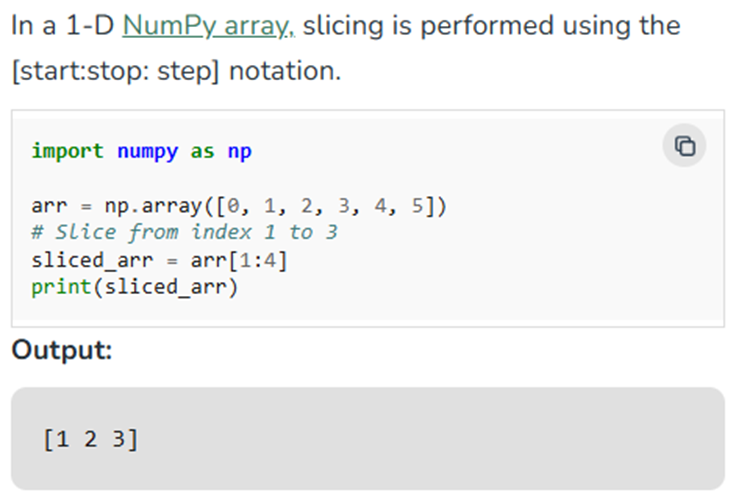
Slicing takes a section out of an array. For a simple 1D array:
The same idea extends to multi-dimensional arrays, such as an image:
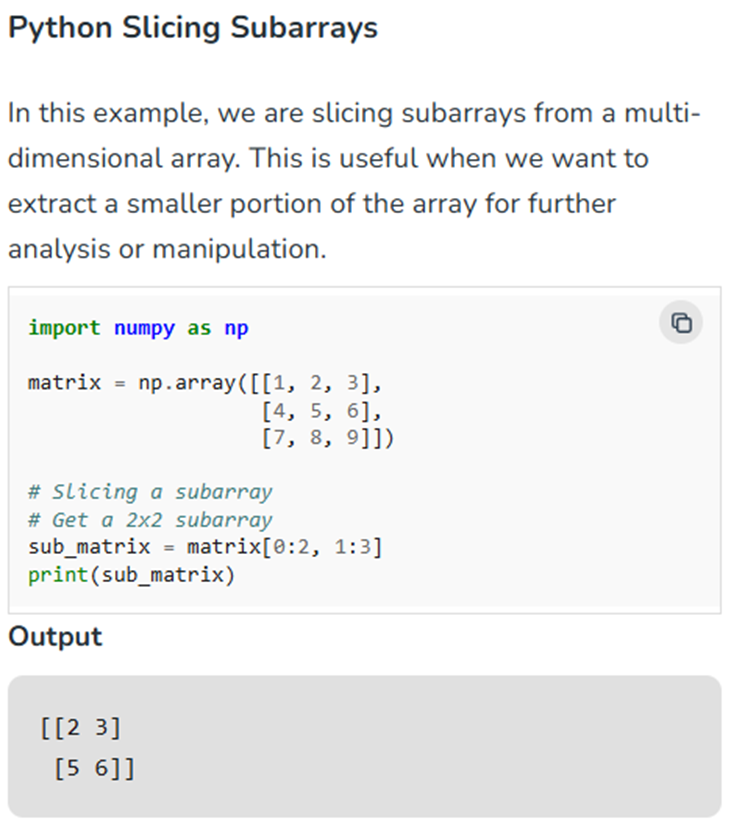
In that example, the matrix is sliced down to its first two rows and its last two columns.
3. Slice the image to zoom in
Since an image is just an array, zooming in is selecting a smaller rectangle from it with slice indexing:

new_image = original_image[top:bottom, left:right]
The pixel coordinate system in OpenCV has (0, 0) at the top-left corner, with coordinates increasing downward and to the right:
   top, left                    top, right
      (0,0) ------------------- (50, 0)
        |                          |
        |                          |
        |                          |
     (0, 50) ------------------ (50, 50)
   bottom, left                bottom, right
Keep in mind that pixel coordinates are integers (whole numbers, no decimals).
4. Example: zoom into two regions of an image
This crops two rectangles out of a banner image and shows all three (original + two zoomed regions). Press any key to save the crops to disk and exit.
import cv2

try:
    # Open the image
    image = cv2.imread("banner-4000x2000.png")
    ratio = 4000 / 2000

    # Resize the image so it doesn't go bigger than your screen
    # (keep the ratio the same as the original image)
    width = 1200
    height = int(width / ratio)
    image = cv2.resize(image, (width, height))

    # Zoom into the window with the robot arm in it
    top_robot_window = 190
    bottom_robot_window = 450
    left_robot_window = 850
    right_robot_window = 1095

    zoomed_robot_window = image[
        top_robot_window:bottom_robot_window,
        left_robot_window:right_robot_window
    ]

    # Zoom into the text "SMR DELFT"
    top_smr_delft = 190
    bottom_smr_delft = 360
    left_smr_delft = 550
    right_smr_delft = 800

    zoomed_smr_delft = image[
        top_smr_delft:bottom_smr_delft,
        left_smr_delft:right_smr_delft
    ]

    # Show the images
    cv2.imshow("original_resized", image)
    cv2.imshow("zoomed_robot_window", zoomed_robot_window)
    cv2.imshow("zoomed_smr_delft", zoomed_smr_delft)

    # Wait for a key press, then save and exit
    cv2.waitKey(0)

    cv2.imwrite("original_resized.png", image)
    cv2.imwrite("zoomed_robot_window.png", zoomed_robot_window)
    cv2.imwrite("zoomed_smr_delft.png", zoomed_smr_delft)

finally:  # Makes sure all windows get closed, even if an error occurs
    cv2.destroyAllWindows()
cv2.waitKey(time)waitstimemilliseconds for a key press before continuing (0waits forever). For a still image,0or1is fine. For video or a live feed, a low value keeps up with the camera and a high value slows playback down. Wrap webcam code intry/finallylike above so the camera is always released, even if the script is interrupted or crashes.
Common mistakes
- Mixing up rows and columns: the first slice index is always the row (vertical,
top:bottom), the second is the column (horizontal,left:right). It’s easy to swap them by accident. - Using float coordinates. Slice bounds must be integers.
- Forgetting the image is BGR, not RGB, when working with colors directly.
Related
Rewritten and consolidated (Sept 2026) from the original student how-to’s: How to zoom in on an image or frame using opencv.