Based on contributions by Luckyhipster10.
Modelling bolts, nuts, and other fasteners by hand is slow and easy to get wrong. SolidWorks ships with a Toolbox library of standard hardware you can drag straight into an assembly instead.
What you need
- SolidWorks with the Toolbox Library add-in.
- An assembly (not a standalone part) — Toolbox parts can only be imported into an assembly.
Steps
1. Enable the Toolbox Library add-in
Go to Add-Ins, enable SOLIDWORKS Toolbox Library, and press OK.
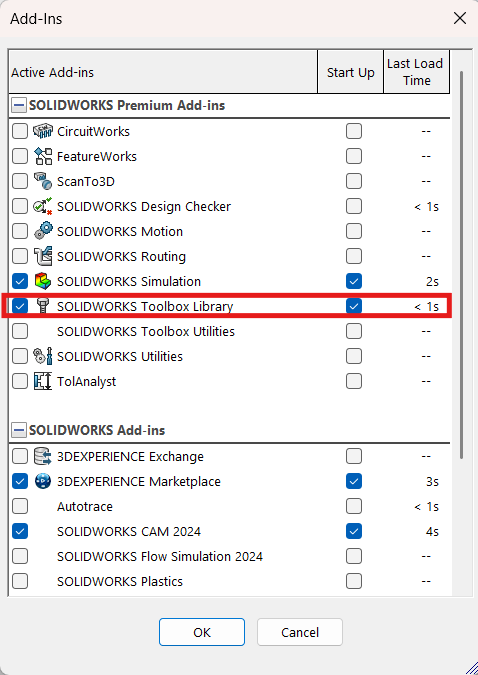
Note: you can only import parts from the Toolbox into an assembly, not into a standalone part file.
2. Open the Toolbox in the Design Library
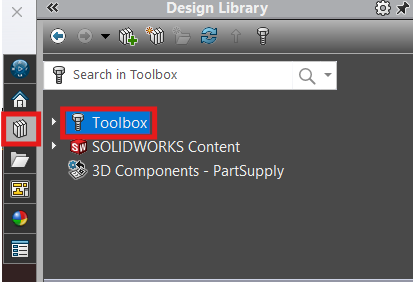
With your assembly open, go to the Design Library (the three-books icon) on the right side of the screen and open Toolbox.
3. Find the part you need
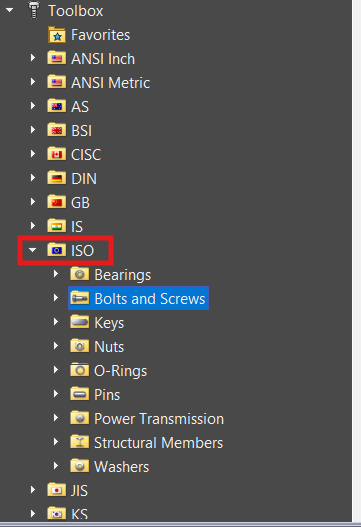
Open the ISO folder for European standard parts, then open the folder for the type of hardware you want, and find the correct variant. The exact size and length are set later, so don’t worry about getting them right at this step.
4. Drag the part into the assembly
Drag the part to the location where you need it. SolidWorks will snap it into place and add mates automatically if it finds a matching hole or feature. You can also place it manually, but letting SolidWorks snap it is faster when placing multiple parts.
The initial size may not be exactly right — this can be adjusted after placement. Keep in mind not every part is available in every size.
5. Set the size and length
Once the part is positioned, release it. A configuration menu opens where you select the correct size and length.
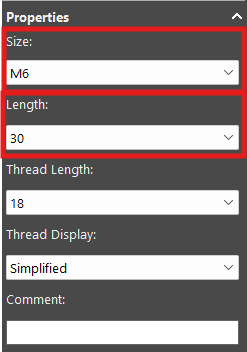
After selecting the right dimensions, press the check mark to confirm. You can then place additional copies of the same part if needed — press the cross when you’re done placing that part.
Related
Rewritten and consolidated (Sept 2026) from the original student how-to’s: How to import ISO(standard) hardware from the SolidWorks Toolbox.