Based on contributions by Kevin.
This walks through printing a model on the robot lab’s BambuLab P1S, from slicing to starting the print on the printer itself.
What you need
- A finished, printable model as a
.STLor.3mffile — see How to design parts for 3D printing in SolidWorks for how to design and export one. - A USB stick.
- Access to the 3D-printer-assigned laptop in the robot lab, with Bambu Studio installed.
- The printer’s micro SD card.
Steps
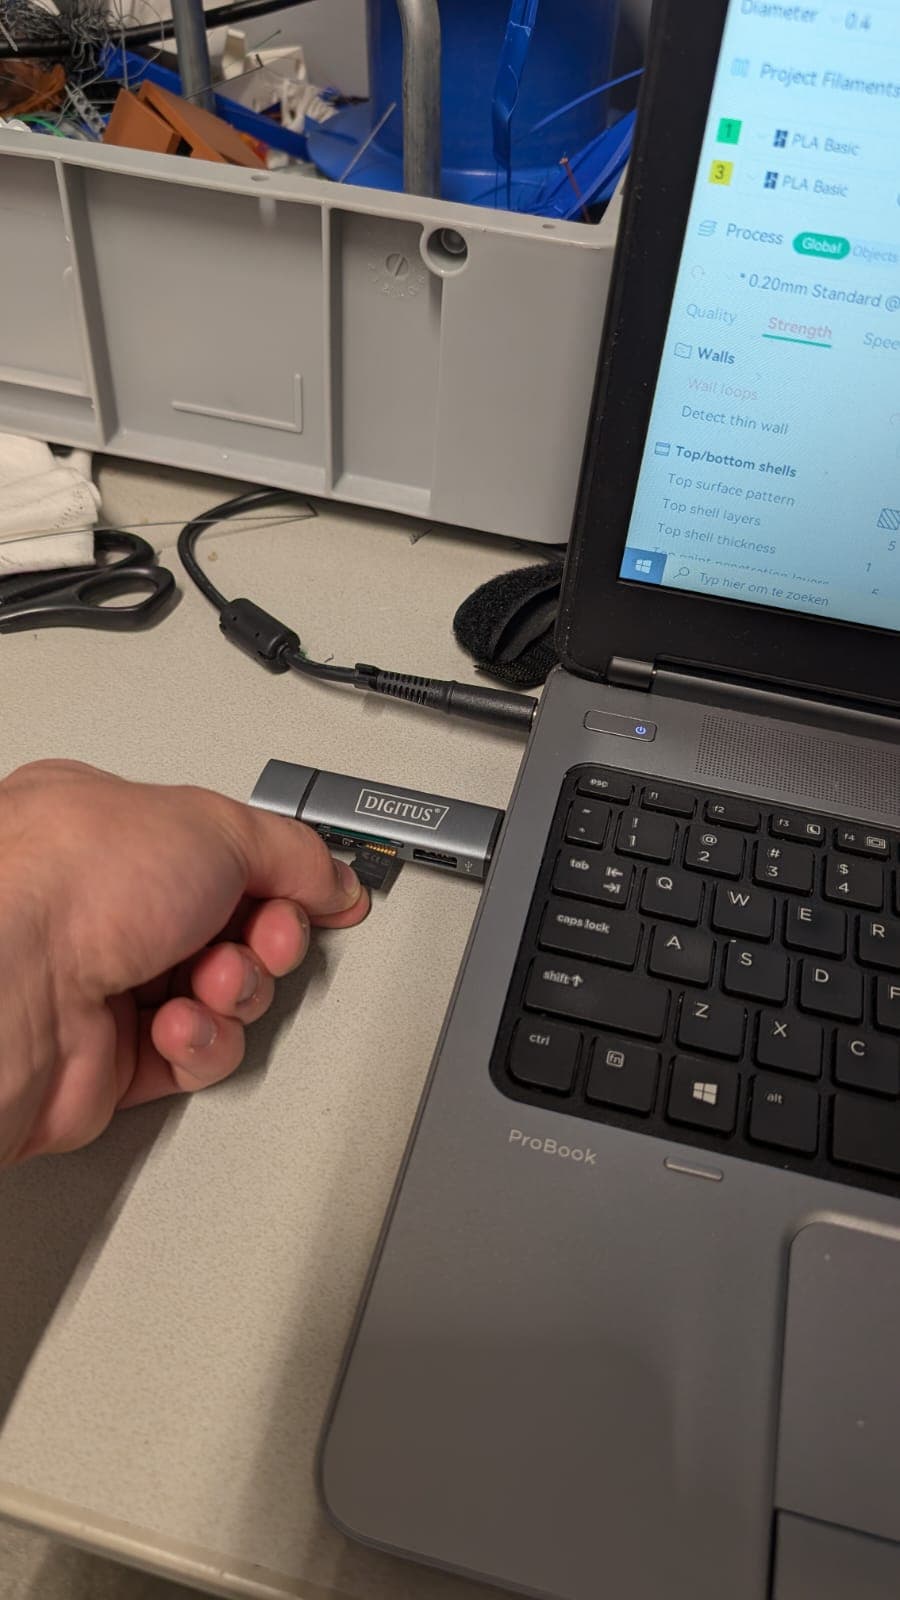
1. Check the SD card is in the laptop
Make sure the printer’s micro SD card is inserted into the 3D-printer-assigned laptop before you start.
2. Bring your model file to the laptop
Copy your .STL or .3mf file onto a USB stick and plug it into the 3D-printer-assigned laptop.
3. Import the model into Bambu Studio
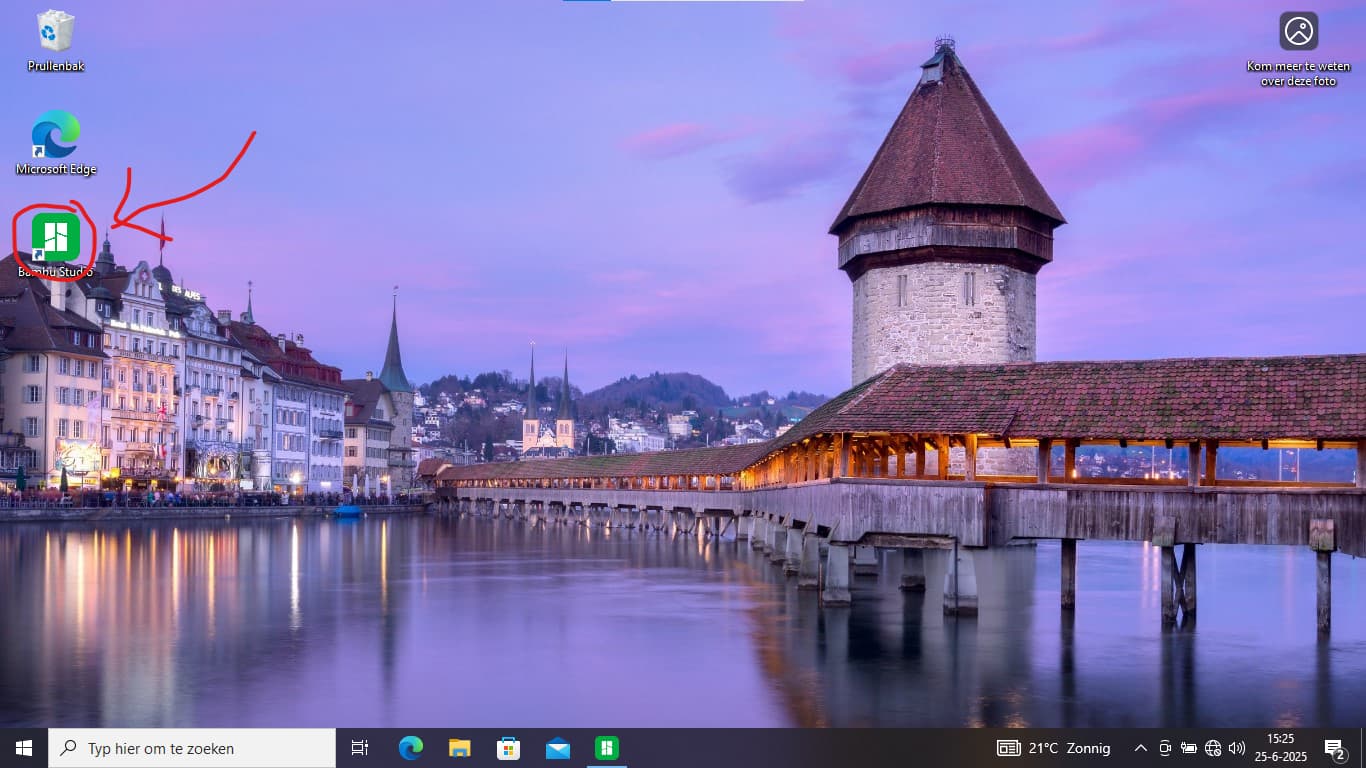
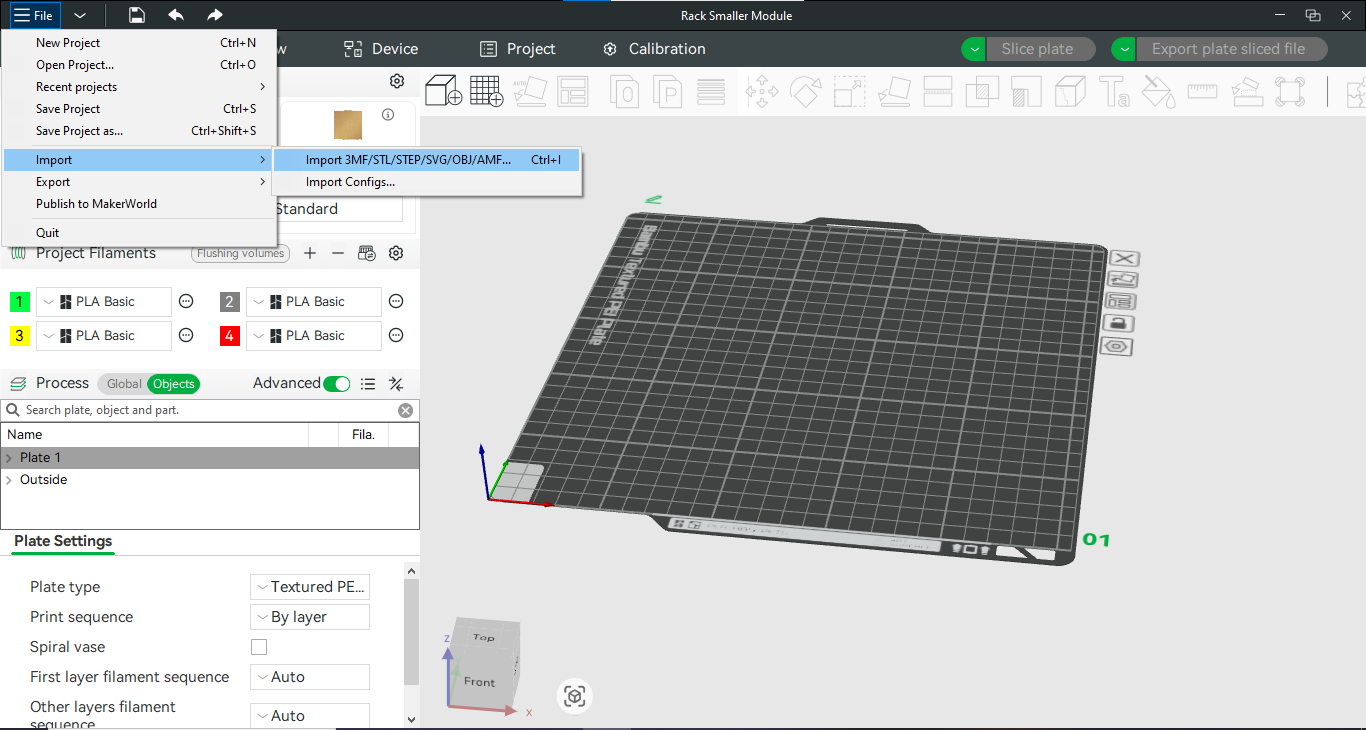
Open the Bambu Studio app on the laptop and import your model onto the print plate — either use the import dialog or drag the file from Windows Explorer directly onto the plate. Repeat for each model if you’re printing several at once.
4. Arrange the models on the plate
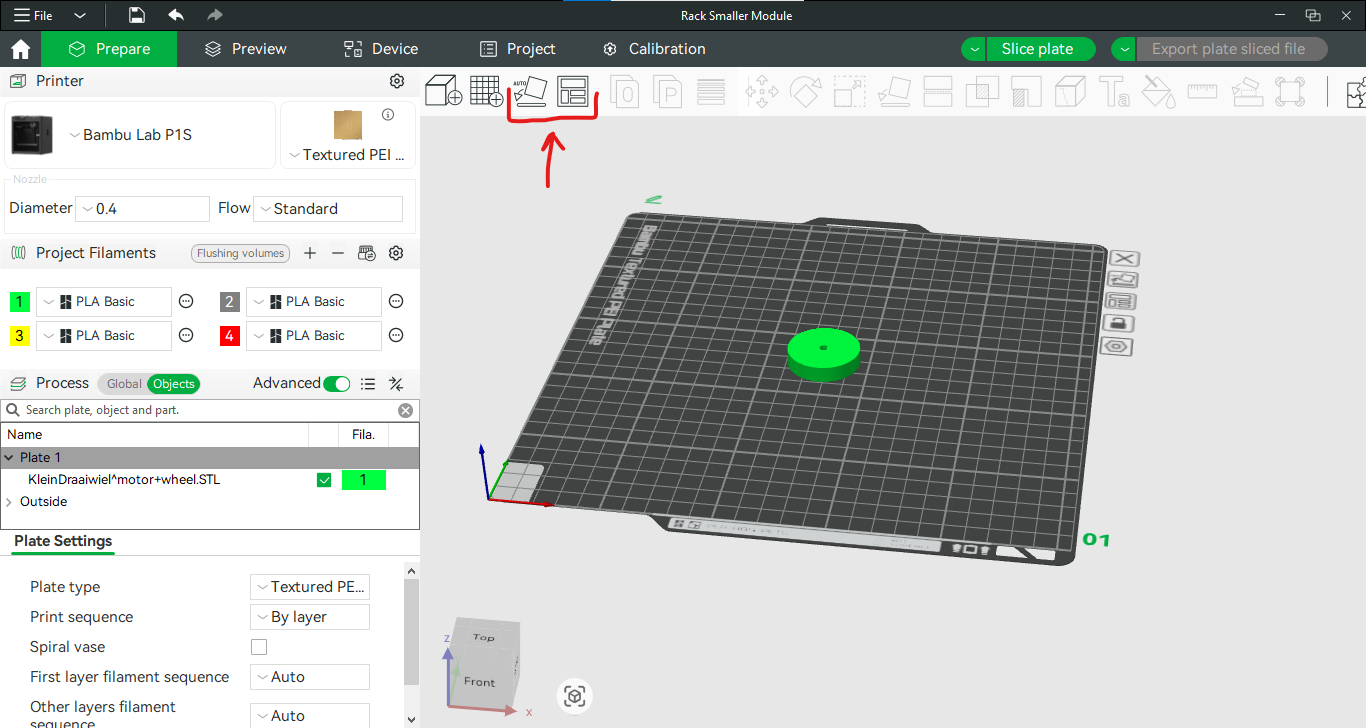
Make sure every model is placed correctly on the plate. You can move them manually, or use Auto Arrange and Auto Orient:
5. Select the filament
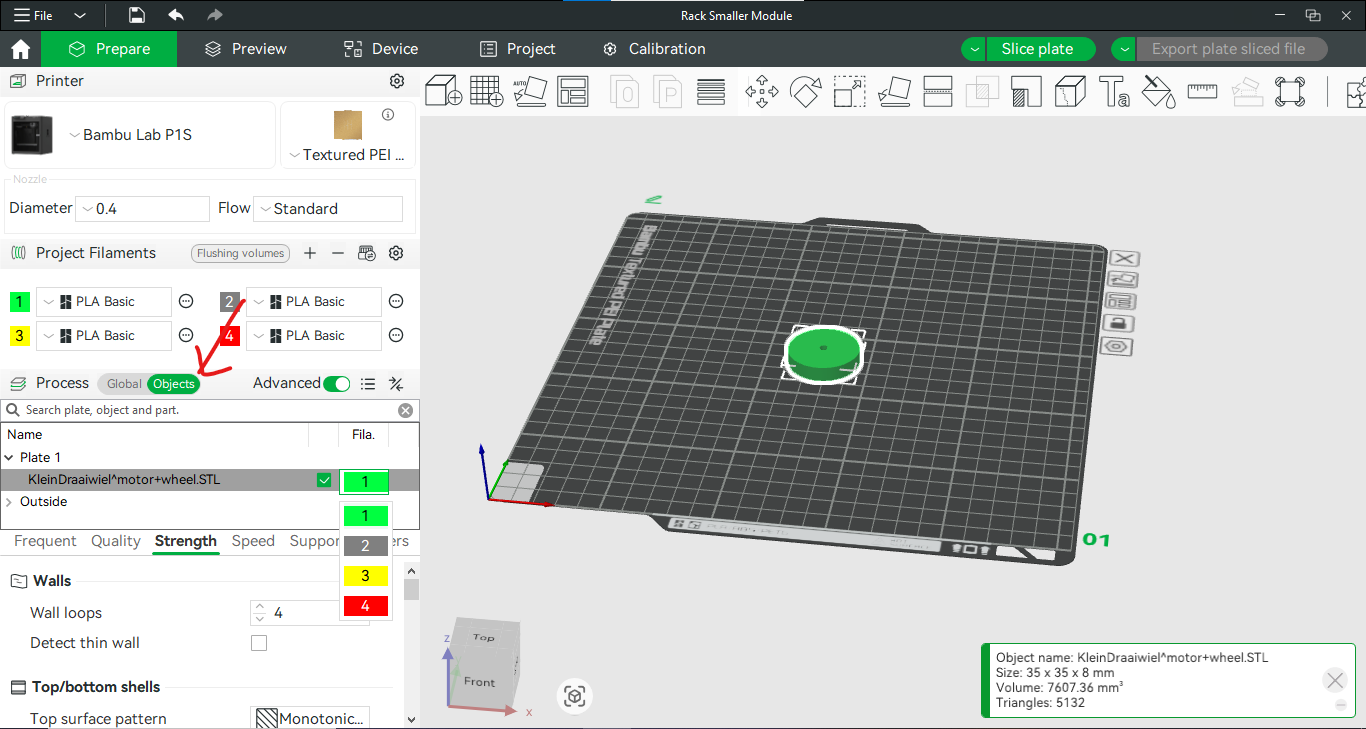
The person responsible for 3D printing in the minor keeps the filaments in the slicer matched to what’s actually loaded in the printer. Click the Objects tab below the filament list, then double-click the filament swatch next to an object to choose which loaded filament it should use.
6. Select the print profile
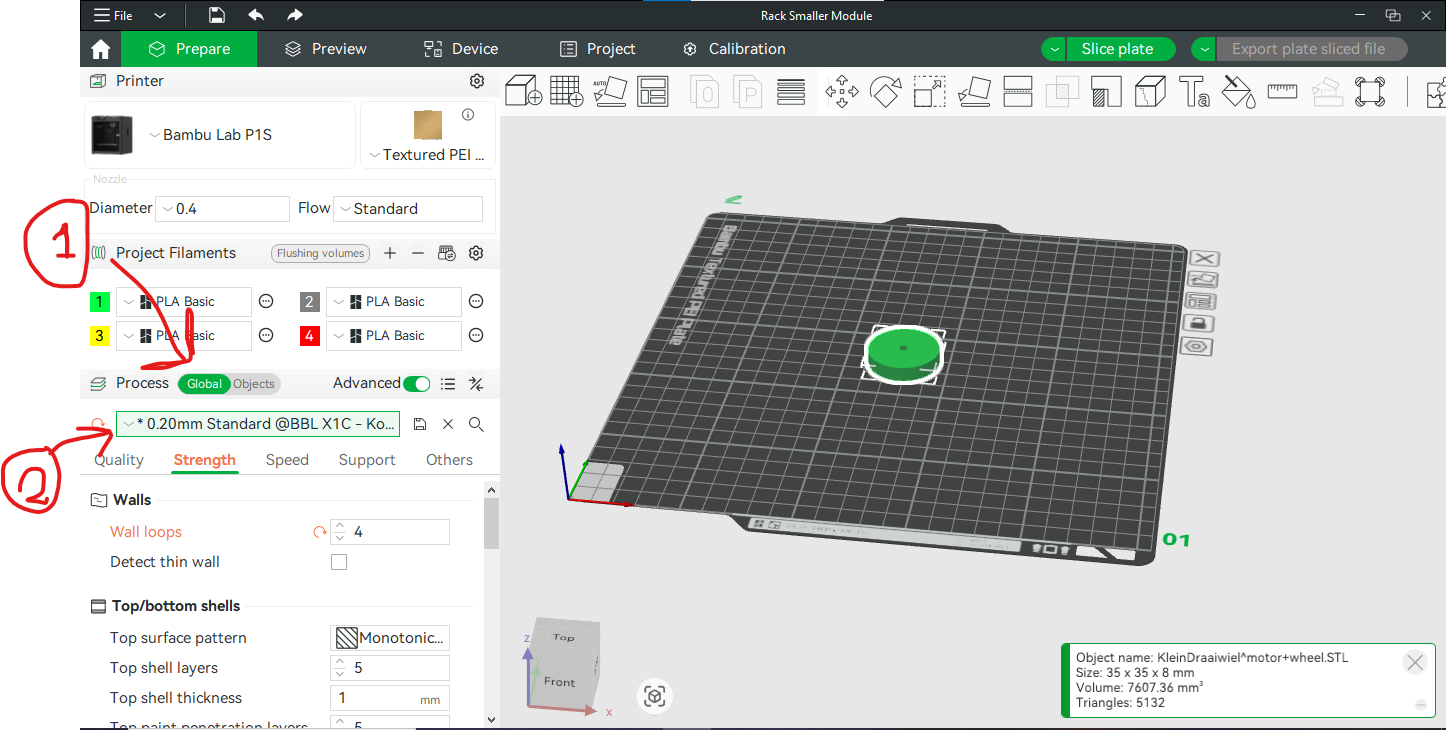
The print profile determines print speed and strength: a lower layer height looks nicer but is less strong. Select the Global tab below the filaments, then choose the print profile. If your model has to withstand high forces, use a strength-oriented print profile instead of a standard one.
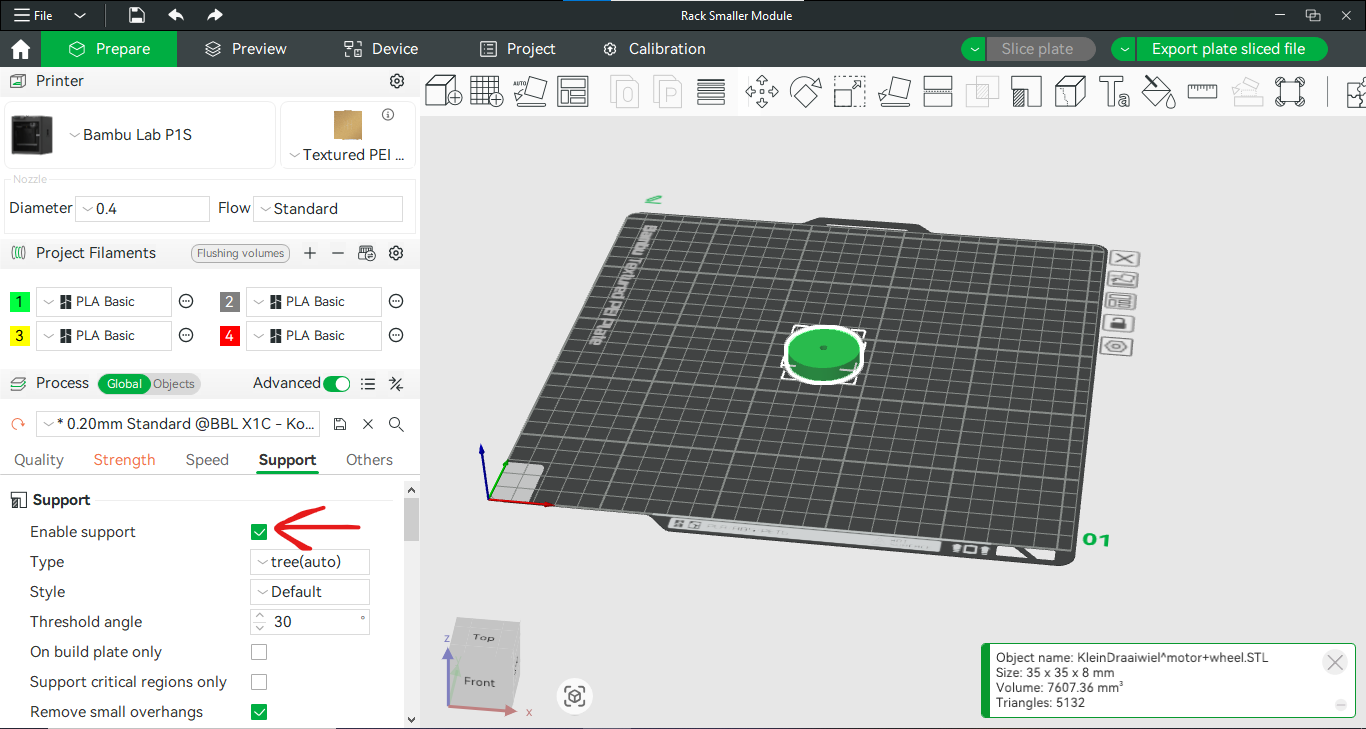
Make sure supports are turned on for your print — the slicer sometimes disables them by itself.
7. Slice and export
-
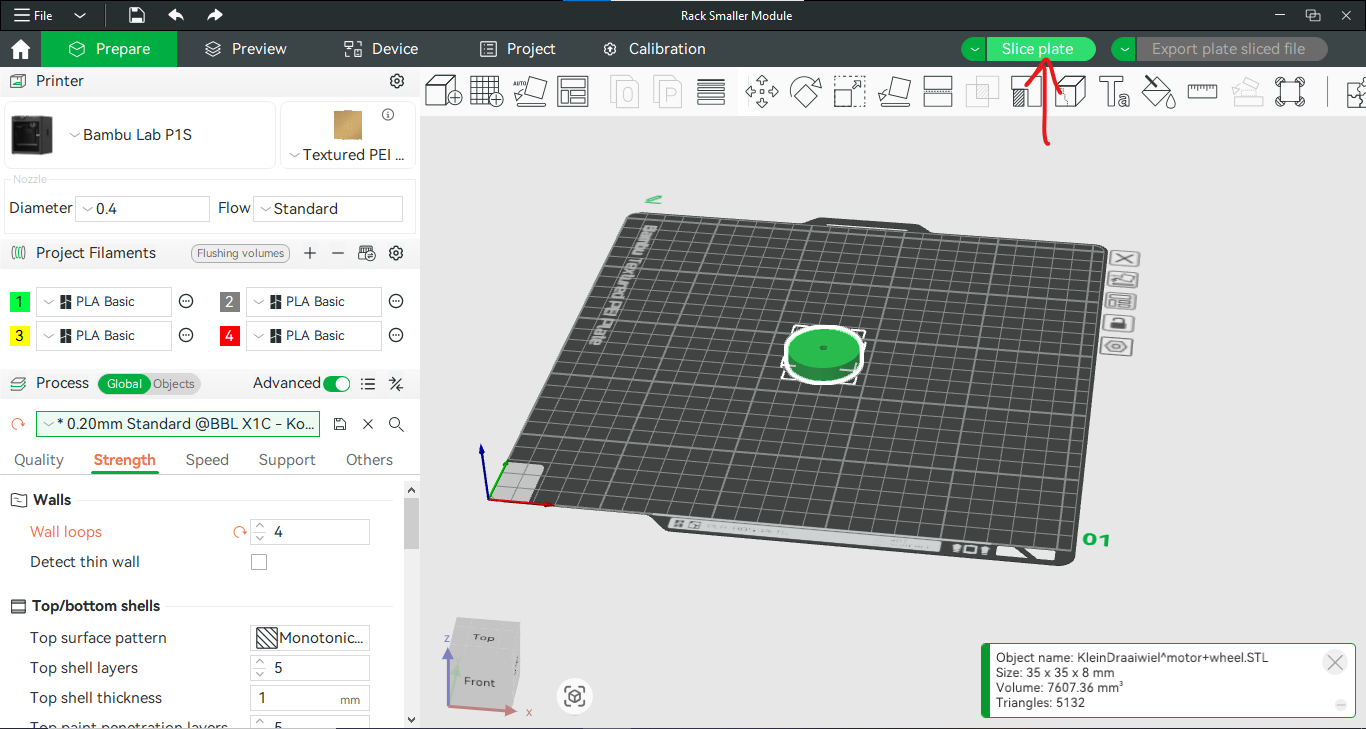
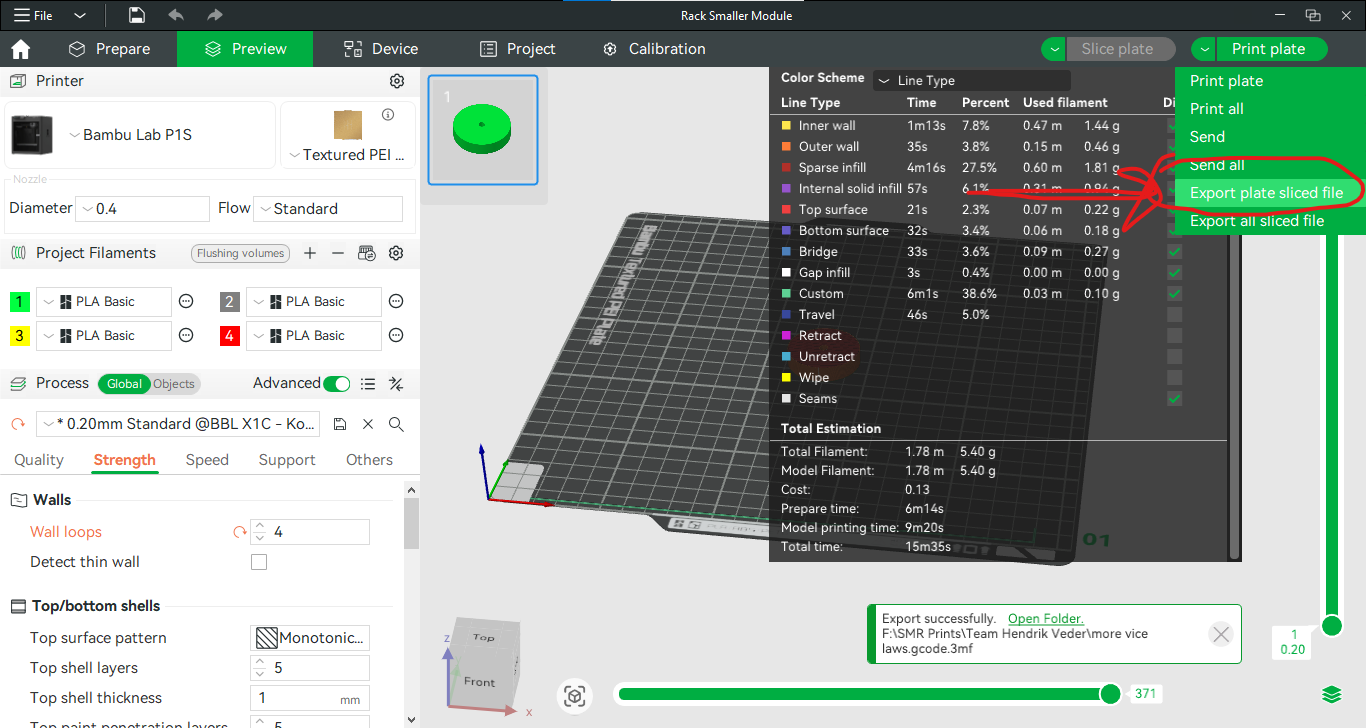
Click Slice plate in the top right and wait for slicing to finish.
-
Click the arrow next to “Print plate” and choose Export plate sliced file.
-
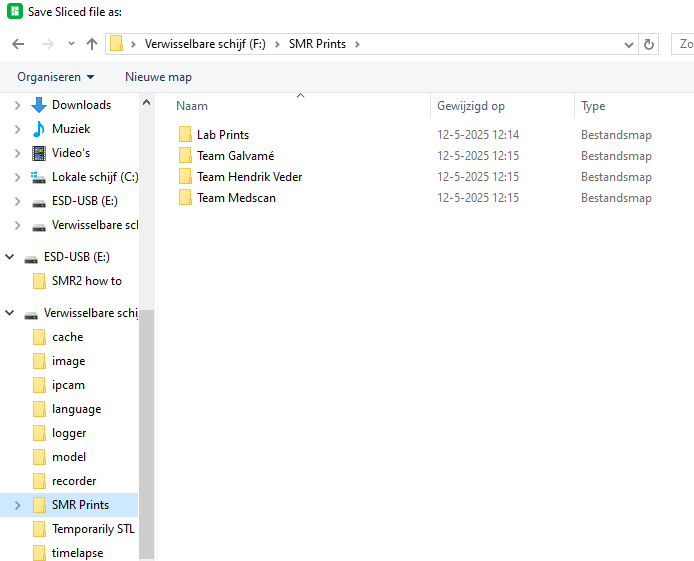
Save the file to the printer’s micro SD card. The 3D-print-responsible person will have set up a dedicated folder for your group — save into that folder.
8. Start the print
Insert the micro SD card into the printer.
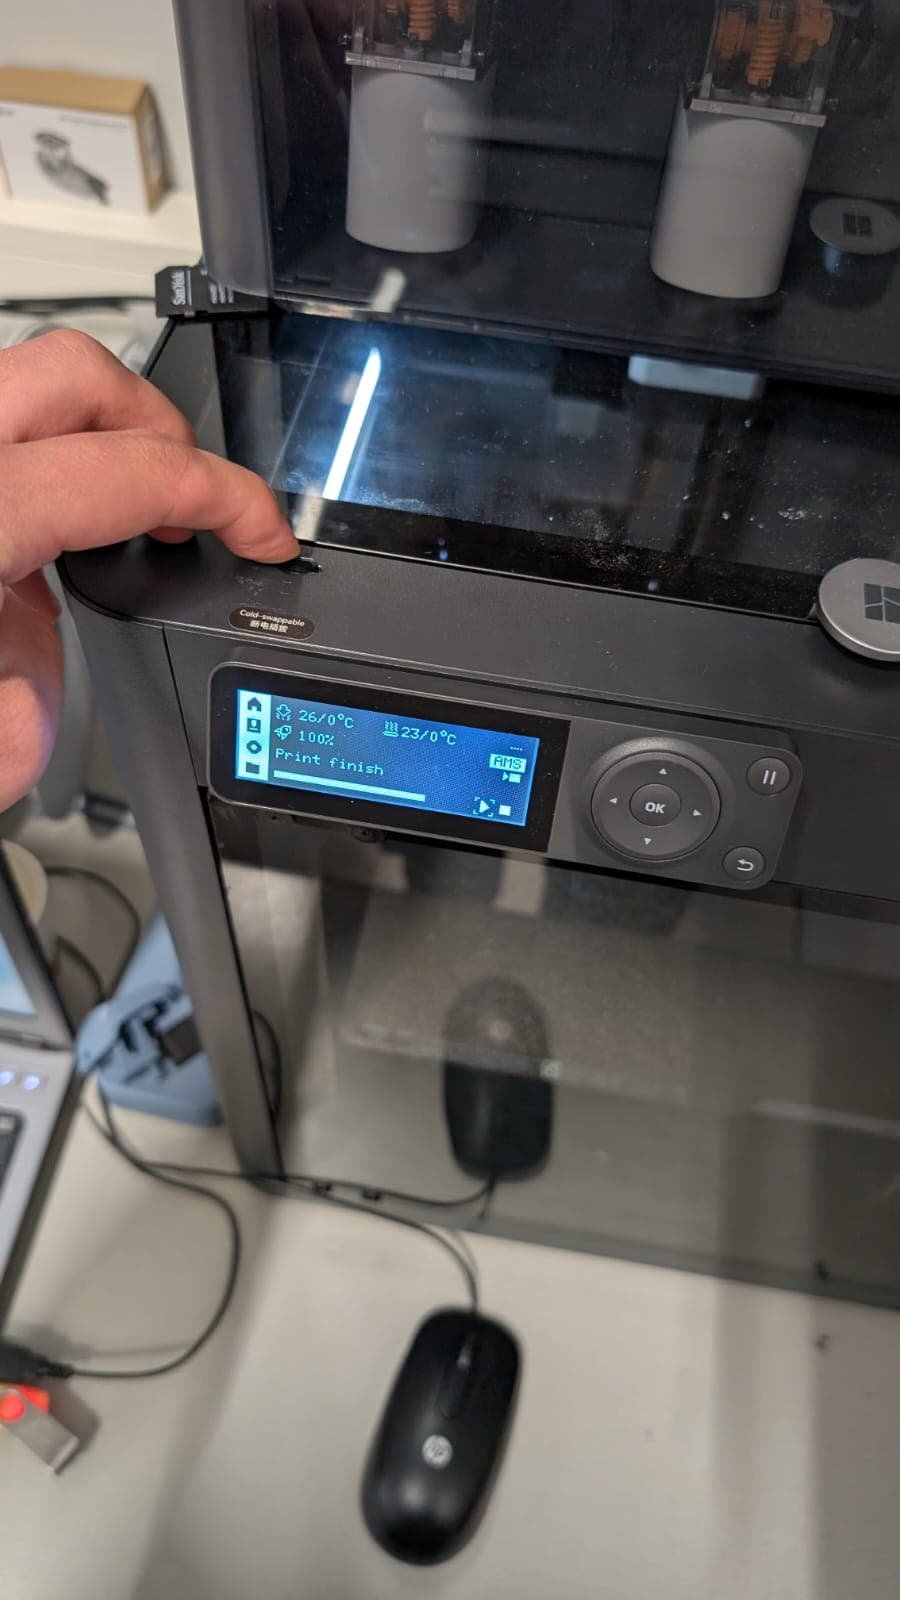
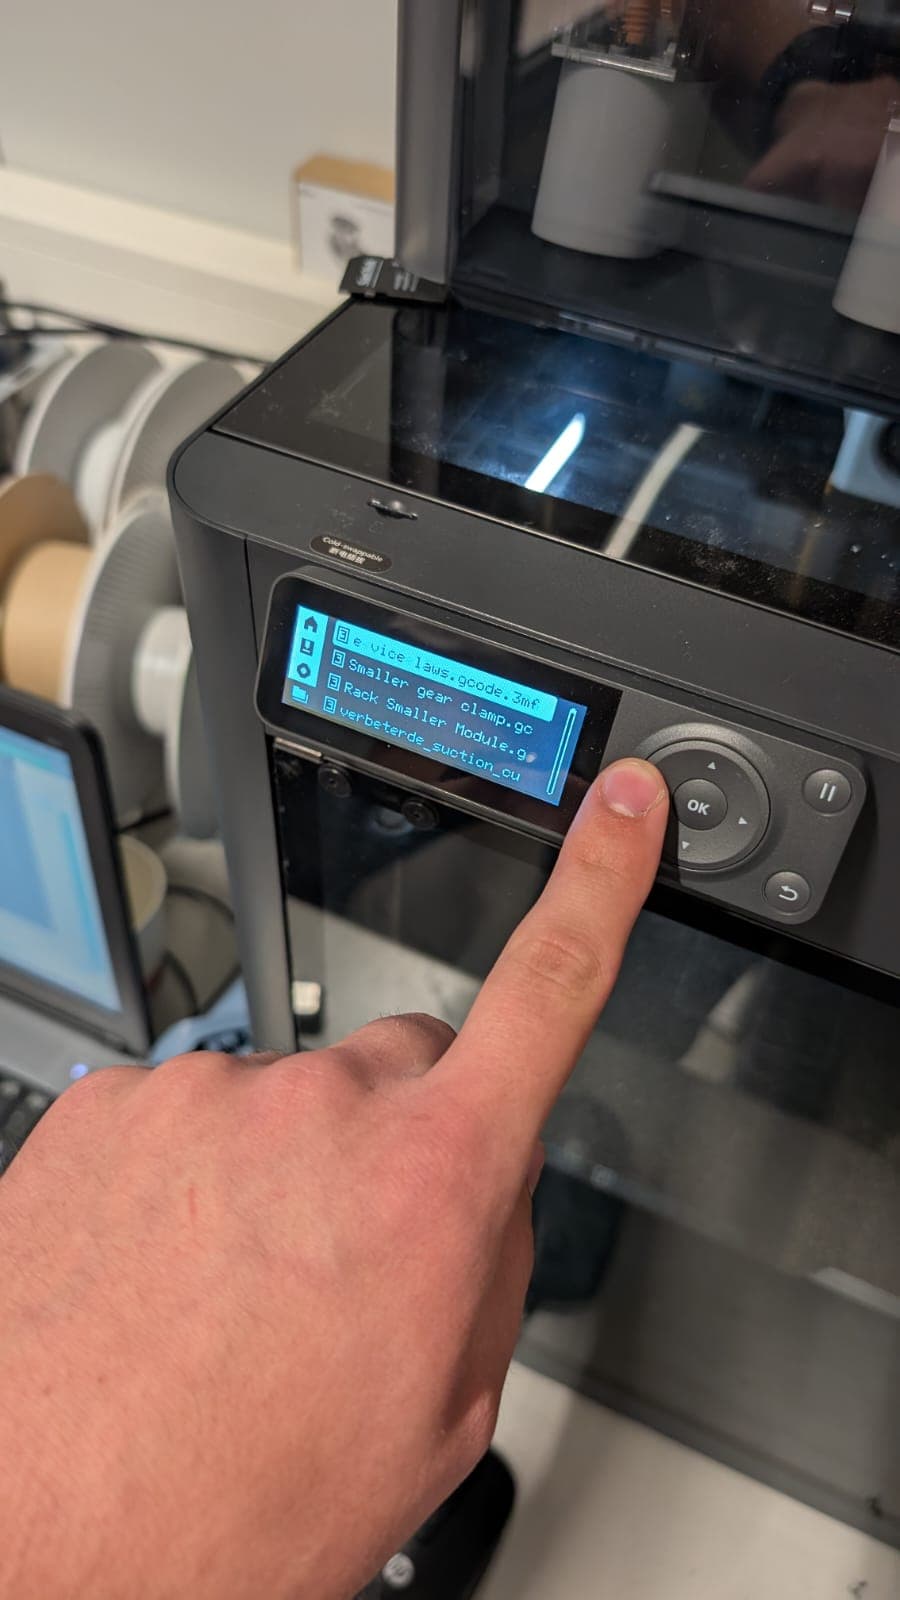
On the printer, open the print file menu on the left. The file you just saved should be at the top. Select it and press Start print.
9. Remove your print
When the print finishes, the printer lowers the bed so you can take the part out. Avoid touching the bare bed surface — skin oils reduce grip and can make later prints not stick.
Troubleshooting
- Nothing shows up on the SD card menu — check the file was actually saved into your group’s folder on the card, and that the card is still inserted.
- Print doesn’t stick to the bed — check nobody touched the bed surface; also see How to design parts for 3D printing in SolidWorks for design tips that improve bed adhesion.
- Slicer keeps turning supports off — re-check the support toggle right before slicing; it can silently reset per-model.
Related
Rewritten and consolidated (Sept 2026) from the original student how-to’s: How to print something on the BambuLab P1S 3d printer in the robot lab.