Based on contributions by Mark.jensen, Rafika.
Before you can train a YOLO model you need a labelled image dataset: a set of images with a box (or polygon) drawn around every object you want to detect. Roboflow is a free web tool for uploading images, annotating them (alone or with a team), and exporting the result in a format YOLO/Ultralytics can train on.
What you need
- A Roboflow account (sign up with email, Google, or GitHub)
- A set of images of the object(s) you want to detect, ideally taken in conditions close to your final setup (lighting, background, camera angle)
- Teammates’ email addresses if you want to annotate collaboratively
The free tier is limited to 3 members per workspace and your project will be public.
Steps
1. Create an account and workspace
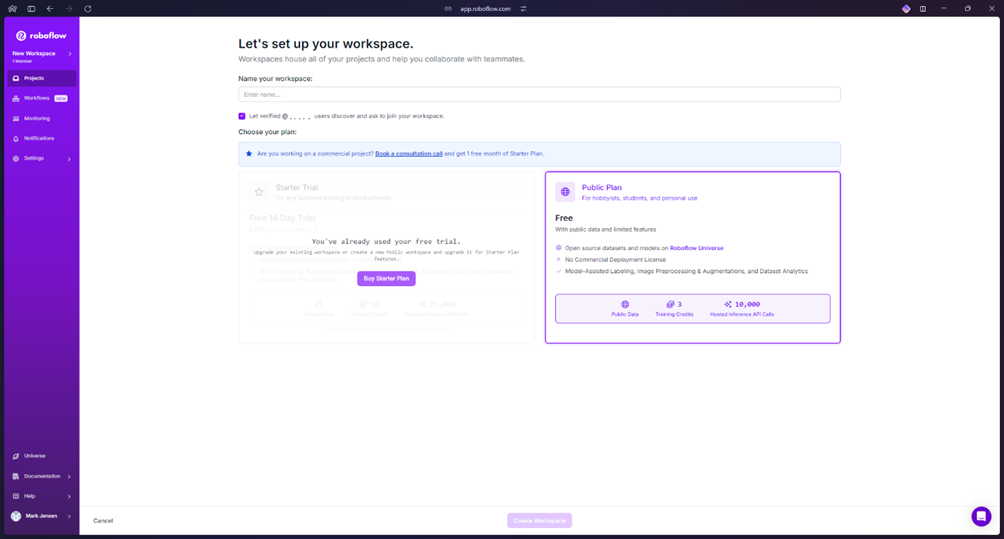
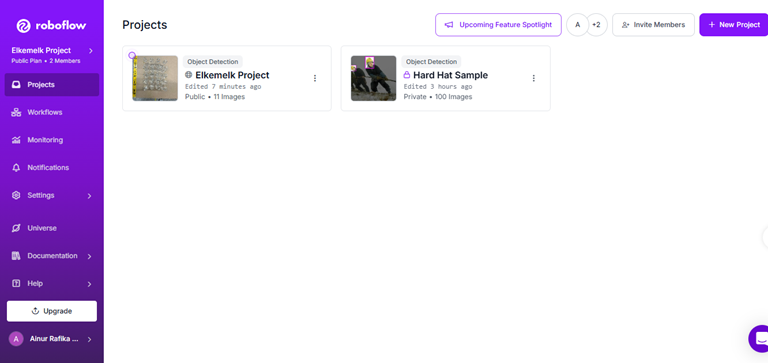
Sign up and name a workspace after your project. You’ll be asked to choose a plan — the free Public Plan is enough for annotation.
2. Add team members (optional)
From the workspace settings, invite teammates by email. Assign each person a role:
- Admin: full permissions
- Labeler: can only annotate images
- Reviewer: reviews annotations
Both Admin and Labeler work fine for a group project.
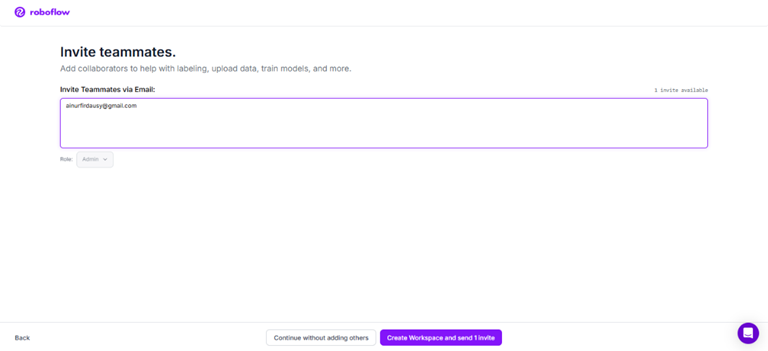
Teammates receive an invite by email and Roboflow notification. Clicking the link takes them straight to the shared project. You can also invite people later, directly from the upload screen (see step 5).
3. Create a project
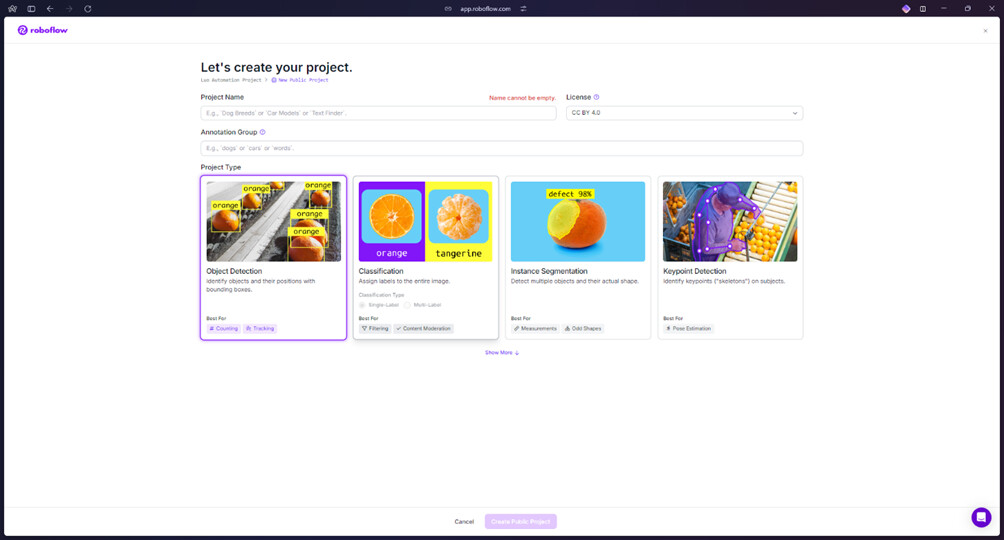
Inside your workspace, create a new project and choose what type of detection you want to train (e.g. object detection with rectangular boxes, or oriented bounding boxes — see How to train a YOLO OBB model and get the center and angle of detections if your objects can appear rotated).
4. Upload your images
Go to the Upload Data tab and add your images. Make sure your files are in a supported format (JPG/PNG).
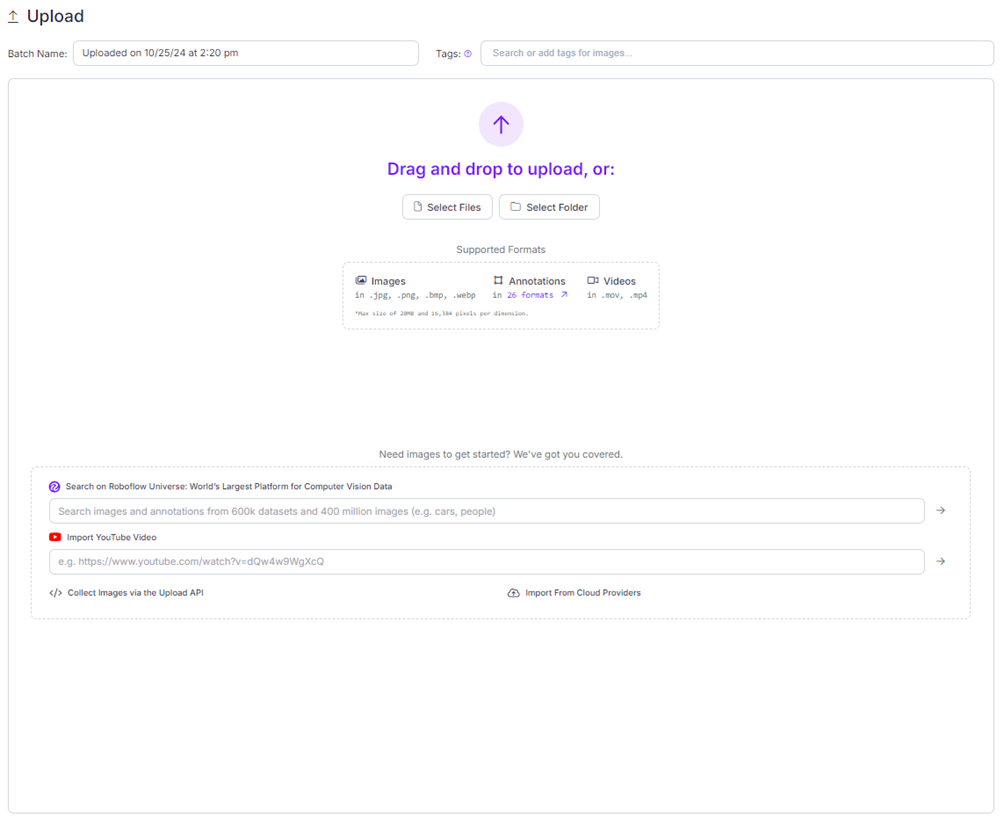
When uploading, choose Start Manual Labelling if you’re annotating with a team.
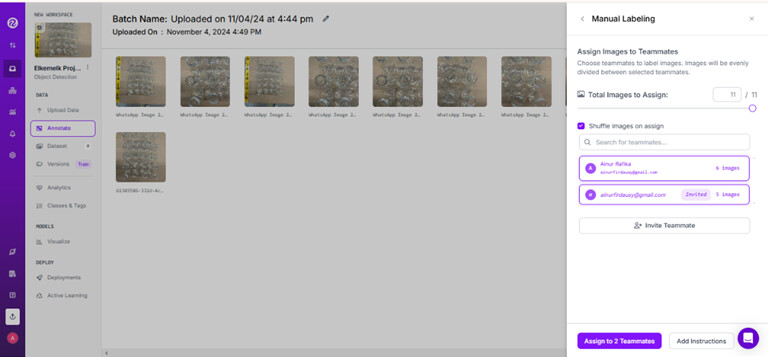
5. Distribute annotation tasks (team projects)
Choose how many images to assign to each team member so the work is split up.
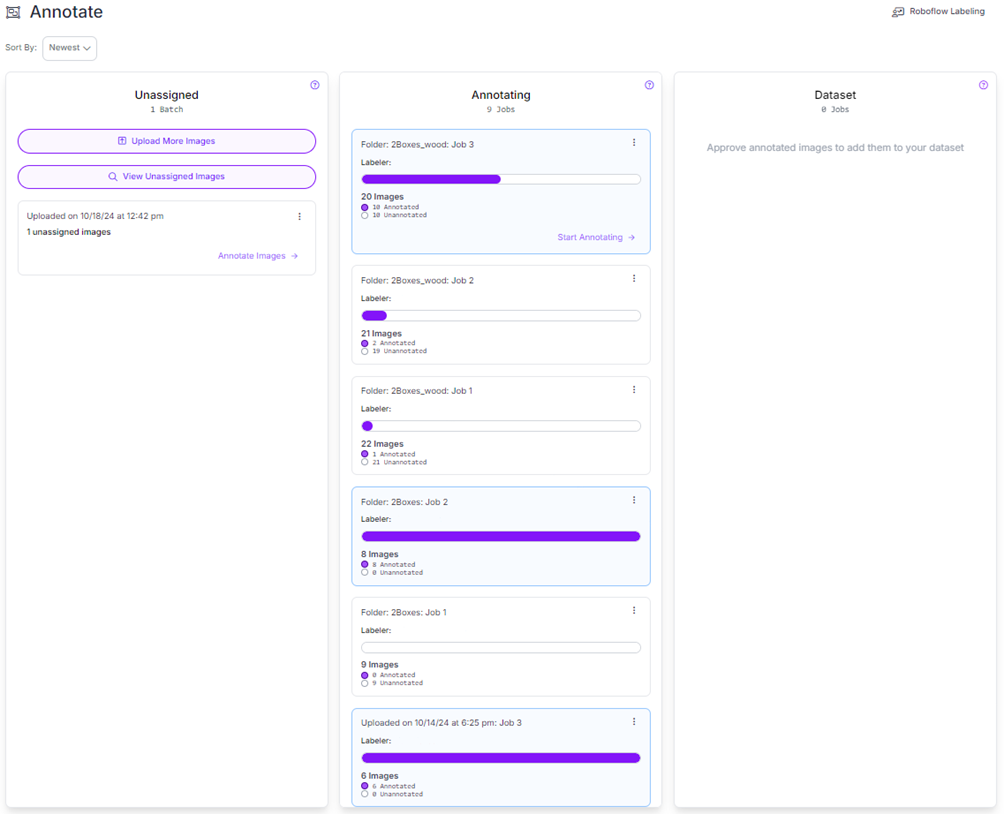
Images can also be assigned to specific people after upload.
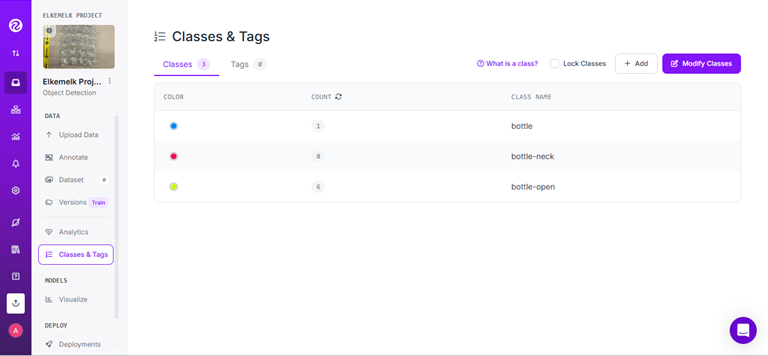
6. Create your classes
Open Classes & Tags and add a class for each object you want to detect. You can give each class its own colour to tell them apart while annotating.
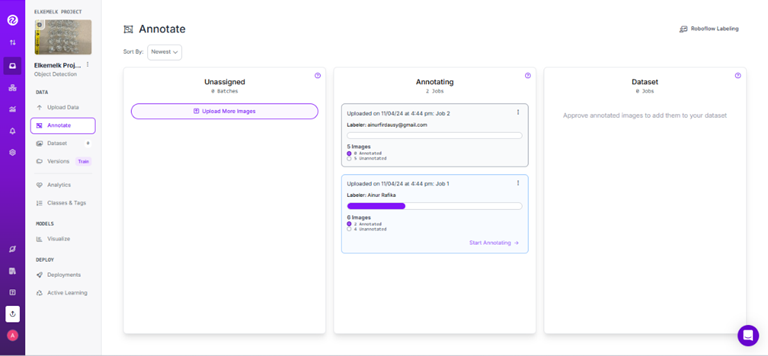
7. Annotate your images
Depending on how complex your object’s shape is, annotate with a plain rectangle or a polygon:
- Bounding box: click and drag a rectangle around the object. Good for simple, mostly axis-aligned shapes.
- Smart polygon tool: recommended for more complex shapes. Click the tool to open its options.
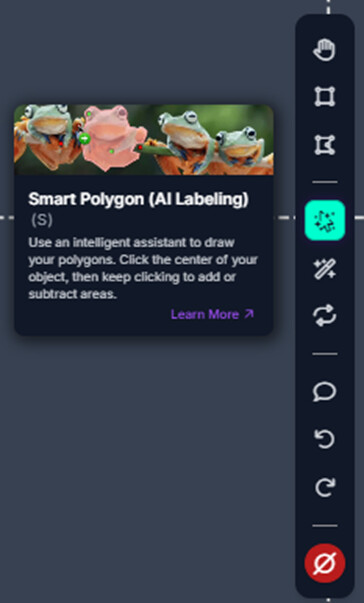
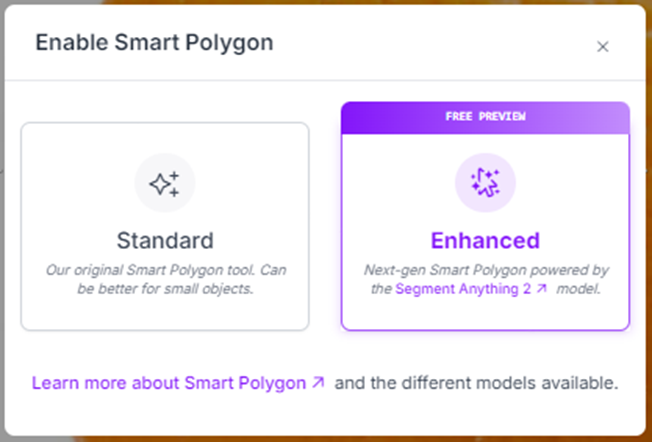
- Standard smart polygon: click the object, hold, and drag a rough box around it — Roboflow finds the object’s edges for you.
- Advanced smart polygon: hover over the object; the auto-detected shape highlights and you click to select it.
After marking an object, drag the point-count slider to increase or decrease how many points the polygon uses, depending on how detailed the shape is.
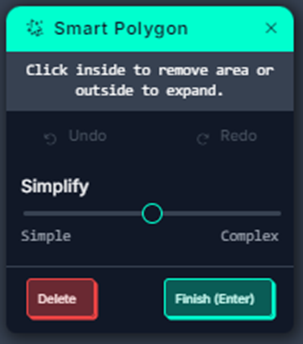
When you click Finish, name the object’s class (or pick one from your existing list) and adjust the polygon points if needed. Switch between images with the controls at the top of the screen. Repeat until every object in every image is annotated.
8. Add annotated images to the dataset
Once an image is fully annotated, go back to the image list — annotated images are marked as done. Select them and add them to the dataset from the top-right corner of the Annotate tab. Choose how the images should be split between the train/validation/test pools.
You can review everything you’ve added from the Dataset tab.
9. Generate a dataset version
Go to the Generate tab. Here you can add preprocessing and augmentation steps before exporting (see How to augment images and OBB labels to expand a YOLO training set for augmenting OBB datasets specifically).
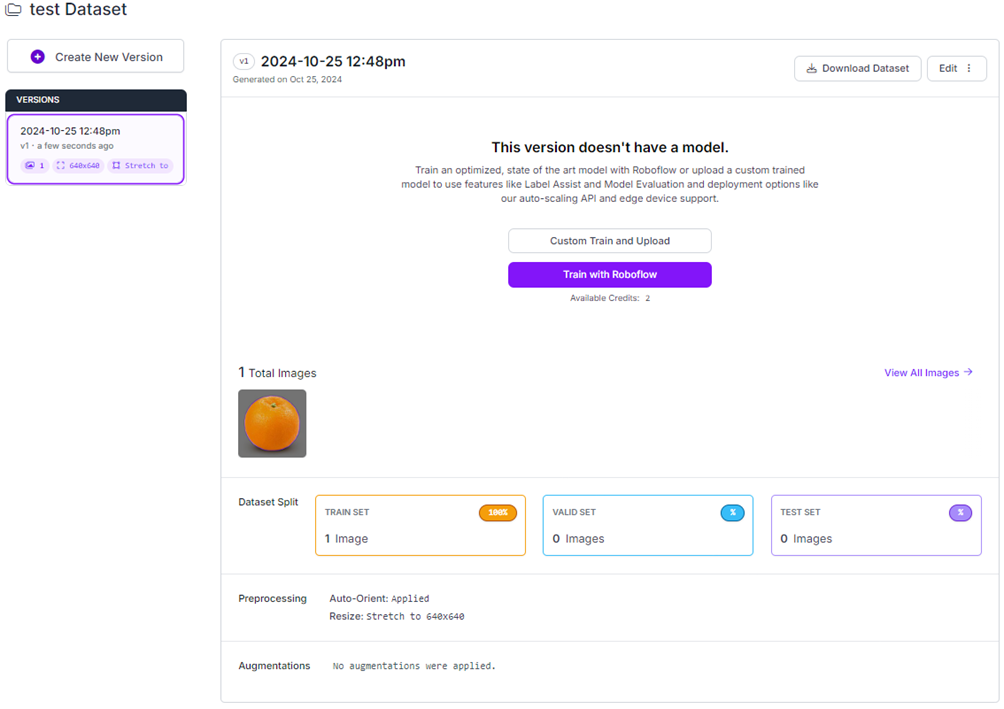
10. Export the dataset
Click Custom Train and Upload.
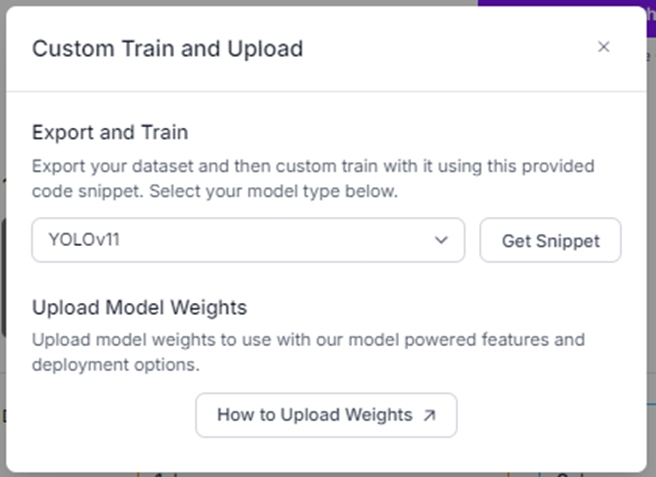
Pick the export format that matches your YOLO version (for example “YOLOv8” for regular boxes, or “YOLOv8 Oriented Bounding Boxes” for OBB). If there’s a checkbox to train the model on Roboflow itself, uncheck it — you’ll train it yourself.
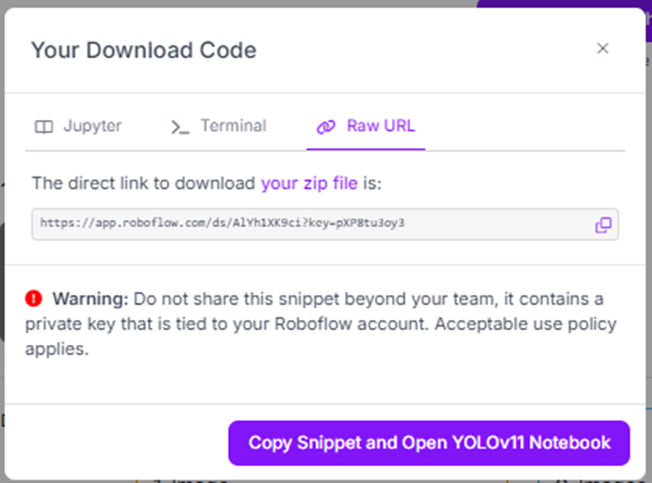
Your dataset is now ready. You can download it as a zip file, or copy the generated code snippet (pip install roboflow + a short Python download script) to pull it straight into a Google Colab notebook — see How to train a YOLO object detection model with Roboflow and Ultralytics for how to use that snippet when training.
Common mistakes
- Uploading images that don’t match your real setup’s lighting/background makes the trained model less reliable — annotate images that look like what the camera will actually see.
- Forgetting to uncheck “train on Roboflow” when you intend to train the model yourself.
Related
- How to train a YOLO object detection model with Roboflow and Ultralytics — train a YOLO model on the dataset you just exported
- How to train a YOLO OBB model and get the center and angle of detections — annotating and training with oriented bounding boxes
- How to augment images and OBB labels to expand a YOLO training set — augmenting images and OBB labels to grow your dataset
Rewritten and consolidated (Sept 2026) from the original student how-to’s: How to annotate using roboflow, How to Collaboratively Label Images on Roboflow.