Based on contributions by 21142173.
If your SMR project uses any component running at 25V or higher, it must be housed in an electric safety box before you’re allowed to power it up. This guide covers the assembly; see the Rulebook for the full electrical safety rules.
What you need
- An electric safety box (available in the robot lab)
- DIN rail(s)
- Cable glands and blanking plugs
- Terminal blocks, including grounded terminal blocks
- Cable shoes (for bare/stripped wires), available in the workshop
- Bolts, for components without a DIN-rail connector
Steps
1. Place the components in the box
Use one of the electric safety boxes available in the robot lab. Place one or more DIN rails on the metal bottom plate, then attach that bottom plate into the corners of the box. Mount your components on the DIN rail(s); if a component doesn’t have a DIN-rail connector, bolt it directly to the metal bottom plate instead.
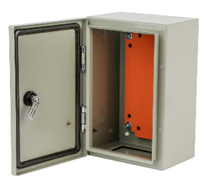

2. Prepare the box for wiring
Every cable that leaves the box must be fed through a cable gland and connected to a terminal block for strain relief. Fit cable glands into the holes on the sides of the box, and close any unused holes with blanking plugs. Mount terminal blocks on the DIN rail, placing signal/power terminals between grounded terminal blocks.

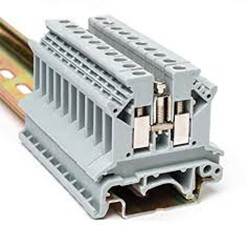
Grounded terminal blocks:
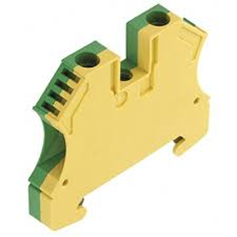
3. Wire the components
Plug in cables that already have a connector. For bare (copper) wires, crimp on cable shoes before connecting them — these are available in the workshop. Check that the cable’s diameter is suitable for the current your application draws.
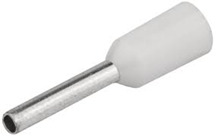
4. Get it checked and approved
Before powering up your box, an authorized teacher (electrical safety officer) must inspect it and issue a pass. Only use the box once you have that pass.
Related
- How to use the 230V power-outlet switch (PNOZ X7 relay) — using the 230V power-outlet switch
- How to switch higher-voltage loads with an Arduino (relay, optocoupler, H-bridge) — switching higher-voltage loads with an Arduino
- How to design a PCB in KiCad — designing a PCB in KiCad
Rewritten and consolidated (Sept 2026) from the original student how-to’s: How to - Electric safety box.